Overview
If you are topping the coolant up every week or two, the coolant is going somewhere - and finding out where is the whole battle. Coolant leaks are experts at hiding: the system only builds pressure when the engine is hot, so a pinhole that seals perfectly on your cold driveway inspection opens up ten minutes into a drive, sprays a mist of coolant onto hot metal, and evaporates without leaving a puddle. You end up with a mystery loss, a crusty stain if you are lucky, and a garage quoting diagnostic time by the hour.
A cooling system pressure tester ends the mystery in about ten minutes. It screws onto the expansion tank in place of the cap and lets you pump the system up to operating pressure with the engine cold and off - so the leak opens up exactly as it does on the road, except now you can safely get your eyes, ears and fingers close to it. This guide shows the method on a real workshop job: a Vauxhall Mokka that was losing coolant from a pinhole in its header tank, found in minutes, fixed the same afternoon, and proven fixed with the same tester before it went back to its owner.
Signs You Have a Coolant Leak
- Coolant level in the expansion tank drops week after week
- Low coolant warning light, especially first thing in the morning
- Sweet, syrupy smell around the car after a run
- White, orange or green crusty residue on hoses, joints or the radiator
- Heater blowing lukewarm because the level has dropped
- Temperature gauge creeping higher than it used to
What You Need
DIY Car Service Guide
- Full service at home: oil, filters, plugs, fluids
- Which jobs are safe to DIY and which are not
- What a garage charges for each item, so you know the saving
Instant PDF download · works on phone, tablet or PC · 7-day money-back guarantee
Step-by-Step Guide
Match the tester cap to your car
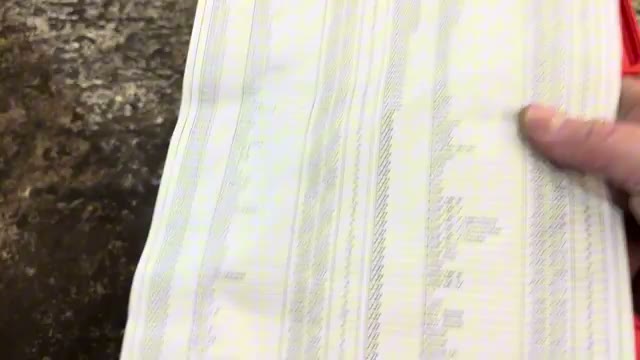
A pressure tester kit comes with a set of numbered adapter caps and a chart telling you which cap fits which vehicle. Look your car up and pick the matching cap. The seal has to be exact - a cap that nearly fits will bleed air at the neck of the tank, and the gauge will drop even on a perfectly healthy system, sending you hunting for a leak that does not exist.
Fit the test cap to the expansion tank
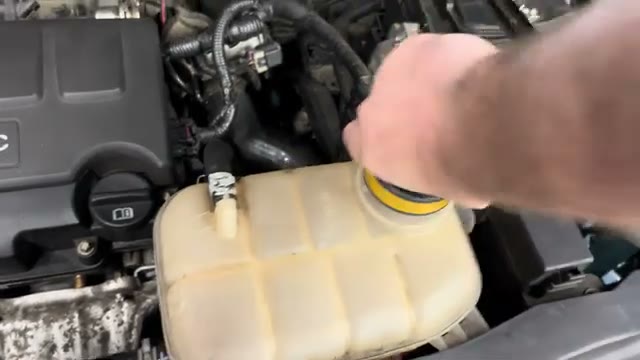
With the engine stone cold, take the expansion tank cap off and screw the tester's adapter cap on in its place - it fits exactly like the original. This is also your moment to note the pressure rating stamped on the original cap, because that number is your do-not-exceed limit for the whole test.
Connect the pump and pressurise
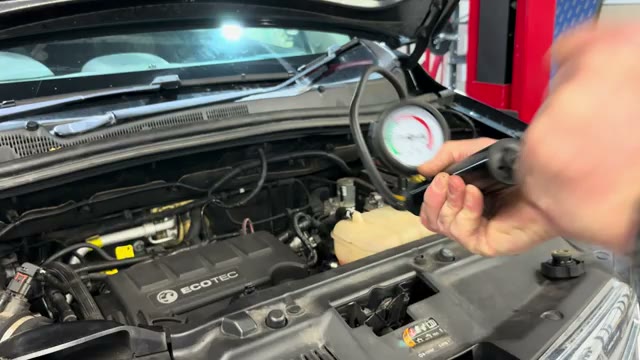
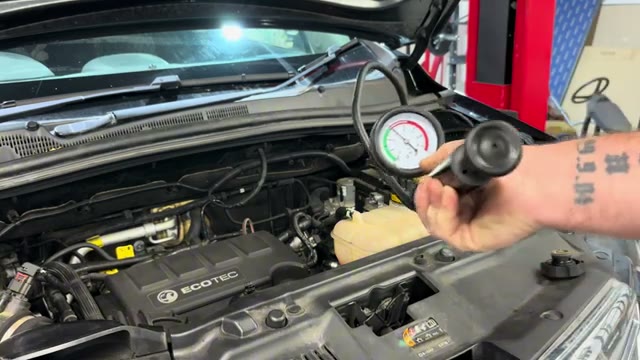
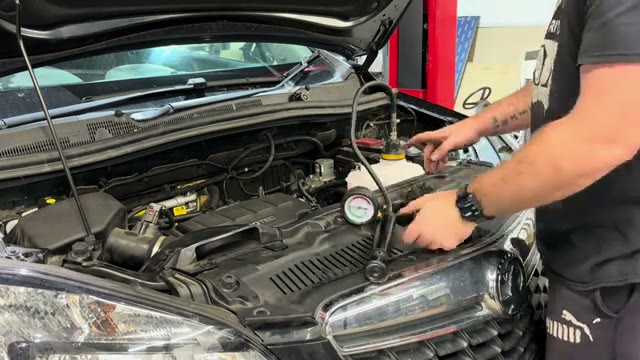
Push the hand pump onto the adapter's quick-fit connector and start pumping, watching the gauge climb as you go. Take the needle to the top of the green band on the gauge - that matches the pressure the system runs at fully warmed up - and stop there. It only takes a dozen or so strokes on most cars.
Read the gauge
Now the system tells you the truth. Needle holding steady: the cooling system is tight, and your coolant loss is happening somewhere the pressure test cannot see - jump to the hidden-leaks section below. Needle dropping: you have an external leak, and the faster it falls, the bigger the hole. On this Mokka the needle started sagging within seconds of the pump coming off.
Follow the staining
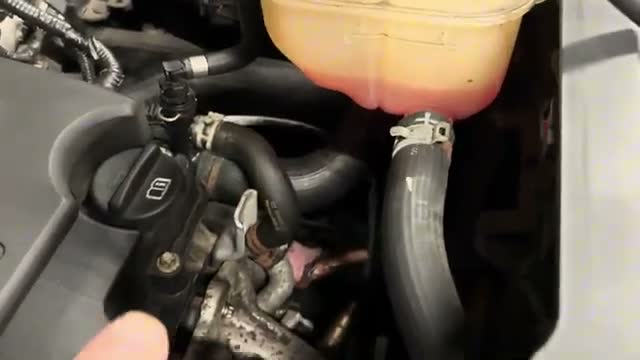
With the system pumped up, work around the engine bay with a torch looking for the evidence. Dried coolant leaves a crusty residue in the colour of your coolant - orange, pink, green or blue - wherever it has been escaping and evaporating. On this car there was orange staining low down beside the header tank, which narrowed the hunt to one corner of the bay before a drop of fresh coolant had even appeared.
Listen for the leak and pin it down
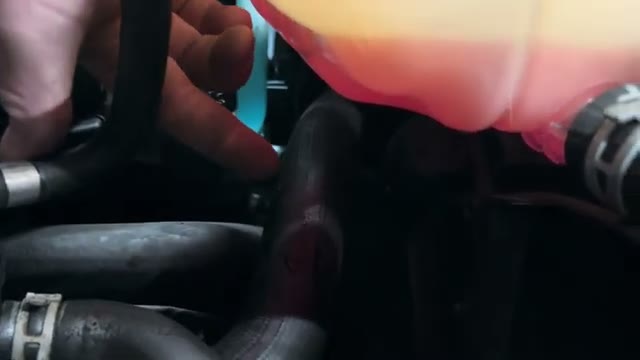
Here is the trick that makes the pressure test so good: switch everything off, lean in and listen. A pressurised leak hisses. On this car the hiss led straight to a tiny pinhole in the bottom of the header tank, dripping onto the pipe underneath - and because the coolant level had dropped so far, it was escaping air rather than coolant, which is exactly why the owner never saw a puddle.
Get access for the repair
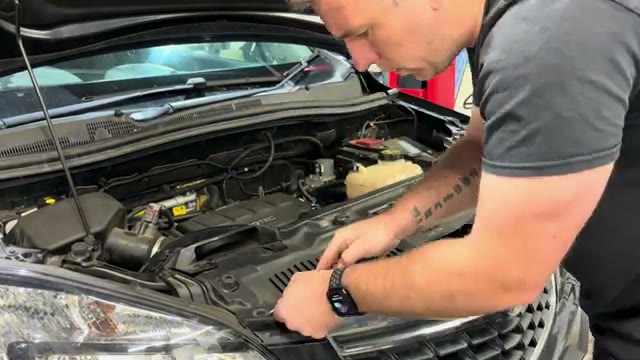
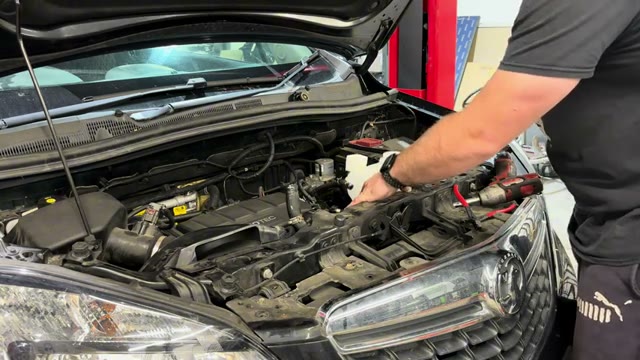
The fix on this Mokka was a new header tank, and like most engine bay repairs it started with plastic. The tank's two 10mm bolts hide under the front cover, so the plastic trim clips pop out first, then the cover lifts away from the grille and the bonnet release. A few minutes with a trim tool - and keep the clips somewhere they cannot roll under the workbench.
Replace the leaking part
Suck the old coolant out of the tank first - it saves the mess when the pipes come off. Work the hoses free and prop the lower hose up higher than the tank so it does not drain itself over the engine, undo the two 10mm bolts, and lift the old tank out. The new tank slides on exactly as the old one came off; refit the hoses with their spring clips, the two bolts, and the front cover with its trim clips.
Refill, re-test and prove the fix
Fill the new tank with the correct coolant for your car, then put the tester straight back on and pump the system up again. Two things happen here: you check the rest of the bay for any second leak that was hiding behind the first, and you prove the repair. On this car the needle had not moved after 45 minutes under pressure - that is a fix you can hand back to the owner with confidence, not a hopeful top-up.
Where Coolant Leaks Actually Turn Up
After twenty years of pressure testing, the same culprits keep appearing. Plastic parts lead the table: header tanks crack and pinhole with age, thermostat housings on modern engines are plastic and warp, and radiator end tanks split along their crimped seams. Hose joints leak where spring clips have lost their bite or the hose has gone hard, and the water pump has a small weep hole underneath that dribbles when its internal seal fails - staining on the front of the engine below the pump is its signature. The heater matrix is the sneak: it leaks inside the car, soaking the passenger carpet and misting the windscreen with a sweet film, with nothing to see under the bonnet at all.
The pattern worth remembering: coolant runs downhill and along pipes before it drips, so the wet patch is usually below and behind the actual hole. Find the highest wet point and you have found the leak.
If the Gauge Drops but Nothing Shows
A falling gauge with a dry engine bay means the coolant is leaving by a hidden route. Check the passenger carpet for damp and the windscreen for a greasy film - that is the heater matrix. Sweet white smoke from the exhaust, bubbles rising in the expansion tank or mayonnaise under the oil cap point at the head gasket, which a combustion gas test on the coolant confirms in minutes - our head gasket test guide shows the whole method - before anyone orders expensive parts. On many diesels the EGR cooler can also fail internally and feed coolant into the intake, mimicking a head gasket with a perfectly healthy engine underneath. If the symptoms do not quite line up, run them through the symptom finder - coolant loss plus its companions (smoke colour, heater behaviour, where the smell is) usually points to one answer.
What It Costs
| Route | Typical price | What you get |
|---|---|---|
| Pressure tester kit | £20–£45 | Universal kit with adapter caps - yours forever, works on every car |
| Garage leak diagnosis | £40–£90 | The same test, plus experienced eyes - fair value if you stop there |
| This repair (header tank) | £15–£40 part | Most header tanks are cheap; hoses and clips similar money |
Typical UK prices in 2026. The part is rarely the expensive bit of a coolant leak - the cost is in finding it, which is exactly what the tester removes.
Common Mistakes When Chasing Coolant Leaks
- Opening the system hot. Scalding coolant at 1.5 bar exits at face height. Cold engine, every time, no exceptions.
- Pumping past the cap rating. Over-pressurising can split a healthy hose or burst a tired plastic part, turning a diagnosis into a repair. The cap's printed figure is the ceiling.
- Condemning the part under the drip. Coolant travels before it falls. Trace the wetness uphill to its highest point before buying anything.
- Skipping the re-test after the repair. Systems that have run low and hot often have a second, smaller leak waiting. Five more minutes with the tester now saves a breakdown later.
- Topping up with whatever is on the shelf. Coolant types do not mix - the wrong chemistry gels and corrodes. Match the specification in the handbook, and if the history is unknown, flush and start fresh.
- Ignoring a slow leak because it is slow. Leaks grow, and aluminium engines do not forgive a boil-over. One overheat can cost a head gasket - or the engine.
Stay Ahead of It
Most of the leaks in this guide start life as a five-year-old piece of plastic or a tired hose - which is why coolant condition and age are on every proper service schedule. If you do not know when your car's coolant was last changed, put your reg into our maintenance schedule checker and see what is due. A cooling system that gets fresh coolant on time corrodes less, runs cooler and gives its plastics the longest possible life - and if your temperature gauge is already misbehaving alongside the coolant loss, check fault code P0128, because a lazy thermostat shows very similar early symptoms.
Verdict
The pressure test is the single most useful trick in cooling system diagnosis: ten minutes, no skill barrier, and it turns "the coolant disappears and nobody knows where" into a specific part with a hole in it. The kit pays for itself the first time you skip a diagnostic charge, and as the Mokka in this guide shows, the repair it points you to is often a cheap plastic part and an hour of your time. Test cold, respect the cap rating, follow the stains and the hiss, and always re-test after the fix - that is the whole method, and it works on every car in the car park.