Overview
The Ford Puma has been one of the UK's best-selling cars since 2020, so plenty of them are now reaching the age where a stone or, as on the car in this guide, an unlucky bird finds its way through the grille and punctures the air con condenser. When that happens the refrigerant leaks away and the air con fades from cold to ambient, and no amount of regassing will hold - the damaged condenser has to be replaced.
Be aware of what you are signing up for on this car. Unlike some vehicles where the condenser slides out on its own, the Puma buries it inside the radiator pack: condenser, radiator and intercooler all live together in one plastic carrier, and the whole pack has to come out of the bottom of the car before the condenser can be separated on the bench. That means draining the coolant, disconnecting every hose and plug on the pack, and a fair amount of front-end dismantling. None of it is technically difficult, but it is a long, methodical job - and the refrigerant side must legally be handled by an F-gas certified technician, so plan the recovery and regas visits before you pick up a spanner.
Symptoms of a Failed Puma Condenser
- Air con blowing warm or only slightly cool air
- Air con was cold last summer but has faded gradually
- Regas does not hold - system loses charge within days or weeks
- Visible damage or bent fins behind the front grille
- Oily residue on the condenser fins marking the leak point
- Compressor refusing to engage because the charge is too low
What You Need

The UK Car Owner's Essential Guide
- Every dashboard warning light explained
- Fluid, tyre and service checks you can do yourself
- How to avoid getting stung at a garage
Instant PDF download · works on phone, tablet or PC · 7-day money-back guarantee
Step-by-Step Guide
Remove the front bumper
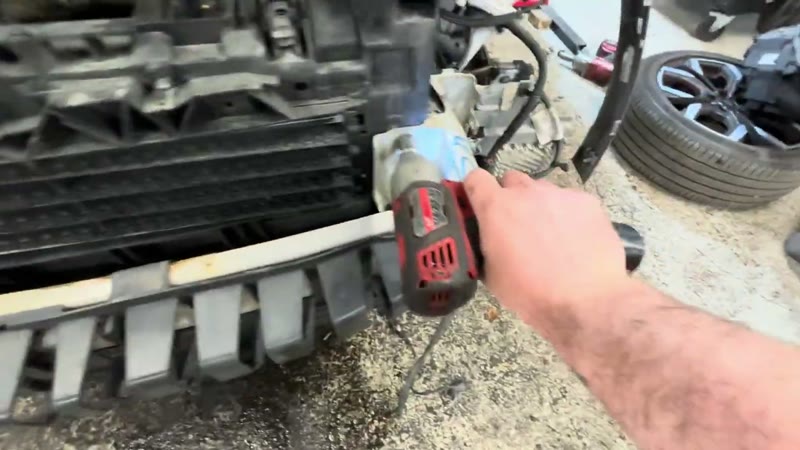
There is a full walk-through of this on its own page: how to remove the Ford Puma front bumper, including the hidden side clips that catch people out. In short: The condenser lives inside the radiator pack, so the front bumper comes off first. It is a job in its own right on the Puma - fixings around each wheel arch liner, along the underside, and across the top edge, then the bumper unclips and the sensor and lamp wiring disconnects. The full bumper removal is shown at the start of the video on this page. Once it is off, you are looking at the radiator pack and slam panel, which is where this guide picks up.
Remove the front plastics and headlights
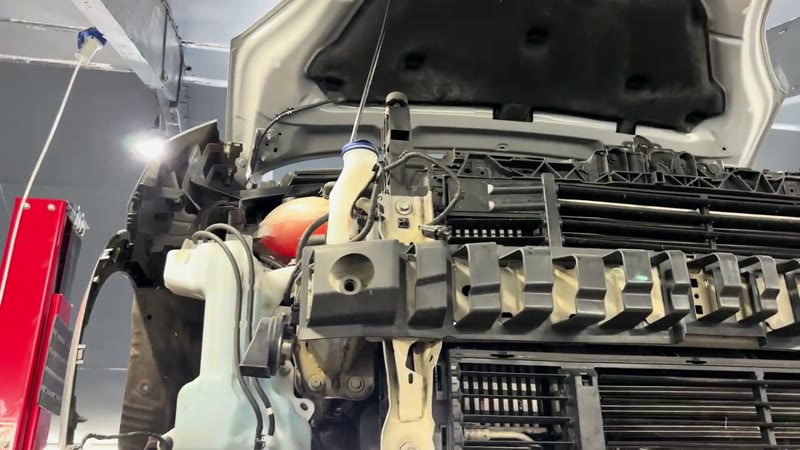
Strip the plastic covers that sit in front of the radiator pack. The upper cover is held by two clips at the top with the rest push-fit; the lower cover has two more clips and pulls free the same way. Remove the top air duct that runs along the top of the radiator. Then take out both headlights - each one is held by two T30 Torx bolts, after which it pulls forward so you can disconnect the wiring behind it.
Remove the undertray and lower shield
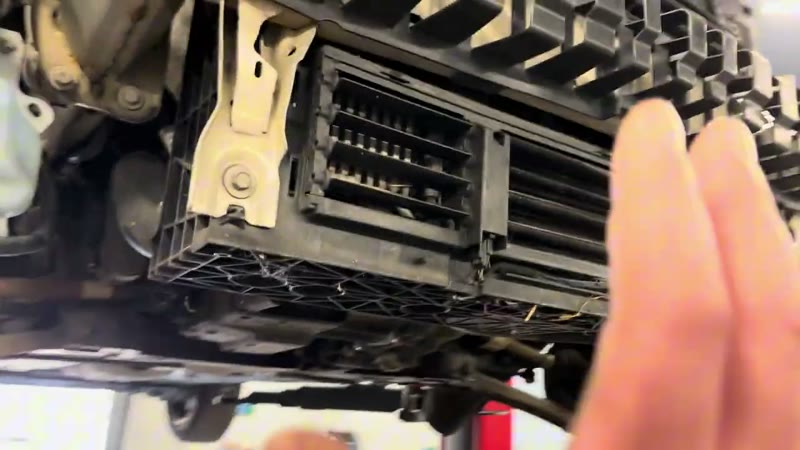
Get under the front of the car and remove the undertray - around six Torx screws and two push-fit plastic fasteners. Behind it there is a hard plastic shield directly under the radiator pack, held by three 10mm bolts with a small electrical plug clipped to it. Undo the bolts, unclip the plug and set the shield aside with its bolts.
Drain the coolant
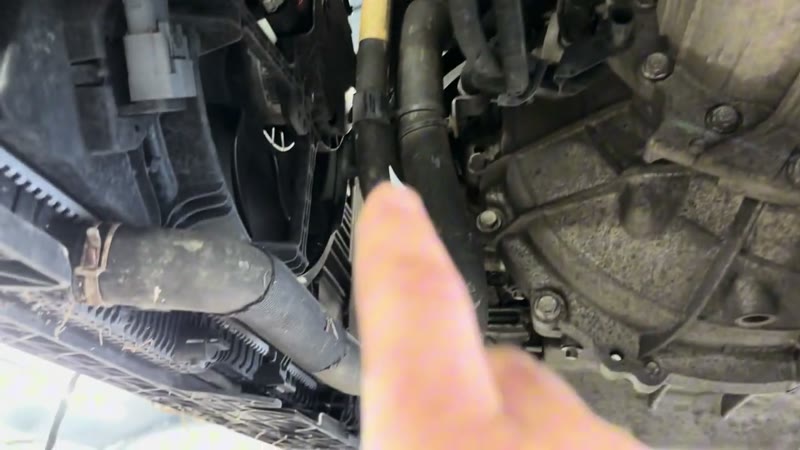
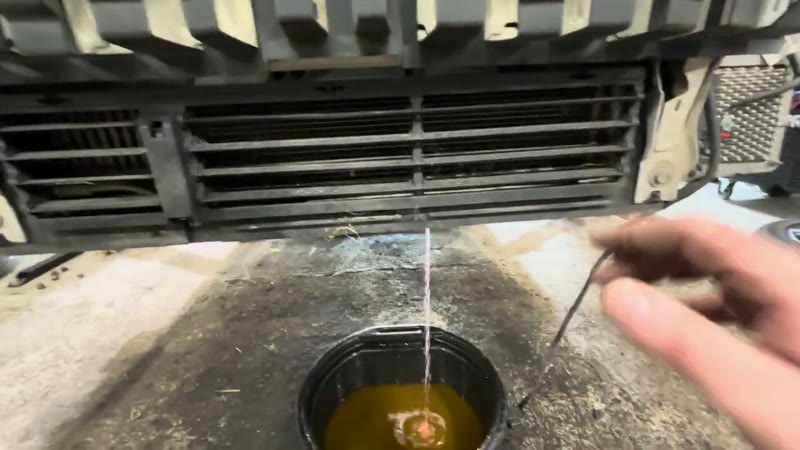
The radiator leaves the car with the pack, so the coolant has to come out. At the bottom of the radiator there is a small drain tap - open it and catch the coolant in a clean drain pan, then take the cap off the expansion tank to let it flow properly. Leave it draining while you carry on with the disconnections; it takes a few minutes to empty fully.
Disconnect the top hoses, boost pipe and wiring
Work across the top of the pack and disconnect everything that ties it to the car. Release the spring clip on the top radiator hose and wiggle the hose off, then free the upper boost pipe - these can be stubborn and usually need a firm wiggle to break the seal. Unplug the fan connectors, pulling the red locking tab back on the big fan plug before it will release, and unclip the wiring loom from the top of the pack. The top air con line disconnects here too - only with the system already recovered.
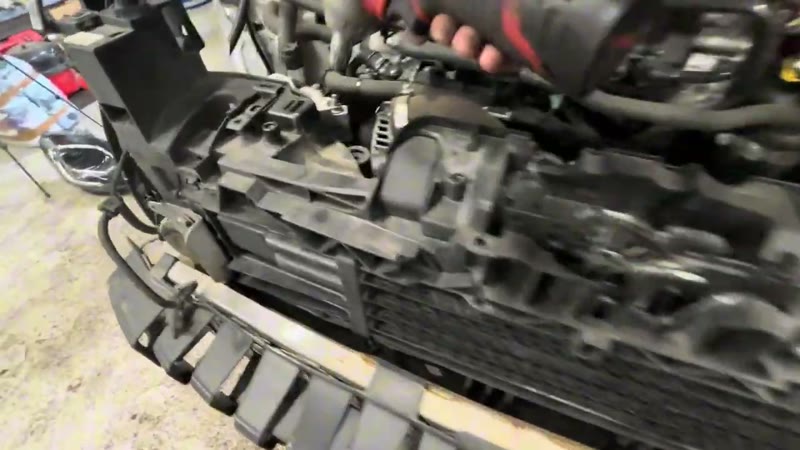
Disconnect everything underneath
Raise the car and repeat the process along the underside of the pack: the bottom radiator hose, the lower boost pipe, the lower air con connection and the large electrical plug that can only be reached from below. Unclip any remaining wiring from the carrier so nothing snags when the pack drops. The rule for this stage is simple - if it connects the rad pack to the car, it comes off.
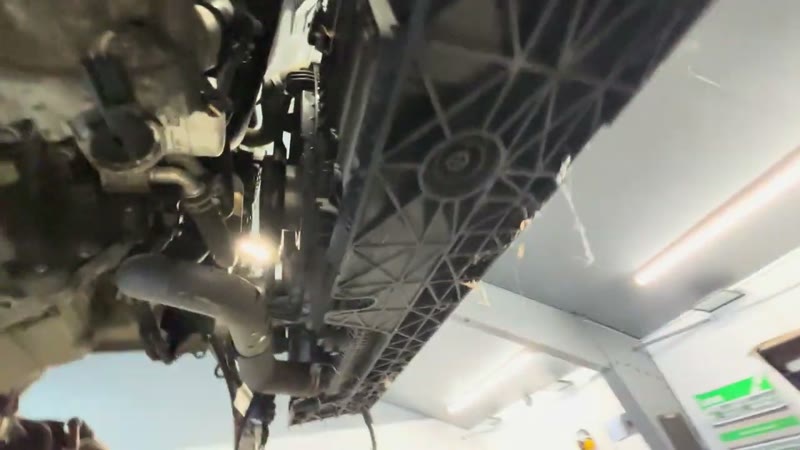
Unbolt the rad pack and lower it out
The pack is held to the car by four 13mm bolts plus a bracket on each side. Loosen the side fixings first, remove the lower bolts, then support the pack while the top bolts come out. Lower the complete pack down to the floor, raise the car up over it, and slide the whole assembly clear. It is bulky rather than heavy - a helper makes this much more controlled.
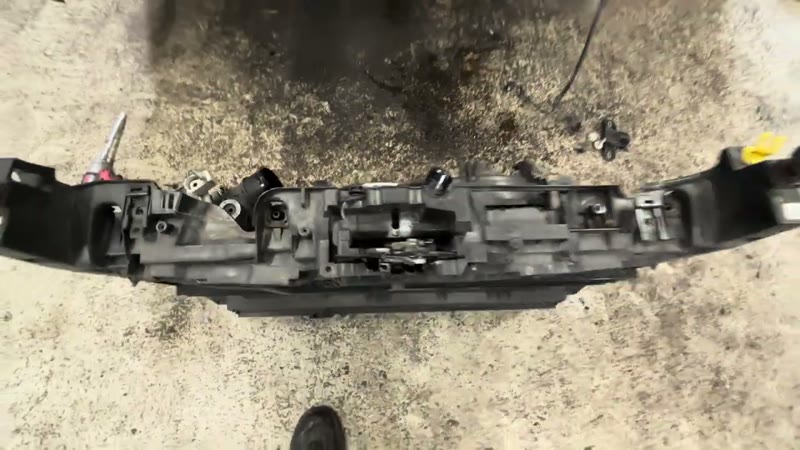
Remove the intercooler from the pack
With the pack on the bench, the radiator will not lift out past the intercooler, so the intercooler comes off first. Its brackets pass right through the carrier and are locked by small plastic tabs - squeeze the tabs on both sides and push the brackets back through, then tilt the intercooler forward and lift it out of the locating hole it sits in at the bottom.
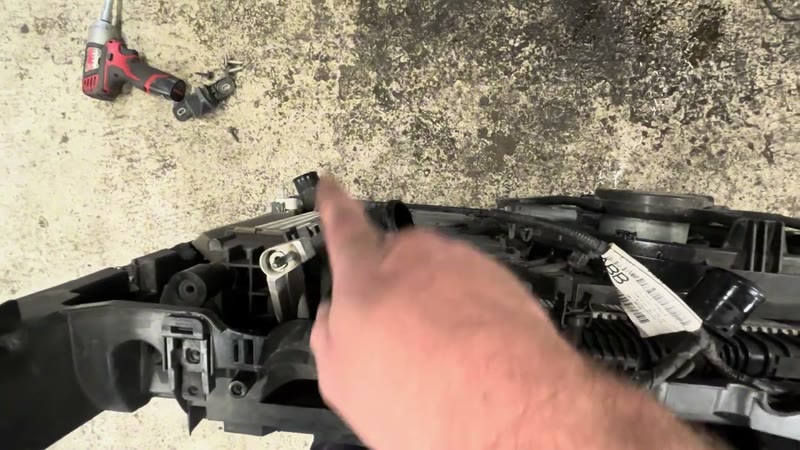
Remove the radiator and inspect the condenser
Pop the retaining clips along the top of the carrier with a pry bar, lift off the rubber grommets, and unclip the small pipe secured at the base of the radiator. The radiator will then wiggle free of the carrier. Now look closely at the condenser core for the leak point. On this car the evidence was unmistakable - a puncture right in the middle of the fins where a bird had gone through the grille. A stone strike leaves the same signature: crushed fins and a dark, oily stain around the hole.
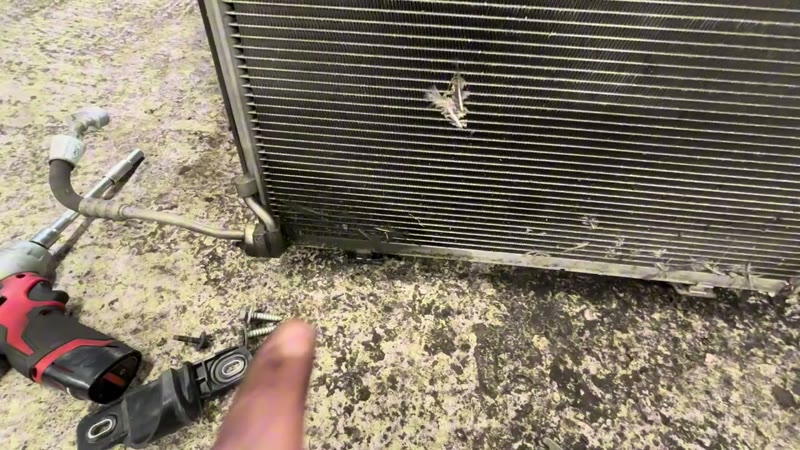
Release the condenser with the hidden tabs
Here is the part that wastes an hour if nobody tells you. The condenser is clipped to the radiator, and the visible metal clips at the top look like the release - there is a tiny clip in the middle of each that you can bend out with a small screwdriver. But even released, the condenser fouls the side of the carrier and will not come out that way. The real answer: turn the assembly upside down. Underneath are plastic release tabs, usually invisible under road dirt. Pull those and the condenser slides straight out of its channels.
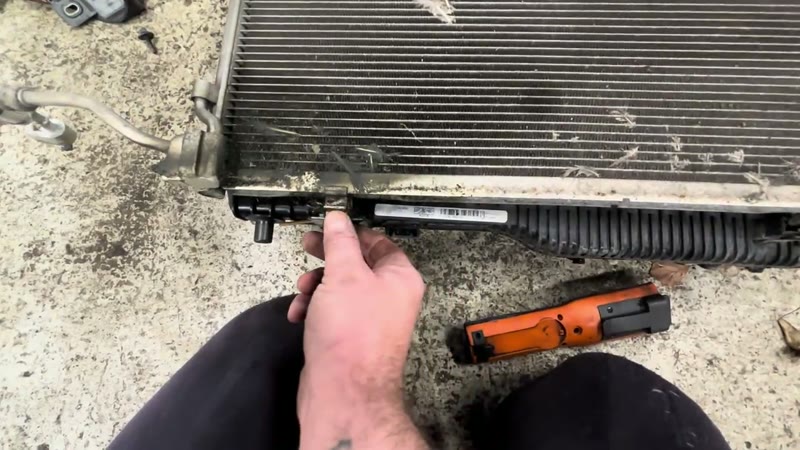
Fit the new condenser and transfer the pipe
Clean the radiator fins and the inside of the carrier before the new part goes anywhere near it - years of leaves and grit come out of these packs. Slide the new condenser into its channels and click the retaining clips home. They are very tight: a screwdriver under the clip, levered gently, seats them - but they are plastic, so no brute force. Transfer the short pipe from the old condenser across, fitting the new seals and stud that come boxed with a decent condenser, and leave the transport caps on every port until the moment each connection is remade.
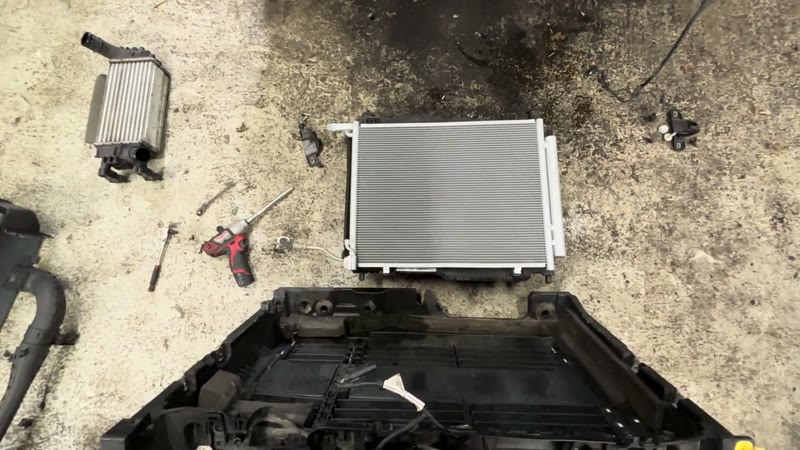
Rebuild the rad pack
Reassembly of the pack is the removal in reverse, with a couple of alignment details that matter. The radiator's lower dowels must seat into their rubber grommets before the top clips will sit down flush and click in. The intercooler slides back into its locating hole at the bottom, then its brackets feed through their housings - again, mind the tabs. Finish with the grommets and top retaining clips so the whole sandwich is locked into the carrier.
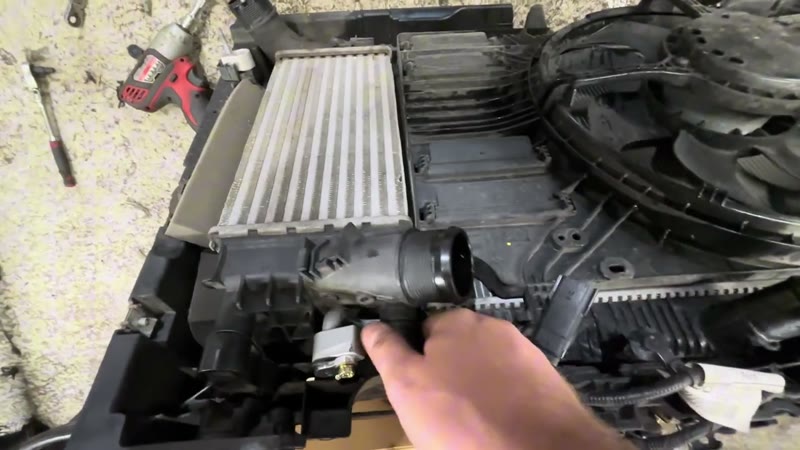
Refit the pack, refill and regas
Hook the side brackets in and lift the pack up into position, guiding the plastic locators into their slots - this is the moment a second pair of hands earns their tea. Refit the four 13mm bolts, then reconnect everything: hoses, boost pipes, air con lines with new seals at the car-side connections, and every plug. Refit the shield, undertray, headlights, front plastics, bumper and arch liners. Refill with the correct Ford-specification coolant, run the engine up to temperature and recheck the level once it has self-bled. Finally, have the system vacuumed and regassed by an F-gas certified technician - on this car the vents were blowing properly cold within a minute of the regas.
Why the Puma Buries Its Condenser
On a lot of vans and older cars the condenser is a bolt-on panel at the front of the rad - a leak means an afternoon's work. The Puma is built the modern way: condenser, radiator and intercooler are clipped into one plastic carrier as a complete cooling module, assembled once at the factory and never intended to come apart in a hurry. It saves weight and assembly cost, but it means the smallest stone strike on the condenser commits you to removing the whole module. It is worth knowing that before you buy the part: the £100 condenser is the cheap bit, and the real cost of this job is the hours of dismantling either side of it - which is exactly why doing it yourself saves so much.
What the Job Costs
| Route | Typical price | What you get |
|---|---|---|
| Ford dealership | £450–£750 | Genuine condenser, fitted, vacuumed and regassed |
| Independent garage | £350–£600 | Quality aftermarket condenser and the full regas |
| DIY fit + paid regas | £150–£280 | £70–£160 condenser, fresh coolant, plus £60–£100 professional recovery and regas |
Typical UK prices for a 2020–2023 Puma. The DIY route is a hybrid by law: you do the mechanical work, an F-gas certified technician does the refrigerant recovery and regas - budget for both visits from the start.
The labour is where the money goes on this job, because the rad pack removal takes hours whoever does it. That is also why it is worth fixing properly the first time - see the full breakdown of UK garage pricing on our repair cost guides.
Choosing the Condenser
OE-grade brands such as Nissens, Valeo and Mahle make condensers for the Puma at £70–£160, built to the same core specification as the dealer part. The bargain-basement units are thinner-cored, arrive with soft fins that crush in transit, and corrode noticeably faster - a false economy when fitting one means dropping the rad pack again. A decent condenser comes boxed with the new seals and fitting stud for the pipe connection; check they are in the box before the old part comes off the car. If your condenser design carries a replaceable drier cartridge, renew it while the system is open - it is the system's moisture trap and it is cheap insurance against corrosion inside the new part.
Common Mistakes on the Puma Condenser Job
- Opening a system that still holds pressure. Refrigerant boils at skin temperature and can cause serious injury. Recovery on the gauges first, spanners second - no exceptions.
- Fighting the top clips to separate the condenser. The release is the hidden plastic tabs underneath the assembly. Flip it over and look - forcing the visible clips just breaks them.
- Snapping the intercooler bracket tabs. They squeeze and push through; they do not lever. A broken tab means the intercooler rattles in the carrier for the rest of the car's life.
- Leaving air con connections open while you work. Every open port drinks moisture that becomes acid in the running system. Caps stay on until the second each joint is remade, with its new seal.
- Forgetting the coolant side. This job opens the cooling system as well as the air con. Cheap coolant, an unbled system or an unchecked level after the first heat cycle can cost far more than the condenser did.
- Not confirming the leak location first. A punctured condenser is obvious once it is out, but if there is no visible strike damage, get a UV dye test done before buying parts - the leak may be a pipe joint or the evaporator, and the £100 condenser fixes neither.
Related AC Faults on the Puma
Warm air con does not automatically mean a dead condenser. Blocked condenser fins can be washed through from behind for nothing, a failed pressure sensor will keep the compressor off with a healthy charge, and a slow leak from an O-ring somewhere else in the system shows the same symptoms as a strike. The honest diagnostic order is: look for physical damage, then a UV dye regas that reveals the leak within a couple of weeks, then parts. If the symptoms do not quite fit, run them through the symptom finder before spending money - and if the airflow is weak rather than warm, start with the pollen filter, not the refrigerant circuit.
Verdict
The Puma condenser replacement is honest, methodical work rather than clever work - but there is a lot of it. Dropping the complete rad pack means the coolant, the boost pipes, the wiring and both headlights are all part of an air con job, and the condenser separation has a genuine trap in the hidden release tabs that this guide (and the video) will save you from. Take your time, protect the plastic tabs, fit new seals at every opened joint, and let the F-gas technician handle both ends of the refrigerant work. Done that way, this is a £500+ garage bill turned into a satisfying day in the garage plus a regas fee.