Overview
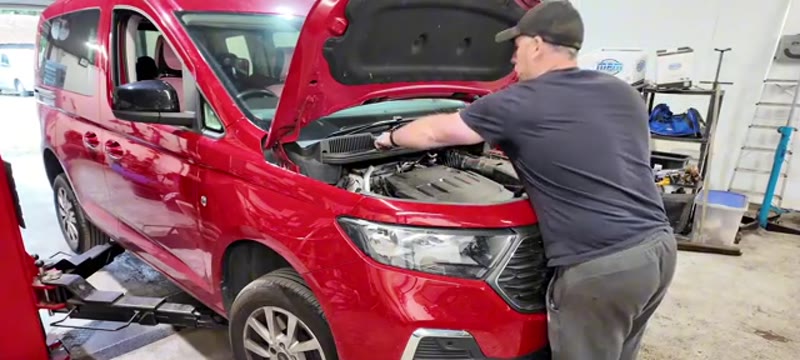
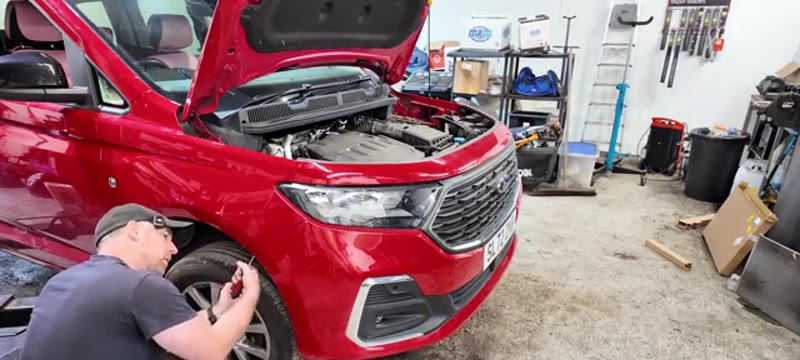
The air conditioning condenser on the 2022 Ford Transit Connect and Tourneo sits at the very front of the car, just behind the bumper. Like all condensers, it is exposed to road debris and stone chips, which can cause a small puncture that gradually loses refrigerant until the system stops cooling altogether. When the air con starts blowing warm, a leaking or damaged condenser is a common culprit - particularly on vans and commercial vehicles that cover high mileage.
The good news is that Ford have designed the condenser access on the new-shape Transit Connect very sensibly. The bumper comes off with Torx screws, the condenser slides out from the bottom without disturbing the radiator or cooling system, and the whole mechanical job is well within the reach of a competent DIYer. You will need access to an R-1234YF regas machine for the refrigerant work - the charge quantity for this vehicle is 460g. The job is rated Advanced primarily because of the bumper removal and the critical importance of fitting new O-ring seals on the pipe connections; done methodically, it is a very achievable repair.
Symptoms of a Failed Air Con Condenser
- Air conditioning blowing warm or ambient temperature air
- System not cooling despite compressor engaging
- Low refrigerant charge confirmed on regas machine
- Oily residue or staining visible on or near the front grille area
- Air con was working, then gradually deteriorated over weeks or months
- Stone chip or visible damage to the condenser fins
What You Need
Parts & Tools for This Job
As an Amazon Associate, Mr Auto Fixer earns from qualifying purchases. Prices and availability may vary.
Step-by-Step Guide
Remove all the bumper Torx screws
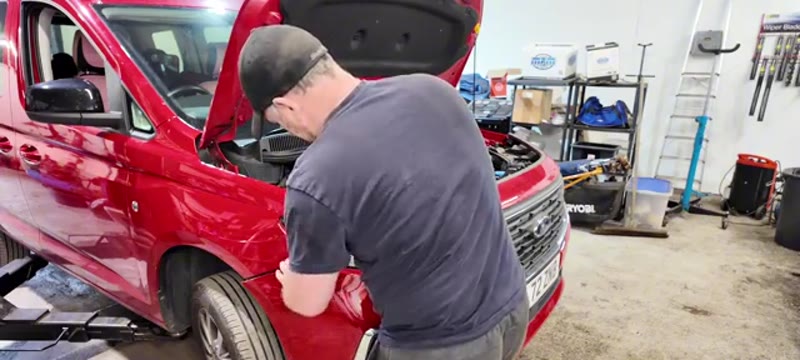
Start at the top of the front bumper and work your way around. There are T25 Torx screws running along the top edge of the bumper where it meets the bonnet line - remove all of these first. Then move to each wheel arch in turn and remove the T25 screws running along the inner face of the arch liner where it overlaps the bumper. Finally, get underneath the front of the vehicle and remove the T25 screws along the underside of the bumper. Count them as you go and keep them together - there are typically 8 to 10 screws in total on this model.
Pull the bumper free and disconnect all plugs
With all the Torx screws out, the bumper is held only by its press-fit clips along the edges. Start at one corner and pull firmly outward - the clips release with a pop. Work progressively along each side rather than trying to pull the whole bumper at once. Once the bumper body is free of its clips, support it with one hand and reach behind it to unplug the two large main connectors. Then deal with the fog lamp plugs on each side - pull the grey locking slide upward first, then squeeze the connector body and pull it straight back. With all plugs disconnected, lower the bumper away from the car and lay it on a clean surface.
Disconnect the bonnet release cable
With the bumper removed, you can see the bonnet release cable routing through the front of the car. The cable end fits into a splined plastic bar - rotate the bar in the correct direction (it will only rotate one way with the cable under the natural tension of the spring) and the cable end slides free of its retaining groove. Carefully feed the cable clear of any retaining clips in this area and set it to one side. Note the routing so you can feed it back cleanly on reassembly.
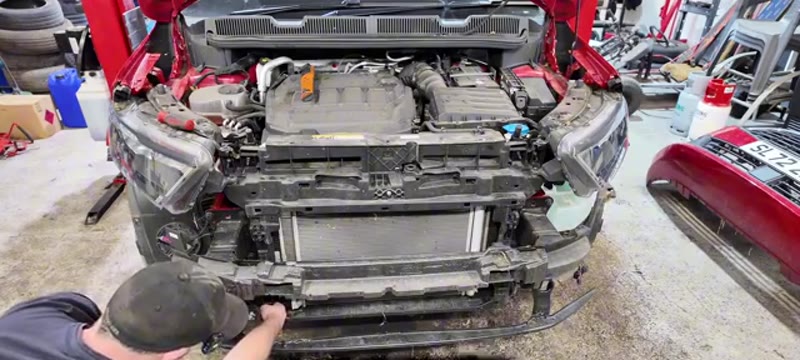
Remove the inner trim pieces and foam inserts
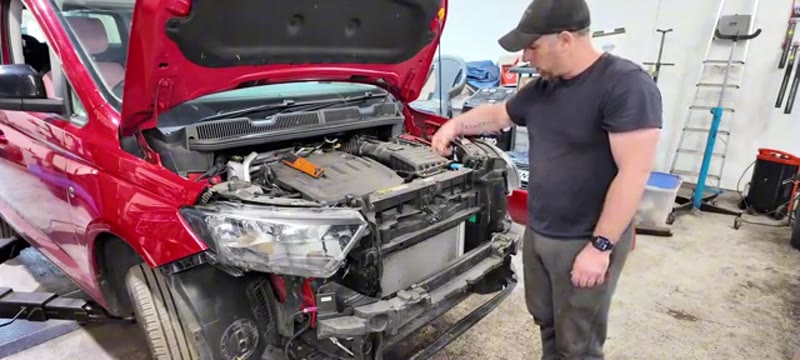
With the bumper off, you will see inner plastic trim pieces running across the front of the car between the bumper mounting area and the condenser. These are held by push-fit clips - a panel clip tool makes removal cleaner but a flat-blade screwdriver will work carefully. Pop the clips and pull the trim pieces free. You will also find foam anti-vibration inserts sitting on each side of the condenser - these just pull off by hand and prevent the condenser from buzzing against the surrounding structure while the engine is running. With these removed, the condenser and its air con pipe connections are now fully accessible.
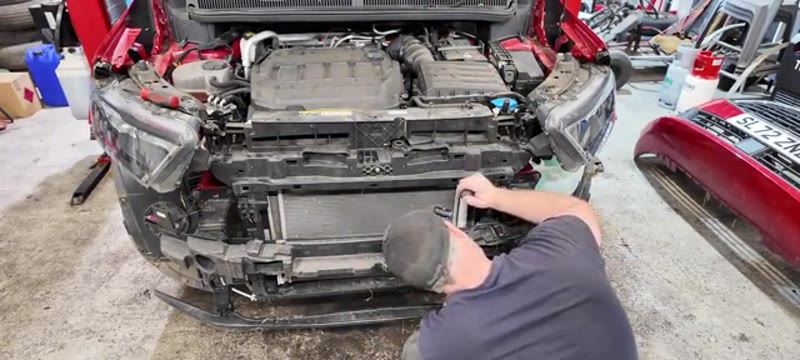
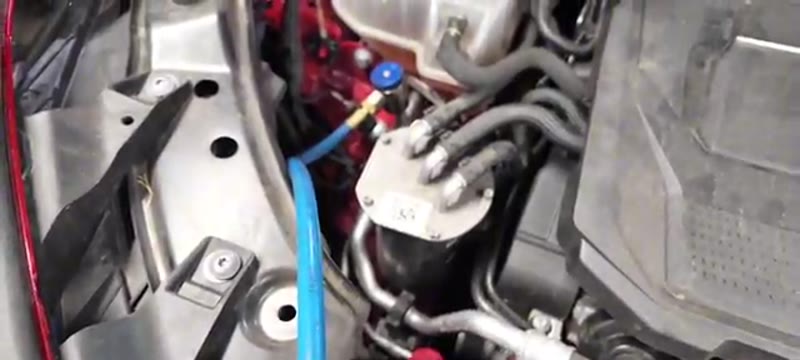
Unbolt the air conditioning pipe connections
Before touching the pipe connections, ensure the air conditioning system has been properly recovered by a qualified technician using an R-1234YF machine - releasing refrigerant to atmosphere is illegal and harmful. With the system evacuated, find the two pipe connections at the condenser. Each one is held by a T30 Torx bolt - remove both bolts and the fittings will release. The moment the pipes are free, cap the open ends immediately using clean plastic caps, clean plugs, or tightly wrapped clean rags. Contamination or moisture entering the air con system here will cause expensive long-term damage to the compressor and expansion valve.
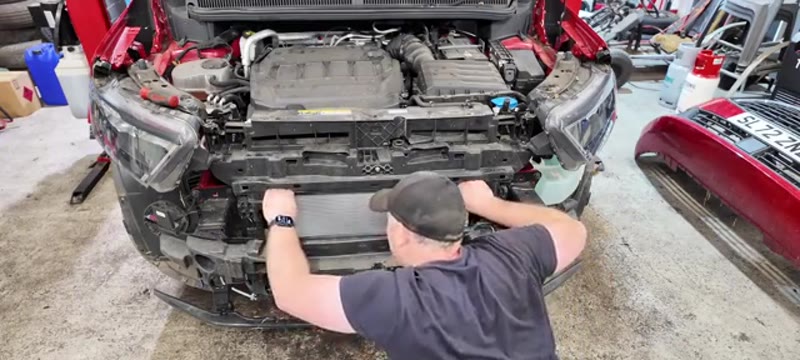
Release the upper clips and slide the condenser out from below
The condenser is retained at its upper corners by two press-fit clips, one on each side. Press each clip firmly inward - you can feel the click as it releases. Unlike most vehicles, the condenser on the 2022 Transit Connect does not come out over the top of the radiator. Once the clips are released, the condenser simply slides downward and out through the bottom of the front end. The radiator stays completely in place and the cooling system is entirely undisturbed. Guide the condenser carefully as it comes down to avoid catching it on any brackets, then set it aside.
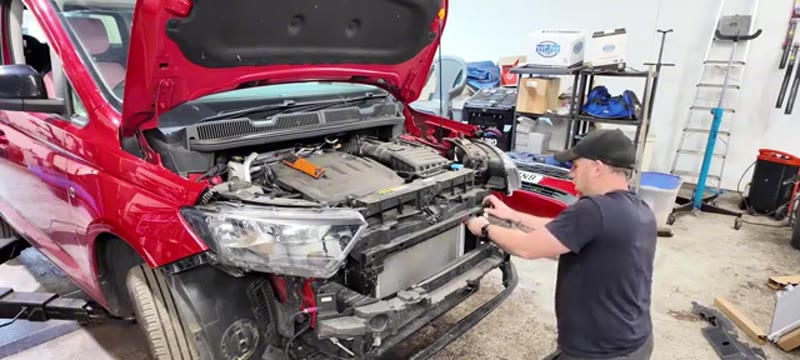
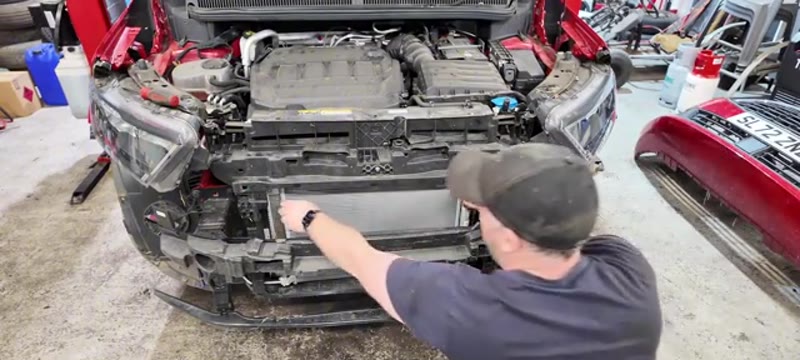
Fit the new condenser and reconnect the pipes with new seals
Slide the new condenser upward into position from below, guiding it carefully into the retaining slots. Push it up until the two upper clips snap firmly into place - check both sides have clicked home. Now fit new O-ring seals onto both air conditioning pipe connection fittings before reconnecting - never reuse the old seals. The old seals will be compressed and deformed and will not seal reliably, resulting in a refrigerant leak. Reconnect both pipe fittings, ensuring each one seats squarely, and refit the T30 Torx bolts, tightening them firmly.
Refit foam inserts, inner trim pieces and bonnet cable
Press the foam anti-vibration inserts back into their original positions on each side of the condenser. Refit the inner plastic trim pieces, pressing each clip firmly back into its hole until it seats fully. Re-route the bonnet release cable back through its clips and engage the cable end back into the splined bar retainer - rotate the bar to capture it and check the bonnet releases and re-latches correctly before moving on.
Refit the bumper and all Torx screws
Offer the bumper back up to the front of the car and reconnect all the electrical plugs before pressing the bumper home - it is much harder to reach the connectors once the bumper is clipped in. Reconnect both large main connectors and both fog lamp plugs, making sure each one clicks firmly into its locked position. Then press the bumper body against the car, starting at the centre and working outward, until every clip snaps home. Refit all the T25 Torx screws along the top, in both wheel arches, and along the underside - tighten them firmly but do not over-torque as the plastic threads strip easily.
Regas with R-1234YF and test the system
Connect the R-1234YF regas machine and pull a vacuum on the system for a minimum of 30 minutes. A good vacuum hold confirms there are no leaks in the new connections - if the vacuum does not hold, find and fix the leak before proceeding. Once the vacuum test is passed, charge the system with 460g of R-1234YF refrigerant. Start the engine and turn the air conditioning on full cold. Check the vent temperature - the air should be cold within a minute of the compressor engaging. Inspect around both pipe connections for any signs of oily residue that would indicate a refrigerant leak before signing the job off.
Mr Auto Fixer Shop
Ford Transit Custom Owner's Bible
Everything you need to know about running and maintaining a Ford Transit Custom - common faults, service schedules, buying advice, and owner tips from a professional mechanic.
Why Condensers Die Young on a Van
The AC condenser lives at the very front of the Connect, ahead of the radiator, where it works as an unpaid stone shield for everything behind it. Its aluminium fins take every stone, insect and winter salt spray the road offers, and the failure modes follow: a stone strike punctures a tube and the refrigerant leaves over a week, or years of salt corrode the thin alloy until it weeps at a seam. On a van the timeline is compressed - more miles, more motorway grit, more years parked outside - and a Connect condenser lasting past ten years has done well. The symptom arc is always the same: AC that is weaker than last summer, then air that is merely ambient, then a system too empty for the compressor to engage at all.
What the Job Costs - and the Regas Reality
| Route | Typical price | What you get |
|---|---|---|
| Ford Transit centre | £450–£650 | Genuine condenser, fitted, vacuumed and regassed |
| Independent garage | £350–£600 | Quality condenser and the full regas |
| DIY fit + paid regas | £140–£260 | £80–£160 condenser, plus £60–£100 professional vacuum and regas |
Typical UK prices for the 2022 Connect. Note the DIY row is a hybrid: you can legally fit the condenser yourself, but the refrigerant work needs an F-gas certified technician - budget for it from the start.
That split is worth understanding: UK F-gas rules mean you cannot buy or vent the refrigerant yourself, and the system must be professionally evacuated before it opens and vacuumed after it closes. The DIY saving is the fitting labour - still £150–£350 of it.
Choosing the Condenser
Nissens, Valeo and Mahle/Behr make OE-grade condensers for the Connect at £80–£160 - the same construction as the Ford-boxed part at over double. The £40 marketplace condenser is thinner-tubed, corrodes in half the time, and often arrives with its fins already crushed in transit. Whatever you fit, always replace the receiver-drier (or drier cartridge) at the same time - it is the system's moisture trap, it is saturated the moment the system opens, and a £15 drier skipped is how new condensers grow acid damage from the inside.
Common Mistakes on the Condenser Job
- Opening a charged system. Refrigerant boils at skin temperature and can blind. If the system might still hold pressure, it goes to the regas man for evacuation first - no exceptions.
- Leaving the open system uncapped. Every hour open to the air, the system drinks moisture that becomes acid in service. Cap every opened fitting immediately and keep the new parts sealed until the moment of fitting.
- Reusing O-rings dry. Every disturbed joint gets a new O-ring, lightly oiled with the correct PAG oil - dry or reused rings are where next spring's leak starts.
- Skipping the oil balance. Some compressor oil left with the old condenser and refrigerant. The replacement's paperwork states the top-up amount - tell your regas technician so the compressor is not run dry.
- Not finding what killed it. A stone-struck condenser is bad luck; a corroded one at eight years is normal; but a system that lost gas with a perfect condenser has its leak elsewhere - pressure-test before buying parts, or the £80 condenser fixes nothing.
Related AC Faults on the Connect
Weak cooling is not always the condenser: blocked condenser fins (wash them through gently from behind - free), a slipping compressor clutch, a failed pressure sensor keeping the compressor off, and simple undercharge from slow seal seepage all present similarly. The cheap diagnostic order is fins, then a UV dye regas that reveals any leak within weeks, then parts. A hissing expansion valve or a compressor that cycles rapidly are different faults with different fixes - the symptom finder separates them before money moves. And if the van's cabin airflow is weak even with the AC healthy, the pollen filter guide covers the £10 cause everyone forgets.
Verdict
The condenser replacement on the 2022 Ford Transit Connect is a straightforward job once you accept that bumper removal is part of the process. The design of this vehicle makes the condenser itself very accessible - slides out the bottom without touching the cooling system, clips back in cleanly, no drama. The two critical details are fitting new O-ring seals on the pipe connections (non-negotiable) and ensuring the refrigerant work is handled with the correct R-1234YF equipment. Get those right and this is a very satisfying repair to carry out yourself at a fraction of the dealership cost.