This 2013 Vauxhall Insignia came in with grinding brakes. On inspection the front discs had a severe lip on the outer edge - a classic sign of long-term wear. One of the inner pads had worn completely through to metal-on-metal contact, and critically, one of the pad slider shims was missing from the caliper carrier, which had caused the pads to wear unevenly and prematurely.
This guide covers full front brake disc and pad replacement including caliper carrier cleaning, slider shim replacement and correct piston retraction technique.
Symptoms That Brought This Car In
- Loud grinding noise when braking
- Severe disc lip visible on the outer edge of the disc
- One pad worn completely to metal - metal-on-metal contact
- Scored and thinned disc surface from prolonged wear
- Missing slider shim causing uneven pad wear
Tools & Parts You'll Need
DIY Car Service Guide
- Full service at home: oil, filters, plugs, fluids
- Which jobs are safe to DIY and which are not
- What a garage charges for each item, so you know the saving
Instant PDF download · works on phone, tablet or PC · 7-day money-back guarantee
Step-by-Step Guide
Remove the Wheel & Initial Inspection
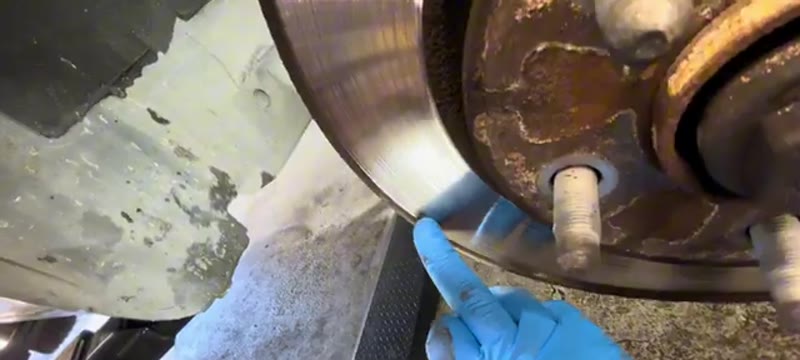
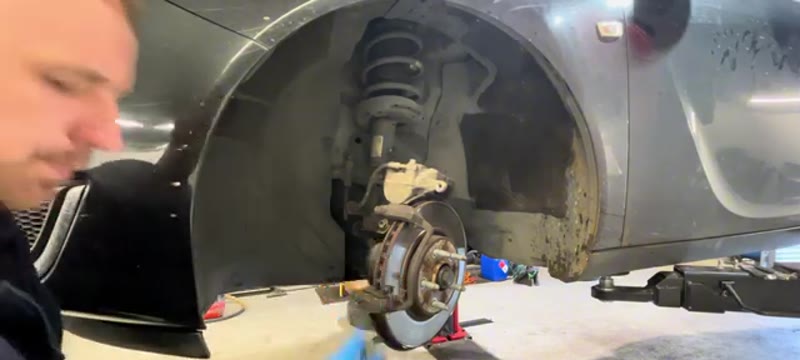
Loosen the wheel nuts with a 22mm socket before raising the car, then lift and support it safely. Remove the wheel. With the disc exposed, inspect the disc face and edges - on this Insignia a massive lip was visible on the disc edge and the inner brake pad had worn completely through. Note the condition before removing anything as it tells the full story of what's happened.
Push the Caliper Piston Back & Remove Caliper
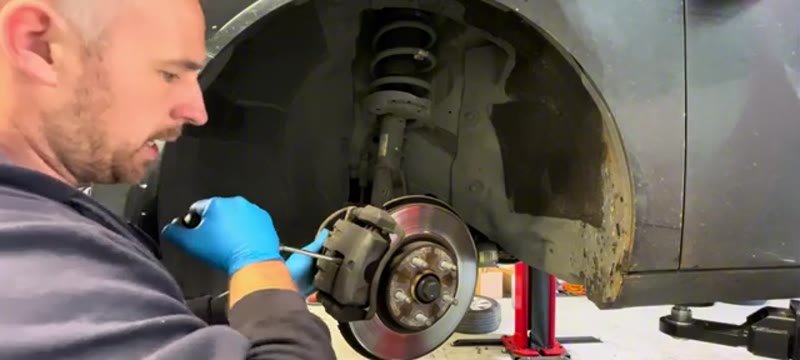
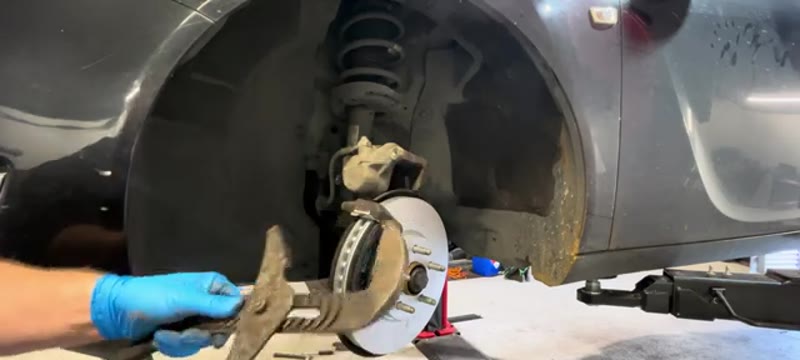
Before removing the caliper, push the piston back while it's still in position - place a flat screwdriver on the edge of the disc and lever it to push the piston inward, then press the piston all the way home. This checks it moves freely and isn't seized. Remove the two caliper bolts (14mm bolt, held with a 17mm spanner on the slider pin behind). Lift the caliper off and hang it safely - never let it hang on the brake hose.
Remove Caliper Carrier & Inspect Slider Shims
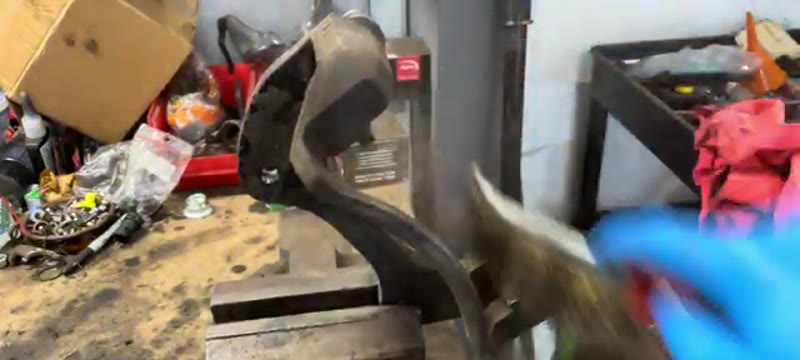
Remove the two large 21mm caliper carrier bolts and pull the carrier free. Take it to the bench. On this Insignia one of the four pad slider shims was completely missing - three were present, one was absent. Missing shims cause the pad to sit unevenly and wear at an angle. Always check all four shim positions carefully and replace any that are missing, bent or corroded. New shims were ordered from Euro Car Parts.
Remove the Old Disc
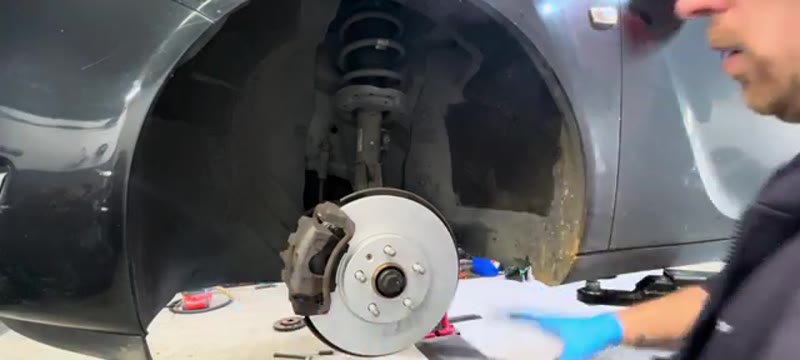
Remove the T30 Torx retaining screw from the disc face. The disc will likely be seized to the hub - use a hammer to tap it firmly from behind to break the rust bond. Once freed, the old disc slides off. Side-by-side comparison with the new disc clearly shows how much material had been lost to wear.
Clean All Mating Surfaces & Caliper Carrier
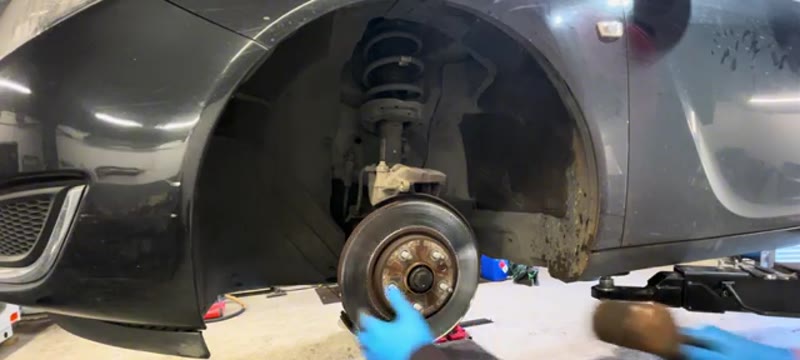
Use a wire brush to clean the hub face where the disc sits, removing all rust and corrosion. Clean the caliper carrier thoroughly - all four pad sliding channels need to be rust-free and smooth. Use a Dremel with a wire wheel attachment on stubborn areas. Run your finger across the surfaces - they should feel flat with no lumpy corrosion. Apply a thin smear of copper slip to the hub face before fitting the new disc.
Fit New Disc, Slider Shims & Pads
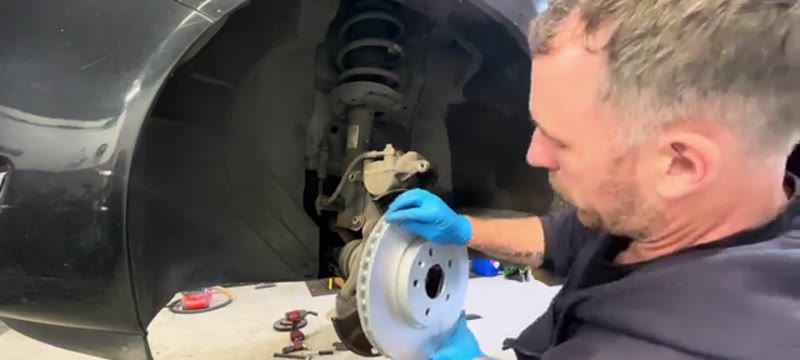
Slide the new disc onto the hub and refit the T30 Torx retaining screw. Clip the new slider shims into all four positions on the clean caliper carrier - they should click firmly into place. Refit the caliper carrier with the 21mm bolts torqued to spec. Fit the new brake pads - note the wear indicator position on the inner pad (usually faces inward at the top). The pad locates against the slider shim which prevents vibration and squealing.
Wind Back the Piston & Refit Caliper
With the new thicker pads, the caliper piston must be fully retracted to allow the caliper to fit over the disc. Use a large pair of grips or a piston wind-back tool to push the piston all the way back until it stops. Slide the caliper over the new pads and disc, refit the two caliper bolts with a 14mm socket and 17mm spanner, and tighten securely.
Refit Wheel, Torque & Bed In the Brakes
Refit the wheel and tighten the wheel nuts to the correct torque (typically 110Nm on the Insignia). Repeat the full procedure on the other front wheel. With both sides complete, pump the pedal firmly several times before moving the car. Road test with a series of moderate stops from 30mph to bed in the new pads and discs - avoid any hard emergency stops for the first 200 miles.
Shop Parts & Tools for This Job
As an Amazon Associate, Mr Auto Fixer earns from qualifying purchases. Prices and availability may vary.
Why Insignia Brakes Wear Out (and How Fast)
The Insignia is a big, heavy car - a family estate or saloon nudging 1.6 tonnes before you load it - and it uses correspondingly big front brakes to manage that mass. Weight is the main wear factor: expect 25,000–35,000 miles from front pads in mixed driving, less if the car tows a caravan or spends its life fully loaded on the motorway with late braking into roadworks. The large-diameter discs are usually good for two pad sets, but check them honestly at every pad change - a heavy car punishes a marginal disc.
Front pads on the Insignia carry a wear indicator, and the first warning most owners get is that metallic scrape on light braking. From there you have a few thousand miles of grace, not ten - the friction material on a heavy car goes from low to gone quickly once the warning starts.
Vauxhall Dealer vs DIY Cost
| Who does it | Typical price | What you get |
|---|---|---|
| Vauxhall main dealer | £320–£480 | Genuine parts and dealer labour for pads and discs |
| Independent garage | £250–£320 | Front pads and discs fitted; pads alone £100–£180 |
| DIY | £80–£140 | Quality factor discs and pads for the whole front axle |
Typical UK prices for a 2013-era Insignia front axle. Disc prices vary with the brake size fitted to your engine and trim, so buy by registration.
The DIY saving is £170–£400 on a job that needs no electronics at the front axle. Our brake replacement cost guide shows where the Insignia sits against other family cars.
Genuine Vauxhall vs Aftermarket Parts
Vauxhall's original brake components come largely from Delphi, ATE and TRW, and all three sell the identical parts in their own boxes at £80–£140 for the axle set instead of roughly twice that through the parts counter. For a heavy car, stick to those OE-grade brands or Brembo - the Insignia is exactly the sort of car where a budget disc shows itself as judder within a few thousand miles because there is simply more mass working the metal.
One Insignia-specific tip: brake sizes vary by engine and trim across the range, so order by registration or VIN rather than by model name, or you will be holding a set of discs a size too small on a Saturday morning.
Common Mistakes on an Insignia Brake Job
- Buying parts by model name instead of registration. Multiple brake sizes were fitted across the Insignia range - the wrong-size disc is the most common returned part on this car.
- Not cleaning the hub mating face. The bigger the disc, the more a speck of hub rust matters: run-out at the hub is multiplied at the disc edge and comes back as steering judder.
- Cracking the carrier bolts without a breaker bar. They are big, torqued hard and usually corroded. Rounding one off escalates the job badly - use a six-sided socket and proper leverage.
- Pushing pistons back against a full reservoir. Check the fluid level first; displaced fluid from two big front calipers is enough to overflow it.
- Leaving the transport coating on the new discs. Clean both faces with brake cleaner before fitting - a heavy car glazes contaminated pads on the first proper stop.
- Hard braking straight after the job. Bed the new friction surfaces with 150 miles of moderate stops. A 1.6-tonne car on unbedded brakes has noticeably longer stopping distances.
Related Faults to Check While the Wheels Are Off
Insignias work their front suspension as hard as their brakes, so check the corner while it is stripped: front wheel bearings on this car are a known wear point - spin the hub and listen for the rumble - and drop links and lower arm bushes knock long before they fail an MOT. Flex the brake hoses, and follow the rigid lines back along the underbody for surface rust while you are there.
Note that the rear axle is a different world on most Insignias of this era: the electronic parking brake means rear pad changes need the EPB wound into service mode first, so do not assume the rear job mirrors this one. If your symptom is judder, pulling or a soft pedal rather than routine wear, the symptom finder will point you at the right component, and the MOT failures guide covers what the tester will check in the brake bay.