The pollen filter on the Vauxhall Astra is located behind the glove box on the passenger side. The glove box is held in by a handful of 7mm bolts - once those are out, the box drops away and the filter trap door is right there. Replace the filter every 15,000–20,000 miles or once a year to keep the cabin air fresh and the ventilation system efficient.
How To Tell Your Pollen Filter Needs Changing
On the Vauxhall Astra J and K, the pollen filter is one of the most ignored maintenance items I see - owners often have no idea the car has one. The first sign of a clogged filter is almost always a smell: a damp, musty whiff from the vents the second you switch the climate control on, especially after the car has been parked overnight. That's mould growing on a filter that's saturated with leaves, road grime and pollen. Other tell-tales: airflow noticeably weak even with the blower wound up to max, windscreen demist takes twice as long to clear, hayfever symptoms feel worse inside the cabin than they do outside, and black dust starts to settle around the dashboard vent outlets. Typical pollen filter life on the Astra in normal UK driving is 12-24 months or 12,000-15,000 miles. City traffic, dusty A-roads, agricultural lanes and heavy summer use will all knock that down. Two or more of these signs and the filter needs to go in the bin - £10-£25 part, 10 minutes.
Common Symptoms of a Blocked Pollen Filter
- Musty or damp smell from the vents on first AC startup
- Weak airflow even with the blower on max
- Windscreen demist takes far longer than it used to
- Hayfever symptoms inside the cabin worse than outside
- Black dust around the dashboard vent outlets
- AC seems weaker - it can't push air through a clogged filter
DIY vs Garage Cost - UK 2026
A pollen filter change on a Vauxhall Astra at a UK independent garage will normally land at £30-£60 - parts plus the half-hour they book it for, even though it's really a 20-minute job once the glove box bolts are out. A main dealer will charge £55-£110, fitting a genuine GM part on a longer booked labour time. DIY, the part is the only real outlay: own-brand budget filters £8-£14, Bosch, Mann or Mahle £14-£28, OE Vauxhall part £25-£45. Labour is basically nothing - twenty minutes with a 7mm socket and your hands. This is one of the best DIY money-savers on the car and Mann or Bosch quality is the same standard as OE at roughly half the price. Beginner-friendly with the right socket, no jacking up the car and no fluids to spill.
Step-by-Step Guide
Shop Parts & Tools for This Job
As an Amazon Associate, Mr Auto Fixer earns from qualifying purchases. Prices and availability may vary.
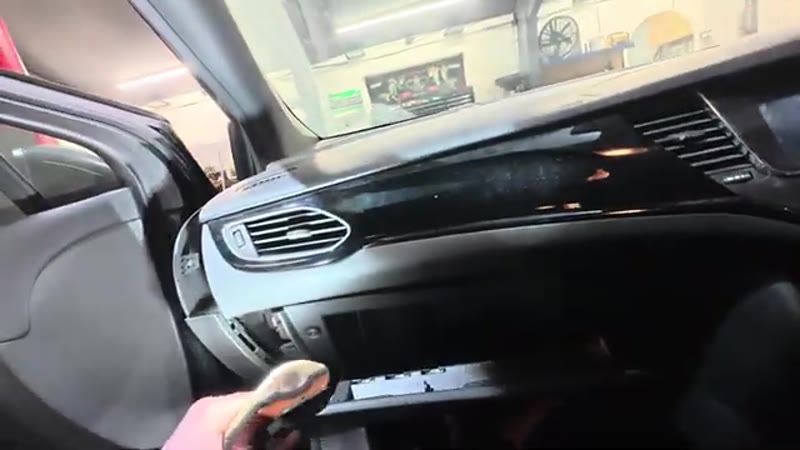
Go to the Passenger Side
Open the passenger door. The glove box must be fully removed to access the pollen filter - it's held in by 7mm bolts.
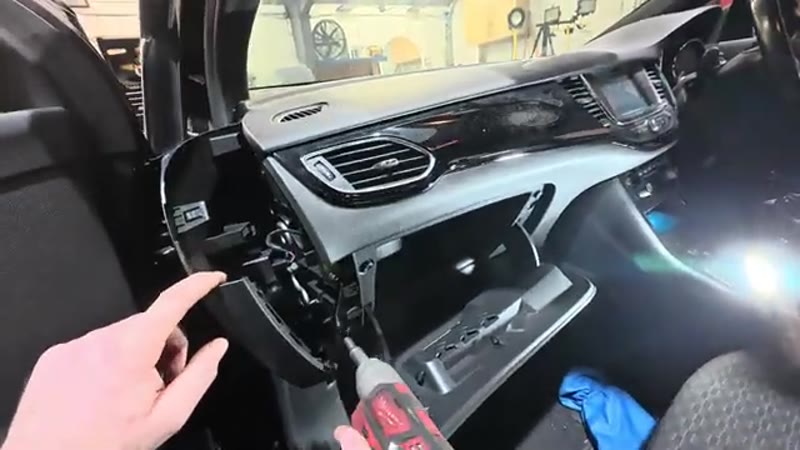
Locate and Remove the 7mm Bolts
Open the glove box. You'll see several 7mm bolts: one at the back, two down the side, and some more hidden under a lower trim panel. Peel back or pop off the lower cover to expose the hidden bolts underneath. Remove all five or six bolts in total.
Remove the Glove Box
With all bolts removed, give the glove box a gentle pull and the whole unit comes out cleanly. Set it to one side.
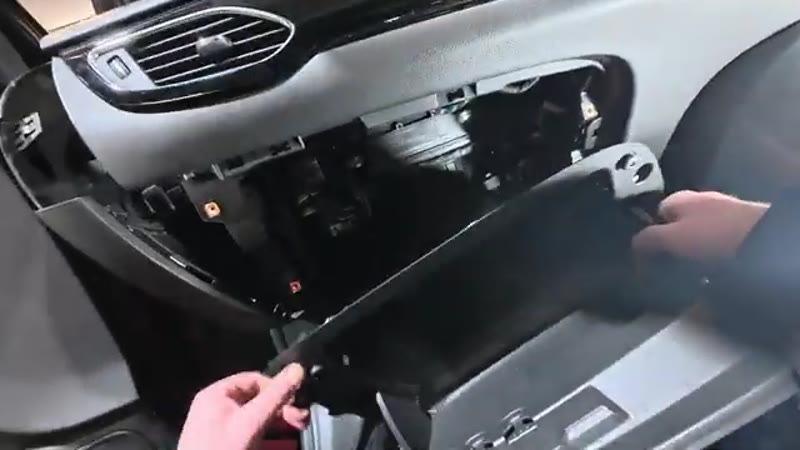
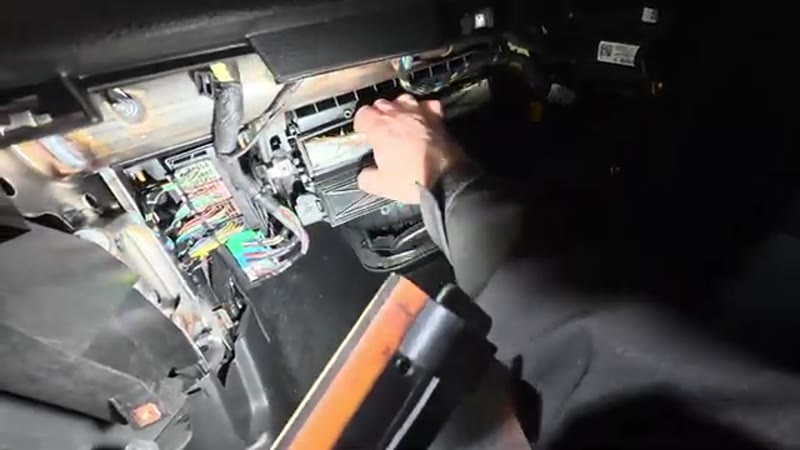
Open the Filter Trap Door
With the glove box removed you'll see a small trap door in the HVAC housing. There's a pull tab on each side - pull both tabs and the door comes down, revealing the pollen filter inside.
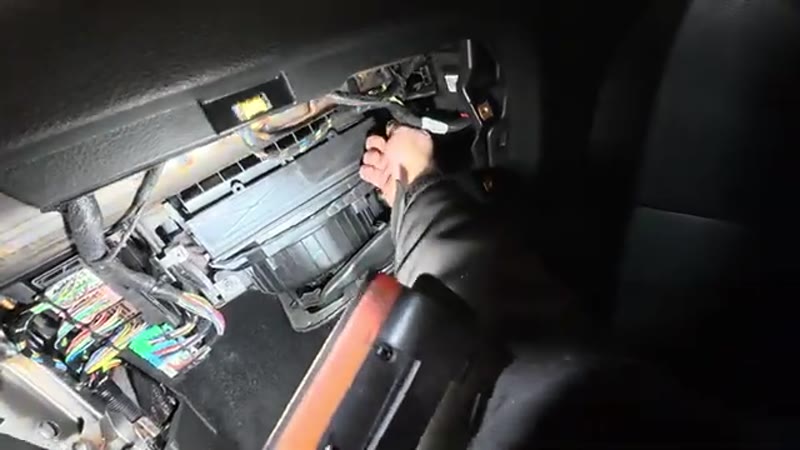
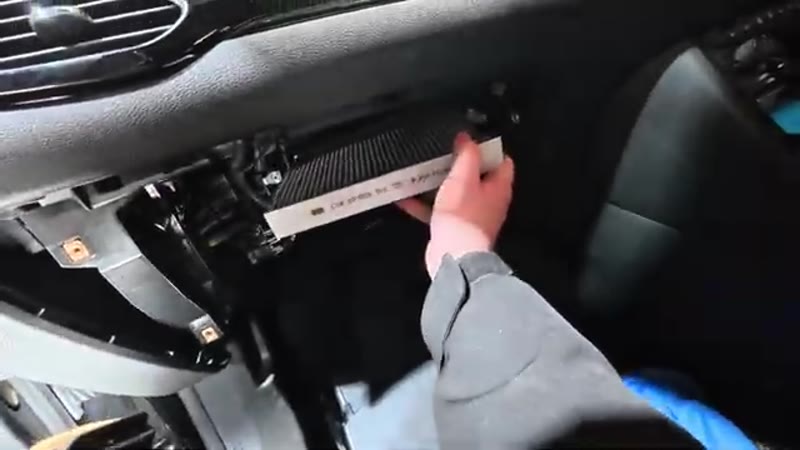
Remove the Old Filter
Slide the old filter out. If it looks black and dirty, it's well overdue for a change. Note which way the airflow arrow points before discarding it.
Install the New Filter
Slide the new pollen filter in with the airflow arrow pointing downward. Push it fully home and then fold the trap door back up until both tabs click into place.
Refit the Glove Box
Line the glove box back up - there are pull tabs on the box that must locate under corresponding lips in the dash. Once those are aligned, push the box home. Refit all the 7mm bolts including the one at the back, then clip or press the lower trim panel back into place.
Common Mistakes To Avoid
I see the same mistakes again and again on Astra pollen filter swaps. First and most common - the filter is fitted upside down or back to front. There's always a printed airflow arrow on the frame and on the Astra it points downward. Get it wrong and you've effectively got no filtration. Second, on the Astra J and K specifically, the lower footwell trim panel sometimes needs to be unclipped before the glove box will swing free - people forget about it, give the glove box a yank, and crack the dashboard hinges. Third, that one hidden 7mm bolt at the back of the glove box gets missed every time; the glove box won't come free until it's out, but don't lever it. Fourth, refitting the glove box without lining up the pull tabs first means the box never sits flush and rattles ever after. Fifth, a cheap off-dimension filter that's even a few millimetres short will not seal so unfiltered air bypasses around the foam edges. Lay the old filter and the new one side by side, fit it the same way round. Done.
Want this guide offline - and 15 more like it?
Our PDF guide collection covers servicing, fault codes, buying a used car and more. Written by a qualified mechanic. Download once, use forever - no ads, no internet needed.
How Often the Astra Filter Needs Changing (Honestly)
Vauxhall's schedule says annually, and for once the schedule and the real world agree. The Astra is Britain's default car - commute, school run, supermarket - and that duty cycle means queue air, which is the dirtiest air a filter ever meets. Twelve months of it turns the element from white to grey-brown, and the first thing owners notice is never the filter itself: it is the windscreen taking longer to demist on autumn mornings, because the clogged element is strangling the airflow the heater depends on. If your Astra's demisting has gone lazy, look at the filter before blaming the heater.
Standard vs Carbon Filters for the Astra
Both grades fit: standard particulate at £8–£15, activated carbon at £14–£25. The carbon element also strips exhaust smells and fumes, and on a car that queues for a living it is the worthwhile upgrade - the difference is noticeable the first time you sit behind a bus. Brand-wise, the filter in the Vauxhall box is made by the same OE suppliers (Mann, Mahle, Bosch) who sell it in their own packaging for roughly half - identical element, cheaper print. Skip the unbranded multipacks: a floppy frame means air goes around the filter, not through it.
Related Astra Symptoms the Filter Cannot Cure
Three vent problems get wrongly blamed on the filter. A blower stuck on certain speeds is the resistor pack - a known Astra wear item, cheap and close to the filter housing you already have open. A musty smell that returns within a week of the new filter lives on the evaporator; a £12 evaporator aerosol treatment through the intake kills it. And damp passenger carpet with stubborn misting is blocked scuttle drains under the windscreen trim, not a ventilation fault at all.
Work through any of those with the symptom finder, and if this ten-minute win has you eyeing the rest of the service schedule, the UK servicing cost guide shows which jobs are this easy and which earn their garage bills.