
Changing the brake light bulb on the Vauxhall Corsa D requires removing the tail light cluster from the inside of the boot - the lights don’t simply pop out from the outside. The driver’s side (shown here) is the trickiest because of the tyre inflator kit that takes up space in that corner, but once you know what needs to move it’s a simple job.
While the light is out it’s worth replacing any other bulbs that look tired - an indicator bulb was also replaced on this one. The bulb types are a 382 brake/tail bulb and a 581 indicator bulb.
Why a Working Brake Light Matters
Brake lights are a legal requirement under the Road Vehicles Lighting Regulations 1989. Driving with a failed brake light is a fixed-penalty offence - if stopped by police you can receive a £60 fine and three penalty points, and the vehicle may fail its next MOT if the fault is not corrected before the test. More importantly, a failed brake light is a genuine safety hazard: drivers behind you have no warning you are slowing down, significantly increasing the risk of a rear-end collision.
On the Vauxhall Corsa D, the brake light cluster contains multiple bulbs: the main brake/tail light (382) and the indicator (581). When one fails it is good practice to replace both the failed bulb and its opposite-side equivalent at the same time - bulbs of the same age and mileage tend to fail close together, and replacing them as a pair saves a second job in a few weeks. Bulbs are inexpensive enough that this makes sound economic sense.
Bulb Types and Specifications
The Corsa D uses standardised bayonet-fit bulbs that are widely available from motor factors, online retailers, and supermarkets. The main brake and tail light uses a 382 bulb (21W, single-filament) and the indicator uses a 581 bulb (21W). Both are standard push-and-twist bayonet fit bulbs - the same type used in a vast range of popular UK cars.
Standard halogen bulbs are the basic replacement and cost as little as £1–£2 each. Higher-performance halogen options (such as Osram Ultra Life or Philips Long Life) cost a little more but last significantly longer and produce a brighter output. LED brake light bulbs are also available as a direct 382 equivalent, offering longer life and a faster illumination response time. However, some LED bulbs can trigger an error on vehicles with bulb monitoring systems - if a dashboard warning light appears after fitting an LED, you may need a resistor adapter or to revert to a standard halogen bulb.
Step-by-Step Guide
Shop Parts & Tools for This Job
As an Amazon Associate, Mr Auto Fixer earns from qualifying purchases. Prices and availability may vary.
Open the Boot & Remove the Inner Panel
Open the boot. On the driver’s side you will see a plastic inner trim panel. Put your finger behind the top edge and pull sharply to pull the panel away from its clips - it will come out. Set it to one side.
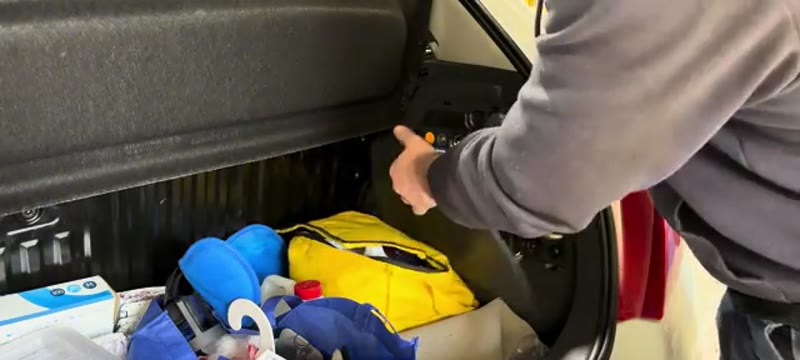
Remove the Tyre Inflator Kit
On the driver’s side there is the tyre inflation kit and the filler bottle stored in this corner. Take these out first. This section of foam and storage can be lifted and removed from the boot - work it slowly to avoid cracking any clips, then set it all to one side. This reveals the back of the light cluster.
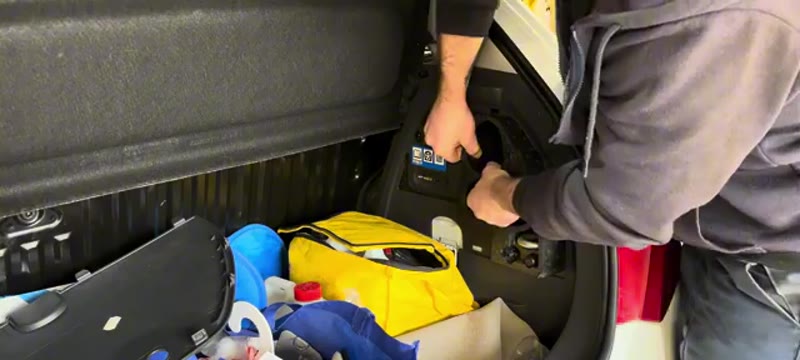
Undo the Two Light Fasteners
With the foam storage section out, you can see two plastic fasteners holding the tail light in from inside the boot. Unscrew both of them by hand (they just need a few turns). With both undone, the light unit is free from the inside.
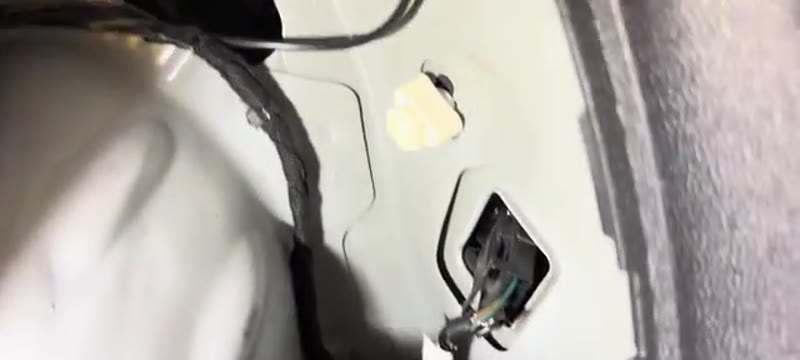
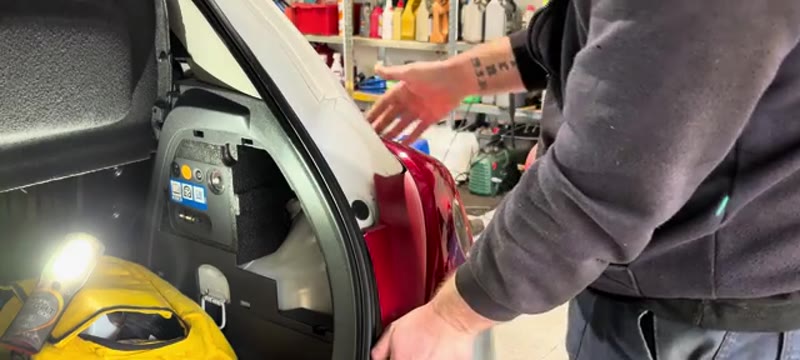
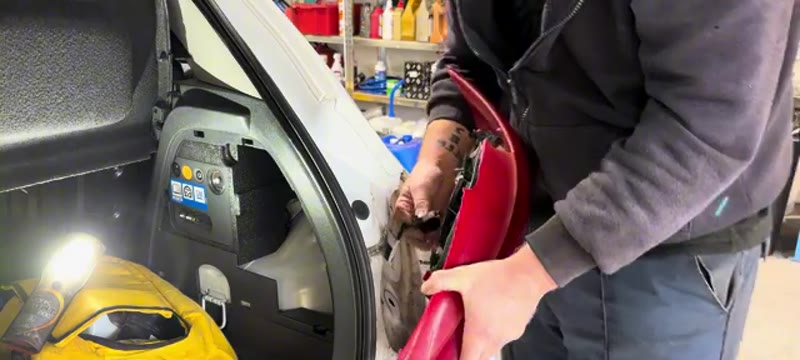
Pop the Light Unit Out
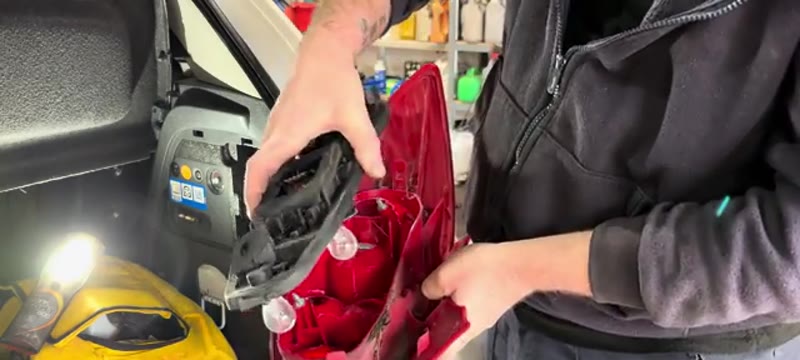
Go around to the outside of the car. Put your fingers behind the top of the light cluster and pop it outward - it has a couple of clip holders on the side that release with gentle pressure. Disconnect the wiring connector by pinching and pulling it off. The light unit is now free.
Access & Replace the Bulbs
The bulb holder is secured by three tabs - pull each tab back and it will release. Once all three tabs are free the bulb holder comes away from the light lens. Push and twist each bulb anti-clockwise to remove. Fit the new 382 brake bulb and 581 indicator bulb by pushing and twisting clockwise. Reconnect the holder to the lens, ensuring all three tabs click back in.
Refit the Light & Trim
Reconnect the wiring connector to the back of the light. Line up the light cluster with its aperture in the body and tap it gently home so the clips engage. Refit and tighten the two plastic fasteners from inside the boot. Replace the tyre inflator kit and foam section, and refit the inner trim panel by pressing all clips home.
Want this guide offline - and 15 more like it?
Our PDF guide collection covers servicing, fault codes, buying a used car and more. Written by a qualified mechanic. Download once, use forever - no ads, no internet needed.
Why Brake Light Bulbs Fail (and How Often)
A brake light filament lives a hard life. Every touch of the pedal slams current through a cold filament - the moment of maximum stress for any bulb - and a brake light does that dozens of times per journey, while sitting in a housing that gets shaken by every pothole the Corsa finds. Two to four years is a normal service life for a halogen 382 bulb in UK use, which is why testers see so many: a blown brake light is among the most common lighting defects found at MOT, and lighting is the single biggest MOT failure category overall.
It also matters more than most blown bulbs. With one brake light out, the car behind has half the warning; if it is stopped by the police it is a £60 fixed penalty and three points territory; and it is an MOT fail if present at test time.
Garage vs DIY Cost
| Who does it | Typical price | What you get |
|---|---|---|
| Vauxhall dealer | £25–£45 | A genuine-boxed bulb and a workshop ramp it never needed |
| Local garage | £15–£35 | The same £2 bulb, fitted while you wait |
| DIY | £2–£5 | A quality branded bulb and twenty minutes with no tools |
Typical UK prices for a single 382 brake light bulb on a Corsa D. This is the cheapest repair on the whole car - and one of the few needing no tools at all.
There is no catch: the Corsa D cluster comes out by hand, exactly as the steps above show. This is the job to learn on.
Branded Bulbs vs Cheap Multipacks (and the LED Question)
Even at pocket-money prices, brand matters. An Osram or Philips 382 costs £2–£5 and holds its rated brightness for years; the ten-for-£3 marketplace multipacks use thinner filaments that blow in months and often sit dimmer than the legal intent. Buy two branded bulbs and do both sides - the second filament has led the same life as the one that just died.
On LEDs, the honest answer: retrofit LED bulbs in a housing designed for halogen are not road legal in the UK and are an MOT fail if the tester spots them, however bright they look. Unless the car left the factory with LED lamps, stay with the halogen 382 the housing was designed around.
Common Mistakes When Changing a Brake Light Bulb
- Buying a 380 instead of a 382. They look identical, but the 380 is a dual-filament stop/tail bulb with offset pins and the 382 is single-filament. The wrong one either will not seat or gives strange behaviour like tail lights that brighten.
- Grabbing the new bulb's glass with bare fingers. Skin grease creates a hot spot that shortens the bulb's life - hold it by the metal base or use a tissue.
- Forcing the bayonet fitting. Push gently and twist; the pins are offset so it only seats one way. Forcing it cracks the holder, which is a £30 part protecting a £2 bulb.
- Ignoring a green or white crusty socket. Corrosion in the holder is why some "new bulbs" stay dark or flicker. Clean the contacts with fine abrasive paper before fitting the bulb.
- Not testing before reassembly. Have a helper press the pedal (or wedge it with a broom handle) while the cluster is still accessible - it saves doing the whole job twice.
- Changing only the dead side. Both bulbs are the same age. Doing the pair now beats doing this job again next month.
If a New Bulb Does Not Fix It
When a fresh bulb still will not light, the fault has moved up the circuit, and on the Corsa D there is a well-known suspect: the brake light switch on the pedal box. A failing switch kills both brake lights at once (and often the cruise control with them), and it is a £10-£20 part. Before that, check the simple things - the stop lamp fuse in the fusebox and the earth point behind the light cluster, which corrodes on cars that live outside. A high-level third brake light that works while the main ones do not is another strong pointer to the switch or wiring rather than bulbs.
Lighting faults like these are exactly what MOT testers catch, so five minutes with a helper each month keeps you ahead - the UK MOT failures guide shows how big a share lighting takes. For anything the bulb swap does not cure, the symptom finder runs the full brake-light logic.
Job Summary
Frequently Asked Questions
How do I know if my brake light is out if I can't see it myself?
The simplest method is to ask another person to stand behind the car and confirm both brake lights illuminate when you press the pedal. Alternatively, park close to a wall or another vehicle and watch for the reflected glow from behind the car when you press the brake. Some modern vehicles have a bulb failure warning in the instrument cluster, but this is not universal - older Corsa D models may not display a warning for a failed brake light.
Do I need to replace both brake lights at the same time?
It is not strictly required, but it is strongly recommended. Both bulbs were fitted at the same time and experience the same number of heat/cool cycles. When one fails, the other is typically close to the end of its life too. Replacing them in pairs is inexpensive insurance against needing to repeat the job very shortly afterwards. The same logic applies to headlight bulbs and indicators.
Will an LED brake bulb work on my Corsa D?
LED 382-equivalent bulbs are available and will physically fit the Corsa D bulb holder. However, the Corsa D's electrical system may interpret the lower current draw of an LED as a bulb failure and trigger a dashboard warning or cause hyperflashing on indicator circuits. If you wish to use LEDs, check that the product specifically states it is compatible with vehicles that have bulb monitoring systems, or be prepared to fit load resistors. Standard halogen bulbs remain the simplest, most reliable choice.
My brake light works but the tail light doesn't - is that a different bulb?
On the Corsa D the tail/brake function uses a dual-filament 380 bulb on some clusters, or separate single-filament bulbs depending on the exact trim level and year. If your brake light (bright flash when pedal pressed) works but the tail light (lower-intensity running light) does not, the tail light filament or bulb has failed. In this case, replace the tail light bulb. The 382 reference covers single-filament brake bulbs - check your specific cluster for the exact bulb type needed for the tail function.