With an experienced eye on the first side, yes. Van brakes forgive nothing when the van is loaded, so the standard is torque-wrench-everything - but the layout itself is as conventional as brakes get.
Overview
The 2022 Renault Trafic uses a conventional sliding-pin caliper system with 13mm slider bolts - similar to many European vans of this size. The procedure is straightforward once the wheel is off.
Always replace discs and pads as a complete axle set and pump the brake pedal before driving after reassembly.
When You Need This Job
Grinding or squealing when braking
Visible lip on the edge of the disc
Brake pad thickness below 3mm
Juddering under braking
Brake pad wear warning light
⚠ Pump the brake pedal before drivingAfter reassembly the piston is retracted. The pedal will go straight to the floor on first press. Pump several times before moving the vehicle.
Tools You'll Need
13mm spanner and socket
18mm socket (caliper carrier bolts)
T30 Torx bit (disc retaining screws)
Wire brush and file
Mole grips
Brake cleaner
Torque wrench
Step-by-Step Guide
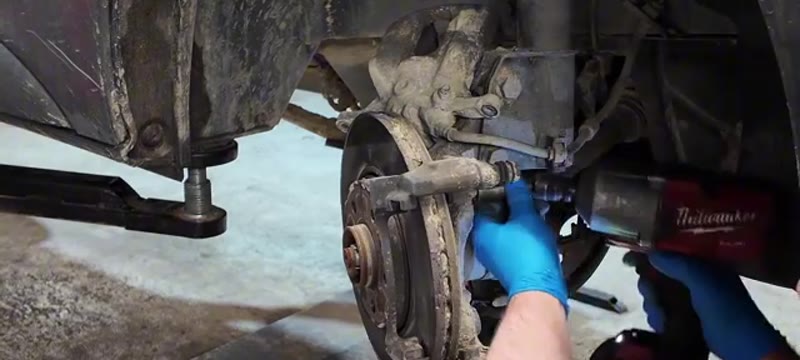
01
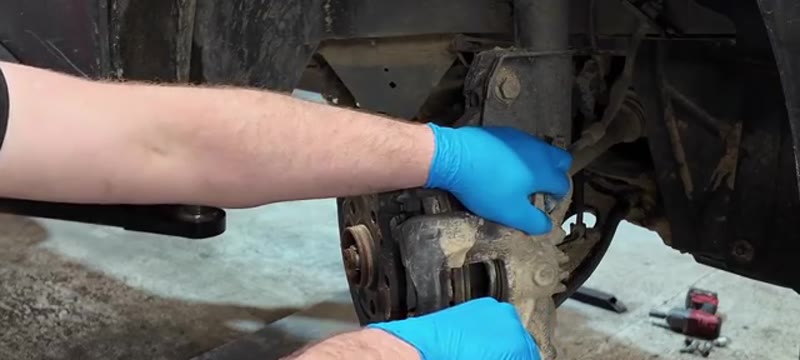
Remove the wheel and push the piston back
Remove the front wheel. Remove the brake fluid reservoir cap. Use a flat screwdriver to push the piston all the way back into the caliper - it is easy to do at this stage before removing anything.
02
Remove the two 13mm caliper slider bolts
Use a 13mm spanner or socket to undo both slider bolts. If they spin use mole grips to hold the slider pin behind. Remove the bolts fully.
03
Remove the caliper and hang it safely
Lift the caliper away. Do not let it hang on the brake hose - hook it up out of the way with a bungee or tie.
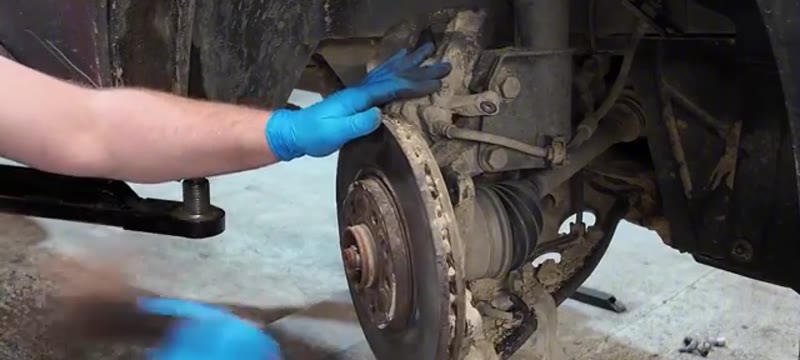
04
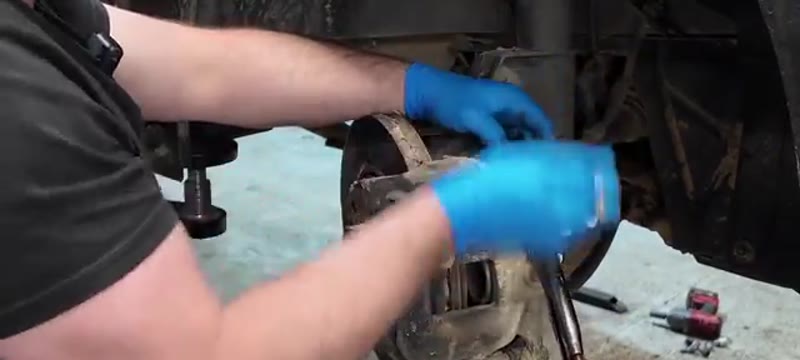
Tap out the old brake pads
Use a screwdriver to knock the pads out of the carrier. Inspect the wear - low pads are often accompanied by a lipped disc.
05
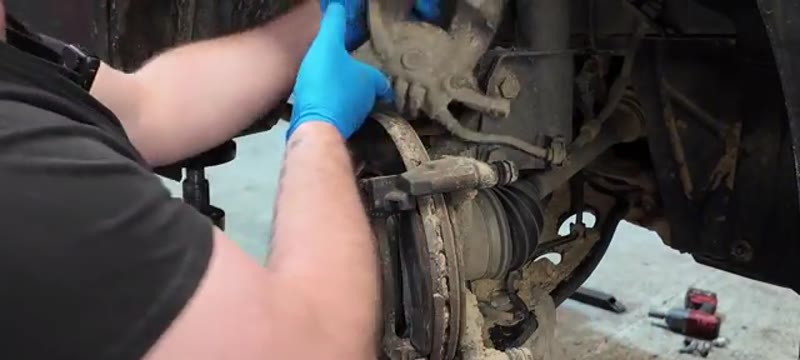
Remove the caliper carrier - two 18mm bolts
Two 18mm bolts at the back of the carrier. Remove both and take the carrier to a bench. Clean up the pad contact surfaces with a wire brush and file until flat and smooth.
06
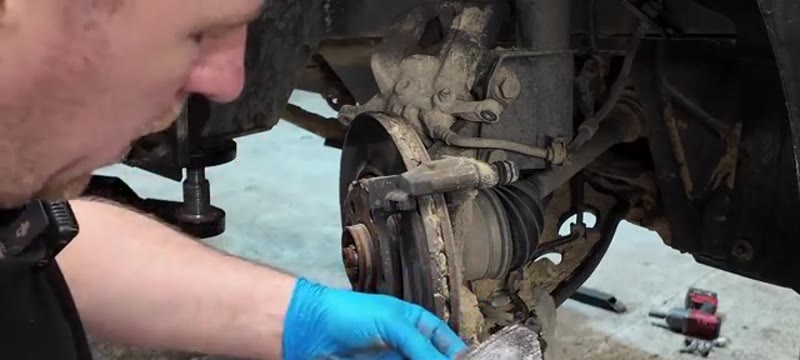
Remove the disc - two T30 Torx retaining screws
Undo the two T30 Torx screws holding the disc. Tap the disc off with a rubber mallet. Clean the hub mating face with a wire brush.
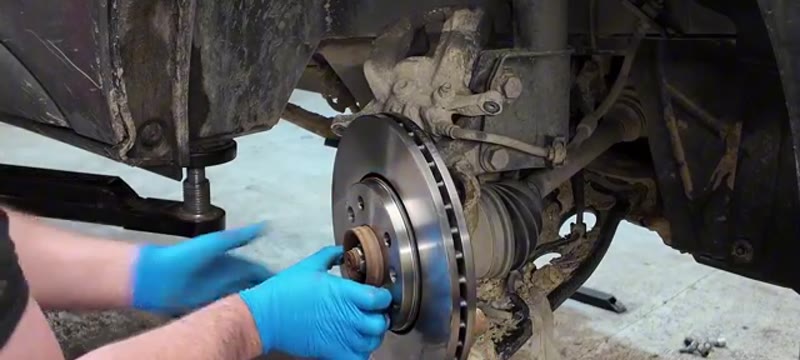
07
Fit the new disc
Clean the new disc with brake cleaner. Fit it and refit the T30 Torx retaining screws.
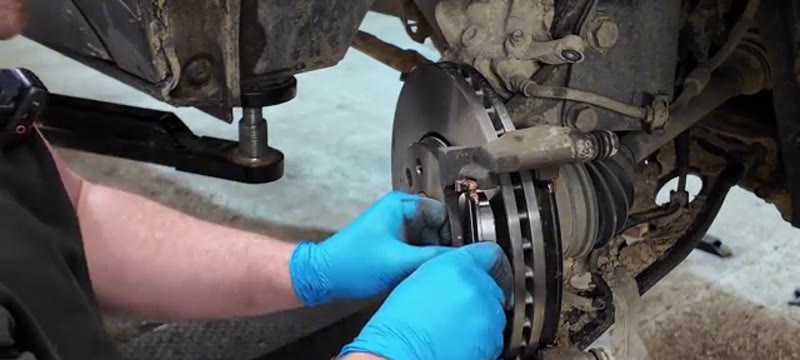
08
Refit the cleaned caliper carrier and new pads
Bolt the carrier back on. Fit the new pads - put the back end of each pad spring against the carrier slider and push it in. If the carrier was cleaned correctly the pads will slot straight in.
09
Refit the caliper and slider bolts
Lower the caliper back over the pads and disc. Refit the 13mm slider bolts and tighten. Refit the wheel and torque the nuts. Pump the brake pedal several times before driving.
Torque Specifications
Component
Torque
Caliper carrier bolts (18mm)
120 Nm
Wheel nuts
130 Nm
Clean the carrier thoroughly
The pad contact channels on the carrier must be completely free of rust and burrs for the pads to slide freely. A file as well as a wire brush gives the best result.
Our PDF guide collection covers servicing, fault codes, buying a used car and more. Written by a qualified mechanic. Download once, use forever - no ads, no internet needed.
The Trafic is a working van, and its front brakes live a working life. Loaded to the gunwales with tools or deliveries, the fronts are converting serious energy at every stop, and urban multi-drop work is the toughest duty a brake ever sees. A Trafic on trade duty gets through front pads in 20,000–30,000 miles; a lightly used crew van will stretch past 35,000. Discs on a loaded van typically last two pad sets before heat cracking, scoring or thickness push them out.
On a 2022 van there is also the warranty question, so let us clear it up: brake pads and discs are wear items and are not covered by Renault's warranty anyway, and under UK block exemption rules, servicing outside the dealer network - including work you do yourself with quality parts and receipts - does not void the remaining warranty on the rest of the van.
Renault Dealer vs DIY Cost
Who does it
Typical price
What you get
Renault Pro+ dealer
£350–£500
Genuine parts, dealer labour, stamped digital service record
Independent garage
£200–£350
Front discs and pads fitted with quality aftermarket parts
DIY
£90–£150
Factor discs and pads for both sides, done on your own schedule
Typical UK prices for the front axle of a third-generation Trafic. Add the hidden cost of a dealer visit for a working van: a day off the road.
Keep the receipts for the parts whichever route you take - a documented brake service supports both the warranty position and resale value. The UK brake cost guide covers how van prices compare with cars.
Genuine Renault vs Aftermarket - the Shared-Van Advantage
Here is a money-saving fact about the Trafic: it is the same van as the Vauxhall Vivaro of the previous generation, the Nissan NV300 and the Fiat Talento, built on Renault's X82 platform. The braking components interchange, which means enormous aftermarket coverage and keen prices. Brembo, TRW and Textar all list quality discs and pads for it at £90–£150 the axle - the same manufacturers who supply the production line, minus the genuine-box premium of nearly double.
As with any working van, buy mid-range branded or better. Budget discs warp under load within months, and a van that judders at 50mph with a payload aboard is a van earning you less.
Common Mistakes on a Trafic Brake Job
Not supporting a loaded van properly. Empty the load area before you jack it. A van's kerb weight plus racking is already at the limit of many DIY trolley jacks and stands.
Leaving the hub face crusty. Any rust between hub and new disc becomes run-out, and a loaded van turns small run-out into a steering wheel shake you feel all day.
Ignoring the caliper sliders. Vans sit outside; sliders seize. A dry pin means the inner pad wears at double speed and you are back in six months.
Forgetting the anti-corrosion coating. New discs ship with an oil film. Brake-clean both faces or the first loaded stop glazes the new pads.
Rattle-gunning the wheel bolts. Trafic wheels are off and on constantly for tyre wear checks. Torque them by hand and recheck after the first 30 miles.
Bedding the brakes in with a full load. Do the first 150 gentle miles empty if you can. Fresh friction surfaces plus maximum payload is how new brakes get glazed on day one.
Related Faults to Check While the Wheels Are Off
Use the wheel-off time the way a fleet workshop would. Rock each front wheel for bearing play - working vans rumble their bearings early. Check the CV boots for splits, flex the brake hoses, and look along the rigid brake lines under the sills for corrosion, the classic van MOT failure. At the back, make sure the rear brakes actually work: rear shoes and calipers on vans seize from standing loaded far more often than they wear out, and a van braking on the fronts alone will pull and dive.
If you run the older shape Trafic as well, our Trafic glow plug guide covers the other job these vans commonly need. For any braking symptom you cannot pin down - pulling, judder, a long pedal - start with the symptom finder rather than a parts order.
Quick Stats
Difficulty
Intermediate
Vehicle
Renault Trafic 2022
Time
2 hrs
Parts Cost
£70–£180
Common Questions
FAQ
Yes - the 2022 Trafic uses a conventional sliding-pin caliper with 13mm slider bolts, the same arrangement as most European vans, and the guide covers the full sequence. Nothing exotic; just van-sized components, so a breaker bar and a proper trolley jack matter more than they would on a small car.
£200–£350 at an independent for front discs and pads. Quality parts from a factor are £90–£150. Van brakes wear fast under load, so learning this job once pays back every year the van works.
One to two hours for both sides, including a proper hub face clean before the new discs seat. A loaded van punishes sloppy brake work - torque everything to spec and bed the new brakes in gently for the first hundred miles.
Both sides of the axle in one session - no exceptions on a working van. Mixed old and new friction surfaces brake unevenly under load, and the MOT rollers will flag the imbalance.
20+ Years ExperienceMOT TesterProfessional UK Mechanic
All guides on this site are written from real, hands-on experience - not copy-pasted from a manual. If I haven't done the job myself, it doesn't go on the site.