
Changing the pollen filter on the Renault Megane Mk3 is a slightly unusual job because the filter is accessed from inside the car through the driver’s footwell, not from the engine bay. Renault dealers are known to quote a high price for this job because they remove the clutch pedal and surrounding trim - but as this guide shows, you can do it without any of that fuss.
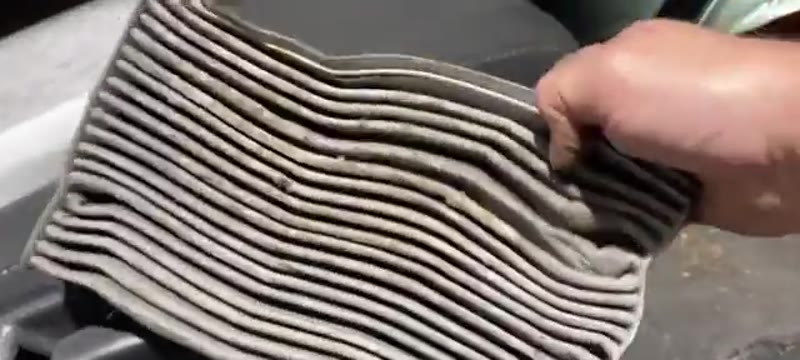
The filter on this one had clearly never been changed and had things growing on it. A blocked pollen filter causes reduced airflow through the heater and ventilation system and can produce bad smells inside the car.
Similar Procedure on These Models
- Renault Megane Mk3 (all variants)
- Renault Scenic Mk3
- Renault Fluence
Tools & Parts Needed
Shop Parts & Tools for This Job
As an Amazon Associate, Mr Auto Fixer earns from qualifying purchases. Prices and availability may vary.
Step-by-Step Guide
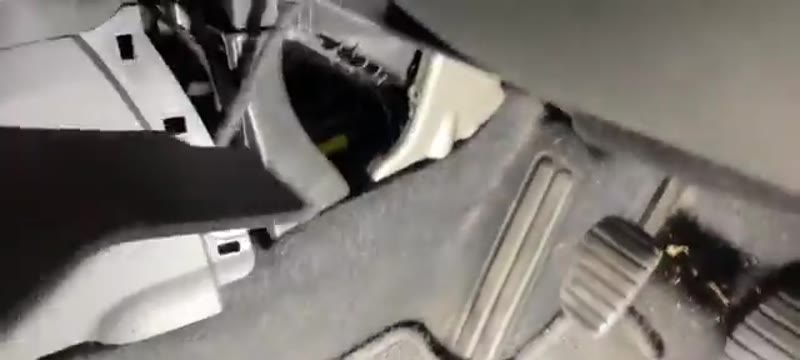
Remove the Lower Footwell Panel
Get inside the car and kneel or crouch in the driver’s footwell. Locate the plastic panel at the bottom of the dash just above the clutch pedal. Grab it at the bottom edge and pull it off - it has a couple of clips. Be careful not to break them. Set it to one side.
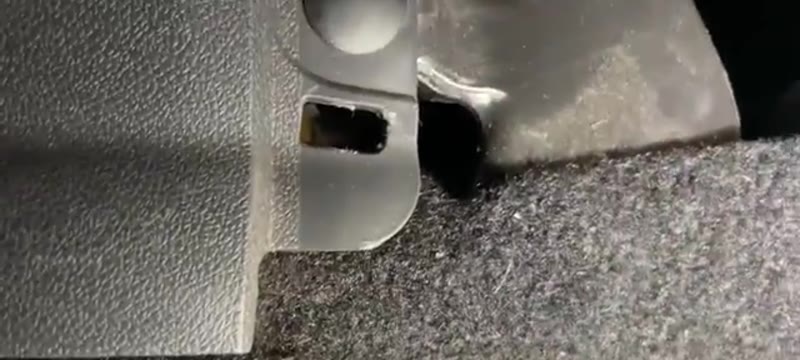
Locate and Undo the T20 Torx Bolt
With the panel off and a torch in hand, look up at the bracket above. You will see a small T20 Torx bolt at the very top of the cover. This is the only fastener. Use a small ratchet with a T20 bit and undo it slowly - it is fiddly to reach but completely accessible. Once undone, get your fingers on it and keep it safe.

Pull the Two Tabs and Remove the Cover
Just below the bolt there are two plastic tabs - one at the top of the cover and one at the bottom. Squeeze them together and pull the cover out. It will come out into the footwell. You can now see the pollen filter sitting in its housing just above.

Remove the Old Filter
Reach up and squeeze the filter slightly to work it free of its housing. It will come out by bending it around the corner of the duct. On this car it had never been changed and had debris and even mould growing on it. Dispose of it and clean the housing if needed.
Fit the New Filter
Check the airflow direction arrow on the new filter - the arrow should point into the car (towards you as you face the housing). Squeeze the filter together slightly and feed it up around the bend into the housing. Once it locates fully into the slot it should sit flush and secure.

Refit the Cover & Panel
Line up the two tabs on the cover with the housing and push it back in so both tabs click into place. Push them in firmly with your fingers to confirm they are seated. Refit the T20 Torx bolt at the top. Refit the lower dash panel, locating the clips before pressing it firmly home. Test the heater blower to confirm good airflow.
Want this guide offline - and 15 more like it?
Our PDF guide collection covers servicing, fault codes, buying a used car and more. Written by a qualified mechanic. Download once, use forever - no ads, no internet needed.
Why Megane Filters Go Unchanged for Years
Renault hid the Mk3 Megane's pollen filter down behind a footwell panel with a Torx bolt, in a spot you work by feel with your head under the dash - and the predictable result is that nobody changes it. Garages quote real labour time for the contortion, home mechanics give up when they cannot see the slot, and the filter quietly does five years of a one-year job. If your Megane's vents smell of damp and the windscreen takes an age to demist, the filter is the first suspect, and if there is no record of it ever being changed, it never was.
Renault Dealer vs DIY Cost
| Who does it | Typical price | What you get |
|---|---|---|
| Renault main dealer | £50–£90 | Genuine filter plus the labour for the awkward access |
| Independent garage | £25–£55 | Same job - the quote reflects the contortion, not the part |
| DIY | £8–£20 | A quality filter, a T20 Torx and twenty patient minutes |
Typical UK prices for the Mk3 Megane. This is one of the few pollen filters where the garage labour charge is honestly earned - which makes the DIY saving all the sweeter.
Genuine Renault vs Aftermarket
Purflux - France's OE filtration supplier and very often the maker of the part in the Renault box - lists the Megane element under its own name at half the dealer price, as do Mann and Bosch, all in the £8–£20 range. Take the activated carbon version for the few pounds extra if the car lives in town; the Megane's low-set intake drinks its share of traffic fumes. Given the access effort on this car, fit a filter worth the crawl - this is not the job to repeat in six months because a bargain element collapsed.
Common Mistakes on the Megane Filter Change
- Losing the T20 bolt in the carpet. You undo it blind, and it drops straight into the deepest pile in the footwell. Magnetic bit or a piece of tape on the driver - learn from those who kneel before you.
- Cracking the cover tabs. The two tabs pull as the guide shows; they are brittle after years of heater warmth. A broken cover never seals again and hisses at motorway speed.
- Creasing the filter getting it in. The slot demands a bend - bend along the pleats, never across them. A kinked pleat is a permanent hole in your filtration.
- Fitting it arrow-backwards. Check the airflow arrow before the element disappears into the slot, because once it is in, you cannot see it again.
- Skipping the vacuum. Everything the old filter caught is now around the slot mouth and in the carpet. Two minutes with the hoover or the blower redistributes it.
Related Megane Faults While You Are Down There
Head under the Megane's dash, you are in the neighbourhood of its other classics: a blower that has lost its lower speeds is the resistor pack (close by, cheap, and this is the visit to do it), and damp carpet on either side means blocked scuttle or door membranes, not the filter. A smell that survives the new element is evaporator mould - an aerosol treatment through the intake sorts it without another crawl. The Megane's other famously awkward electrical job has its own walkthrough in the Megane wiper motor guide, and anything else the vents are doing can go through the symptom finder first.