
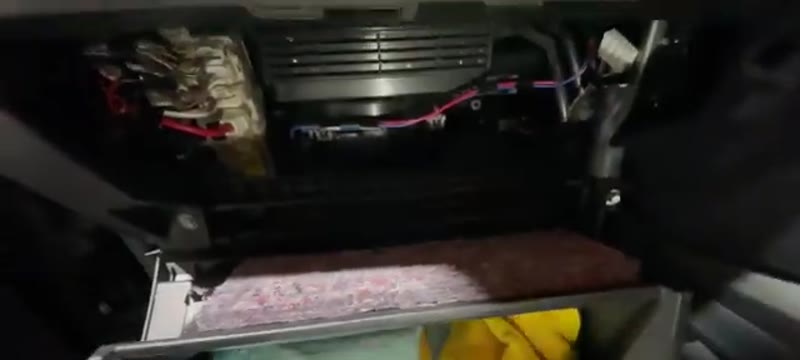
Many L200 owners ask where the cabin filter is located because it is not obvious. On this 2020 L200 Warrior it sits behind the glove box on the passenger side. Access requires dropping the glove box fully open by releasing the damper and two side tabs - straightforward once you know the trick.
This particular truck was on a 20 plate and had never had its cabin filter changed. The filter provides clean air to the cabin and a blocked one reduces heater and air conditioning performance and can introduce bad smells.
Why Change Your Pollen Filter?
On the Mitsubishi L200 the cabin filter - also known as the pollen or air-conditioning filter - cleans the air drawn into the cab through the heater and ventilation. As a working pickup the L200 often runs on farms, sites and unsealed tracks, so its filter copes with heavy dust and grit on top of the usual pollen and road muck.
A blocked filter affects far more than comfort. It restricts airflow across the whole heater system, so the L200's blower has to work hard, demisting drags on cold mornings, and the air conditioning struggles. On a hard-worked truck that has never had the filter changed, a new one makes an immediate difference - much stronger airflow and no damp, dusty smell on start-up.
Signs Your Pollen Filter Needs Replacing
- Reduced airflow from the vents even at full fan speed
- Musty or unpleasant smell when the heater or AC is switched on
- Increased allergy symptoms - itchy eyes or nose while driving
- Windscreen takes noticeably longer to demist than it used to
- Fan sounds louder than normal - working harder against the restriction
- Unable to confirm the filter has been changed in the last 12–15,000 miles
How Often Should You Change It?
Mitsubishi's interval is around every 12–15,000 miles or annually, whichever comes first, but an L200 used off-road or on dusty land will block its filter well ahead of that. The cabin filter is a favourite item for garages to leave out to keep the bill down, so a used L200 with gaps in its history is very likely on its original filter - replace it right away.
If your L200 spends its time on dusty tracks, towing, or crawling through sites and traffic, change the filter yearly no matter the mileage. Dust, chaff and exhaust from that kind of work load a filter far faster than steady tarmac miles do.
Standard vs Activated Carbon Filters
Two filter types suit the L200. A standard particle filter uses pleated paper or synthetic media to catch dust and pollen, matching the basic OEM part - a sensible choice if the truck works in very dusty conditions and you change filters often. A carbon filter adds a charcoal layer that also absorbs fumes and odours, which is worth it if you tow or sit in traffic. It costs a little more but improves cab air noticeably.
Step-by-Step Guide
Shop Parts & Tools for This Job
As an Amazon Associate, Mr Auto Fixer earns from qualifying purchases. Prices and availability may vary.
Open the Glove Box & Remove the Damper
Open the passenger side glove box. Look down at the left side hinge area and you will see a small plastic damper - a thin arm that controls how slowly the box opens. Pinch the end of the damper and pull it off its peg. Now the glove box will drop all the way down when you release it.

Release the Side Tabs & Drop the Glove Box
With the damper removed, squeeze the two plastic side tabs on either side of the glove box inwards - one each side. While squeezing them in, let the box drop all the way down. This reveals the black filter housing behind it.
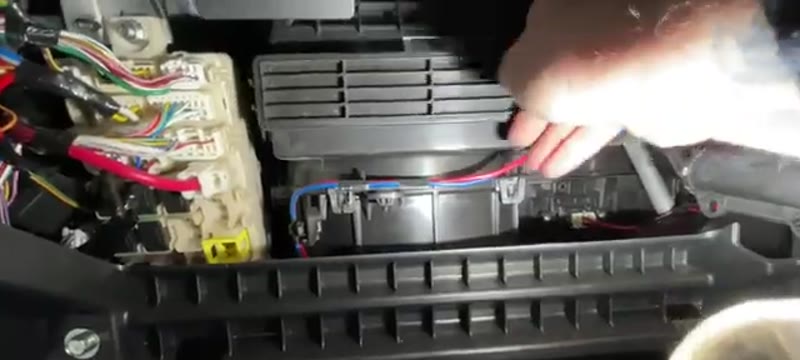
Open the Filter Cover & Remove the Old Filter
The filter housing has a plastic clip on each side. Release both clips and pull the front cover off. The cabin filter is now visible. Slide it out - note the orientation and airflow direction arrow before removing it. On this 20-plate L200 it had never been changed and was heavily contaminated.

Fit the New Filter
The new filter has a directional airflow arrow - the airflow comes in from outside and goes down into the cabin, so position the arrow accordingly. Slide the filter into the housing making sure it seats fully and squarely.

Refit Cover, Glove Box & Damper
Clip the filter cover back into place ensuring both side clips engage. Lift the glove box back up and squeeze the tabs inward to snap it back onto its runners. Refit the damper by pushing it back onto its peg on the side. Shut the glove box and confirm everything is secure. Done.
Want this guide offline - and 15 more like it?
Our PDF guide collection covers servicing, fault codes, buying a used car and more. Written by a qualified mechanic. Download once, use forever - no ads, no internet needed.
Pickup Duty Is the Hardest Life a Cabin Filter Can Live
An L200 works where the air is worst: farm tracks, building sites, gravel yards, muddy lanes behind a flail mower. Every one of those environments is a dust factory, and the cabin filter is the only thing keeping it out of the driver's lungs through a long working day. Car schedules say change the filter annually; a site-based or farm-based L200 realistically needs it every six months, because agricultural dust and site particulates load an element several times faster than town traffic. If the old filter comes out the colour of the yard, that is your interval talking.
Dealer vs DIY Cost
| Who does it | Typical price | What you get |
|---|---|---|
| Mitsubishi dealer | £50–£90 | Genuine filter, booked slot, truck off the job |
| Independent garage | £20–£50 | The same ten-minute swap |
| DIY | £10–£20 | Quality filter, no tools, done in the yard before the kettle boils |
Typical UK prices for the L200. With Mitsubishi gone from UK new sales, independent servicing and DIY are increasingly how these trucks live anyway - this job is the easiest possible start.
Choosing a Filter for a Working Truck
Mann, Bosch and Blue Print (a strong OE-equivalent brand for Japanese vehicles) all list the L200 element at £10–£20, and quality matters more here than on a car: a cheap filter's flimsy frame flexes under the dust load a pickup feeds it, and unfiltered bypass air on a site truck defeats the whole exercise. The activated carbon grade is worth having if the truck queues in town between jobs; for pure yard-and-field work the standard element changed twice as often beats a carbon one left in too long.
Related Checks for a Hard-Working L200
Dust that beats the filter shortens the blower motor's life too - a blower getting noisy or losing its top speed after years of site duty is bearings or the resistor, not the filter. A musty smell that survives the new element is mould on the evaporator (a £12 aerosol treatment fixes it), and a soaked filter means the scuttle or door seals are letting water past - find the leak before the cab carpet becomes a permanent bog.
For symptoms that do not fit the filter story, the symptom finder sorts them fast, and the UK servicing cost guide shows what the rest of the truck's upkeep should cost now the dealer network has thinned.
Job Summary
Common Mistakes to Avoid
The most common error is fitting the filter back to front. Check the airflow arrow on the edge of the new filter and make sure it points the way air enters the cab. Fitted the wrong way it filters badly and the media can eventually collapse against the housing.
The other regular mistake is failing to seat the cover fully. On the L200 a cover left unclipped shows up as a whistle or draught behind the dash and weaker airflow from the vents. Press it home firmly and confirm every clip has engaged before you finish up.
Frequently Asked Questions
Will changing the pollen filter improve my air conditioning performance?
Yes, often substantially. A clogged filter cuts the volume of air the L200's system can move, so the cab is slow to cool or warm. Fit a fresh filter before assuming the air conditioning needs attention - on a dusty, neglected truck the airflow gain alone can be dramatic.
Can I just clean and reuse the old filter?
No. Banging the dust out or blowing a filter through only clears the surface; the media stays packed with fine grit, fumes and moisture that cannot be cleaned out. Filters are cheap, and on a working truck a new one is far better than a contaminated, reused element.
My car doesn't have air conditioning - does it still need a pollen filter?
Yes. The cabin filter serves the fresh-air ventilation rather than the air conditioning, so even an L200 without AC draws its cab air through it. A blocked filter still leaves weak vents and can allow mould in the ducting, so it should be changed on the same schedule whether or not the truck has air conditioning.
What happens if I leave a blocked pollen filter in too long?
Leave it too long and the restricted airflow makes the blower motor labour, shortening its life. A damp, dust-clogged filter also lets mould and bacteria grow in the heater box behind it, producing a musty smell that is hard to remove without stripping the box - a far costlier job than the simple filter change.