Overview
Replacing front brake pads on an Audi is a straightforward job with the right tools. Most Audi models use a sliding caliper design with two guide pin bolts, making the process very similar across the A3, A4, A5, Q3 and Q5 ranges. Budget around an hour for the full job including both sides.
Tools & Parts You'll Need
Shop Parts & Tools for This Job
As an Amazon Associate, Mr Auto Fixer earns from qualifying purchases. Prices and availability may vary.
Step-by-Step Guide
Loosen wheel bolts and jack up the car
With the car on the ground, crack the wheel bolts loose (don't remove). Jack the car up at the correct jacking point and place an axle stand under the subframe or sill. Remove the wheel fully.
Inspect the old pads
Before removing anything, check the remaining pad thickness through the caliper. If the friction material is below 3mm, it's time to replace. Also check the disc for deep scoring or cracks.
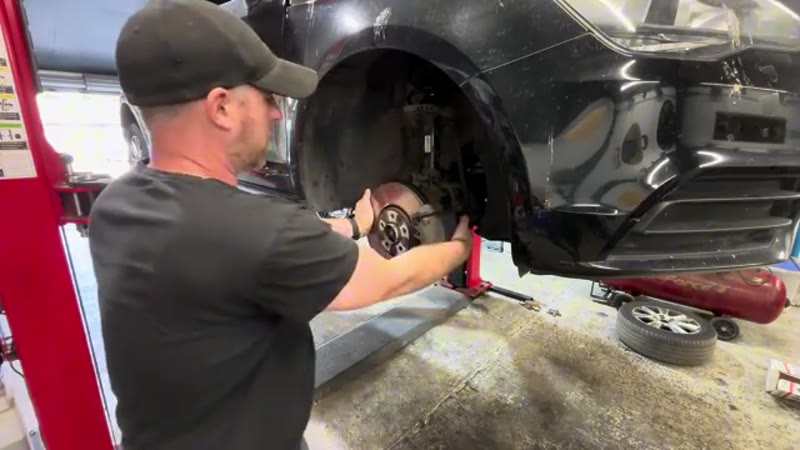
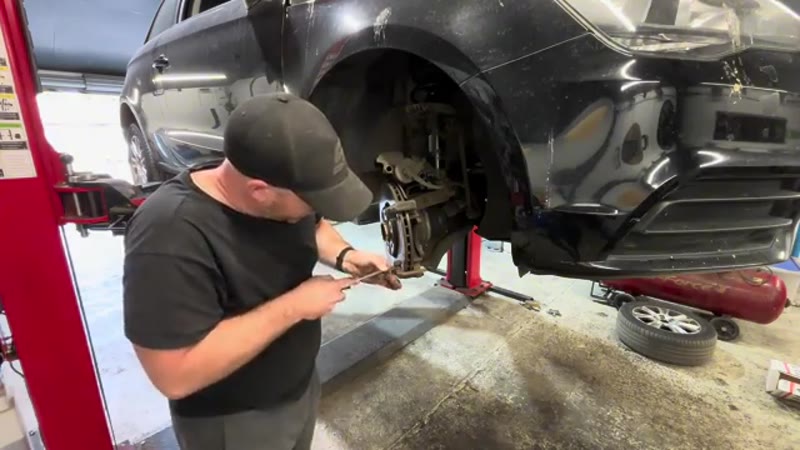
Remove the caliper guide pin bolts
The caliper is held on by two guide pin bolts - typically 7mm internal hex (Allen key). Remove both bolts and slide the caliper body off the disc. Do NOT let it hang by the brake hose - use a wire hook to hang it from the spring or suspension.
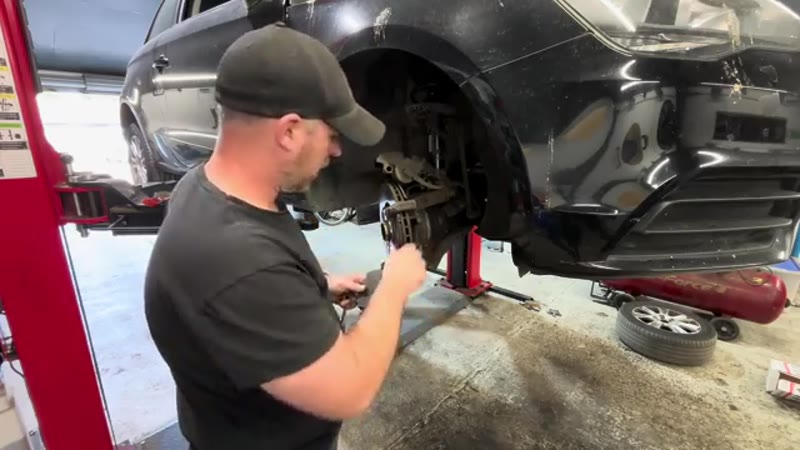
Remove the old brake pads
The inner pad is usually clipped to the caliper piston; the outer pad clips into the caliper bracket. Pull both pads out and set aside. Note which way they sit for reference.
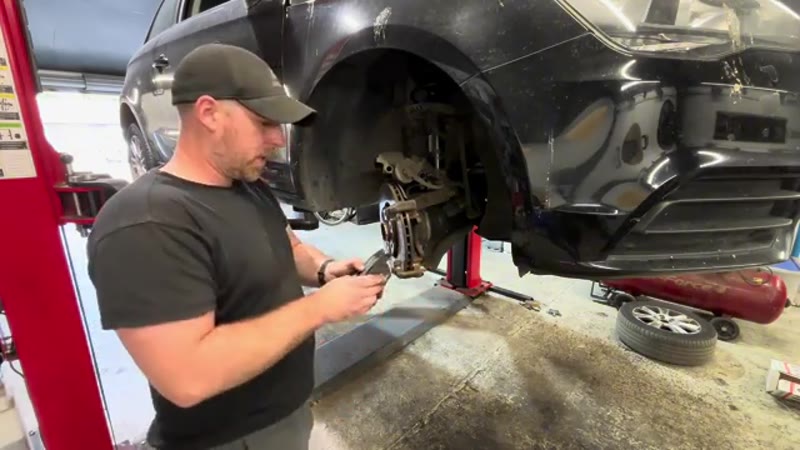
Clean the caliper bracket
Use a wire brush and brake cleaner to clean the pad contact points on the bracket (the sliding surfaces where the pads sit). Remove any rust, corrosion or old grease buildup.
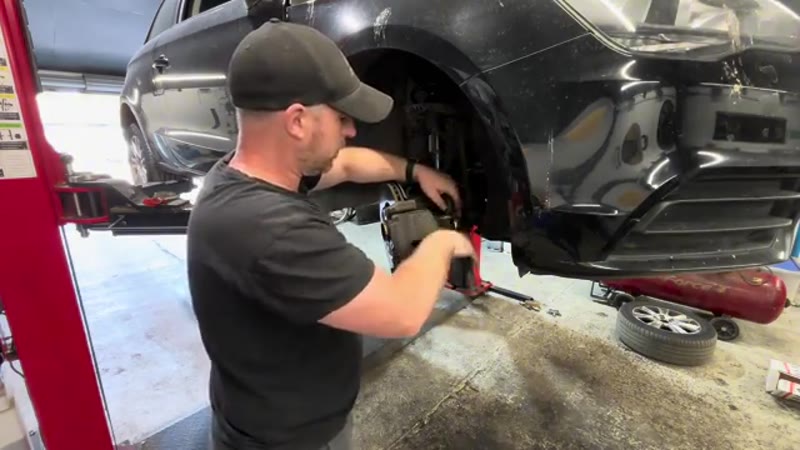
Compress the caliper piston
Before fitting new (thicker) pads, the caliper piston must be pushed back into its bore. Remove the brake fluid reservoir cap first to relieve pressure. Use a piston tool or G-clamp to slowly press the piston back flush. Mop up any fluid that overflows from the reservoir.

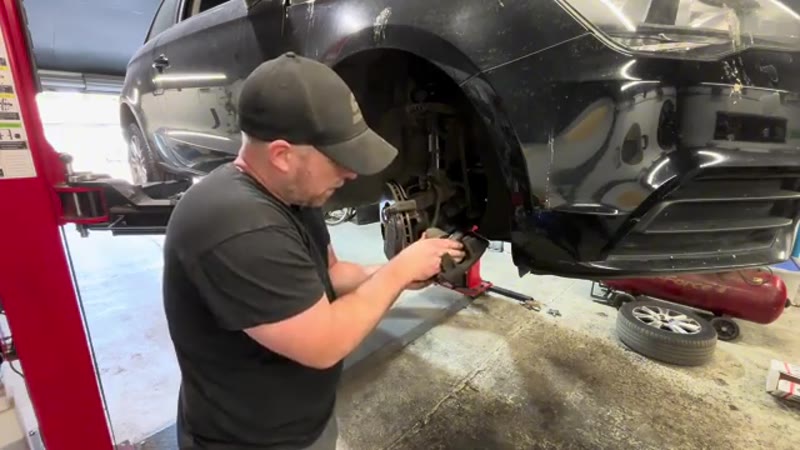
Apply brake grease to contact points
Apply a thin smear of copper grease or brake assembly paste to the metal contact points on the caliper bracket where the pads slide - NOT on the friction material or disc face. This prevents squeal and binding.
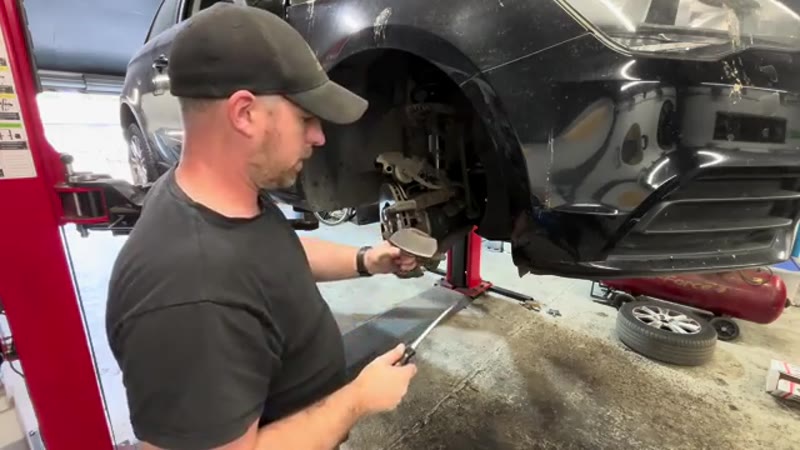
Fit the new brake pads
Clip the inner pad onto the caliper piston face. Clip the outer pad into the caliper bracket. Ensure both pads are seated firmly in their retaining clips and move freely.
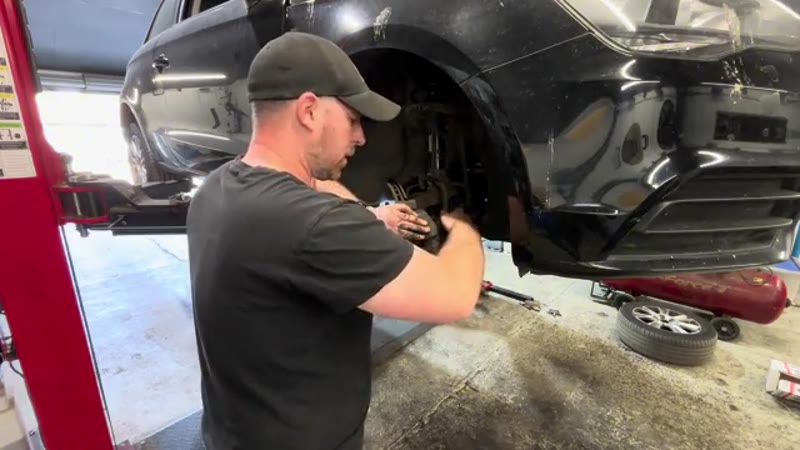
Refit the caliper and torque up
Slide the caliper back over the pads and disc. Thread in the guide pin bolts by hand first, then torque to specification - typically 25–35 Nm for most Audi models. Check your specific model's torque value.
Refit the wheel and bed in the pads
Torque the wheel bolts to 120 Nm (standard Audi alloy wheel spec). Before driving, pump the brake pedal 10–15 times until it feels firm - the piston needs to extend back out against the new pads. Bed in the brakes with several gentle stops from 30 mph before any hard braking.
Want this guide offline - and 15 more like it?
Our PDF guide collection covers servicing, fault codes, buying a used car and more. Written by a qualified mechanic. Download once, use forever - no ads, no internet needed.
Why Audi Front Brake Pads Wear Out (and How Fast)
Brake pads are a consumable, not a fault - every set is slowly sacrificing itself each time you press the pedal. On an Audi you can expect front pads to last roughly 25,000–40,000 miles. Gentle motorway driving sits at the top of that range; short urban trips, hilly routes or a heavier model like a Q5 will chew through them noticeably faster. Fronts always wear quicker than rears because weight transfers forward under braking, so expect to change fronts twice for every rear set.
Most Audis have a wear sensor wire buried in one front pad. When the friction material gets low the disc grinds through the wire and the dash shows a pad warning - that is your cue, not a countdown. Legally you can drive to 1.5mm of friction material, but any garage will tell you to change them at 3mm: below that the pad backing heats up, braking fades on long descents, and an MOT tester will at minimum write an advisory.
Audi Dealer vs DIY Cost
| Who does it | Typical price | What you get |
|---|---|---|
| Audi main dealer | £180–£280 | Genuine pads, dealer labour rate, stamped record |
| Independent garage | £100–£180 | Quality aftermarket pads, parts and labour in |
| DIY | £25–£50 | Branded pad set only - about an hour of your time |
Prices are typical UK figures for front pads only. Add £80–£150 to any option if the discs are below minimum thickness and need replacing at the same time.
Doing it yourself saves £75–£230, and the job needs no special Audi tooling on the front axle. For a full breakdown of what UK garages charge for pads and discs, see our brake pads replacement cost guide.
Genuine Audi Pads vs Aftermarket
Genuine pads from the Audi parts counter cost £70–£120 a set, but here is the thing dealers rarely mention: Audi does not make brake pads. They are supplied by the same manufacturers - TRW, ATE and Textar - who sell the identical friction compound in their own boxes for half the money. A branded aftermarket set from ATE, Bosch, Brembo, Mintex or Textar at £25–£50 gives you dealer-level braking with nothing lost but the Audi logo on the box.
What you should avoid is the £12 unbranded set from an online marketplace. Cheap pads use hard, inconsistent friction material that squeals, eats discs, bites poorly when cold and fades when hot. They also often arrive without the shims, clips or wear-sensor slot your caliper expects. On the one component that stops the car, the £20 saved is not worth it.
Common Mistakes When Changing Audi Front Brake Pads
- Not checking the fluid reservoir first. Pushing the pistons back forces fluid up the lines - if the reservoir was topped up on worn pads, it overflows onto painted metal. Take the cap off and watch the level.
- Levering the piston back against the dust seal. Use a proper wind-back tool or G-clamp on the old pad, square to the piston. A screwdriver on the seal edge tears it, and a torn seal means a seized caliper within the year.
- Greasing the wrong surfaces. A thin smear of copper or ceramic grease belongs on the pad backplate contact points and guide pins - never on the friction face or the disc.
- Skipping the guide pins. The two pins must slide freely. Dry or corroded pins cause the inner pad to wear at twice the rate of the outer - clean them and regrease while the caliper is off.
- Driving off without pumping the pedal. The first press after a pad change goes straight to the floor because the pistons are sitting retracted. Pump until firm before the car moves an inch.
- Braking hard on fresh pads. New pads need 150–200 miles of moderate bedding-in against the disc surface. Hard stops in the first few miles glaze the friction material and the pads stay noisy and weak permanently.
Related Faults to Check While the Wheel Is Off
Five minutes of inspection now saves a second wheel-off session later. Run a fingernail across the disc face: a pronounced lip at the outer edge or deep scoring means the discs are near minimum thickness and should be done as a pair with the next pad set. Grab the caliper and check both guide pins slide; check the piston dust seal for splits; and flex the rubber brake hose, looking for cracking or bulging. Spin the hub and listen - a rumble that speeds up with rotation is a wheel bearing making itself known early.
If you came to this page because of a symptom rather than routine wear - juddering through the pedal usually means warped or worn discs, a grind on one side points to a sticking caliper, and a soft pedal is a fluid or hose problem, not a pad problem. Our symptom finder walks through brake noises step by step, and brakes are one of the top three MOT failure points - see the UK MOT failures guide for what testers actually check.
Quick, Easy & Safe to DIY
Audi front brake pads are one of the more accessible jobs for a home mechanic. With a decent socket set, an Allen key set, and a piston tool, you can save a significant amount over a main dealer service. Always replace both sides at the same time, and never skip the bedding-in process with new pads.