No - this one is the exception on the site. A cambelt on an interference diesel is an experienced-DIYer job: one timing error writes off the engine. If you have never done belt work, use this guide to understand the job and judge a garage's quote instead.
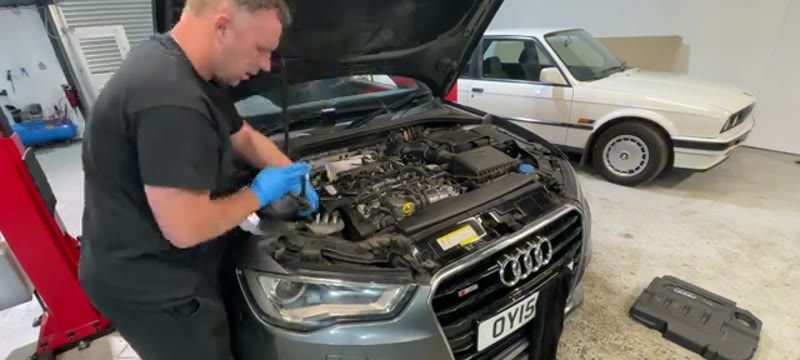
Overview
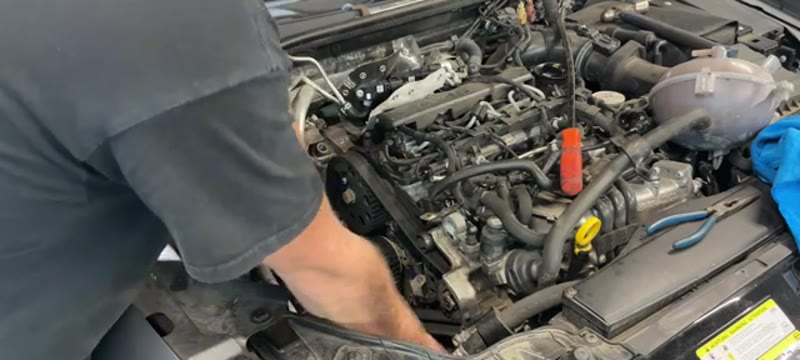
The Audi A3 1.6 TDI CR (CRKB engine) cambelt and water pump replacement is a substantial job requiring the engine mount to be removed and the engine lowered to gain access to the belt and pulleys. The water pump on this engine runs from the cambelt and is known to leak - always replace it at the same time as the belt.
This job requires specialist timing tools to lock the crank, cam and fuel pump in the correct position. Do not attempt without the correct tools.
When You Need This Job
Cambelt replacement interval reached (typically 5 years or 100,000 miles)
Visible coolant leak from water pump area
Rattling or noise from the cambelt area
Preventative replacement on a high-mileage vehicle
⚠ Timing tools are essentialThis job requires three specific timing tools to lock the crankshaft, camshaft and fuel pump. Do not attempt without them - incorrect timing destroys the engine.
⚠ This is an interference engineIf the cambelt snaps on this engine the pistons will hit the valves causing catastrophic damage. Never exceed the replacement interval.
Tools You'll Need
90mm multi-spline socket (crankshaft turning)
Cambelt timing tool set for 1.6 TDI CR
24mm socket (fuel pump bolt)
18mm socket (cam bolt)
13mm socket and spanner
10mm socket
T30 Torx
Engine support bar or jack
15mm spanner (tensioner nut)
6mm Allen key (tensioner adjuster)
Step-by-Step Guide
01
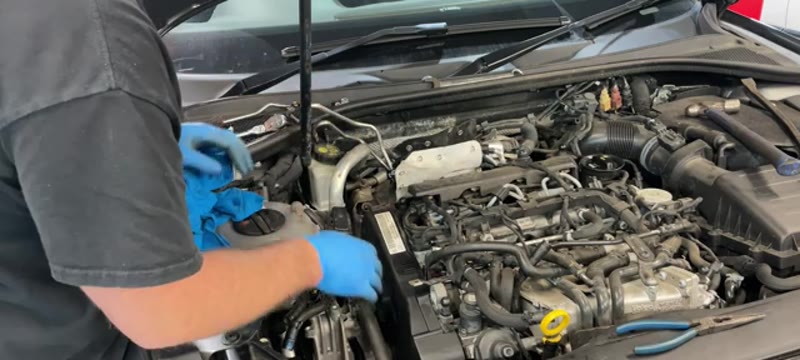
Remove the fuel filter and coolant bottle for access
Undo the 10mm bolts on the fuel filter and move it aside. Release the coolant bottle by twisting it and tuck it to one side. This clears the line of sight to the top cover and timing components.
02
Remove the DPF pressure sensor pipes and top cover
Unclip the T30 Torx holding the metal DPF sensor pipes. Remove the exhaust gas temperature sensor. The top cambelt cover can then be lifted away.
03
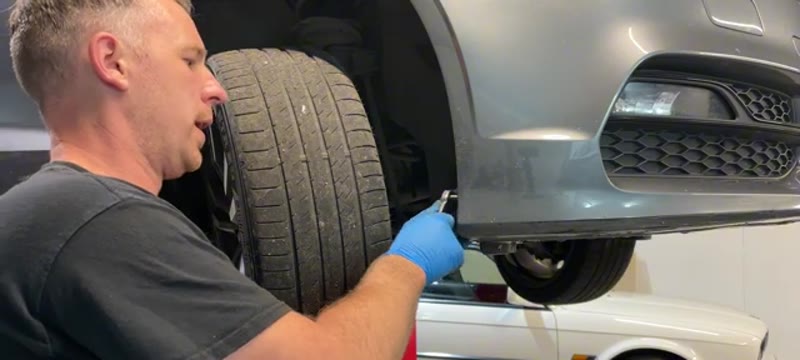
Remove the inner wheel arch liner
Take the vehicle up on a ramp or jack. Remove the inner wheel arch liner held by T20 Torx bolts and push-fit clips. This gives access to the auxiliary belt and lower pulley.
04
Support the engine and remove the engine mount
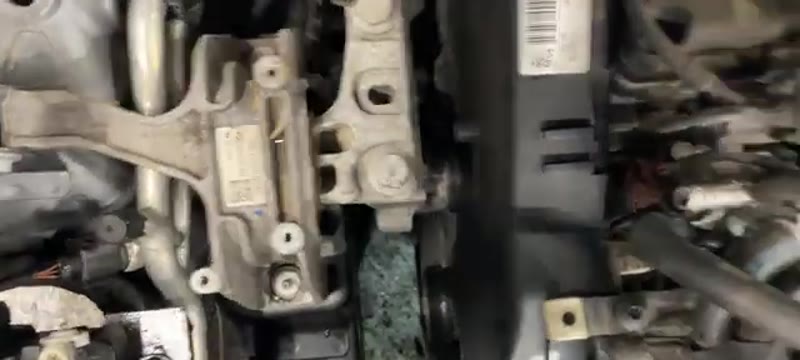
Jack under the engine sump with a protective wooden block. Remove the engine mount - two 13mm bolts at the top and bolts through the lower bracket. The mount comes off as one assembly. Also remove the engine support bracket (three 16mm bolts).
05
Release the auxiliary belt and remove the lower pulley
Use a 16mm spanner on the tensioner to release the auxiliary belt. Remove the four M10 bolts from the lower crank pulley and wiggle it off.
06
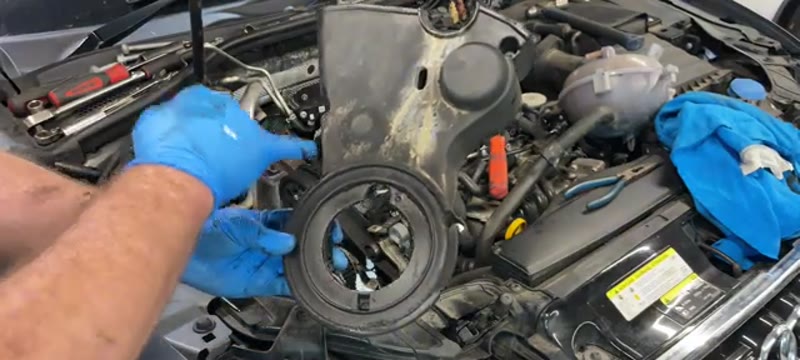
Remove the lower cambelt cover
Four T30 Torx bolts hold the lower cover. Undo them and tilt the cover towards you before pulling it up to avoid breaking the bottom clip.
07
Turn engine to TDC and fit timing tools
Use the 90mm multi-spline socket to turn the engine clockwise until the timing marks align. Fit the crank locking tool through the bottom pulley into the block. Fit the cam locking pin into the head. Fit the fuel pump locking tool.
08
Release the tensioner and remove the old belt
Undo the 15mm tensioner nut and rotate the tensioner by hand to give slack. Remove the old cambelt.
09
Remove and replace the water pump
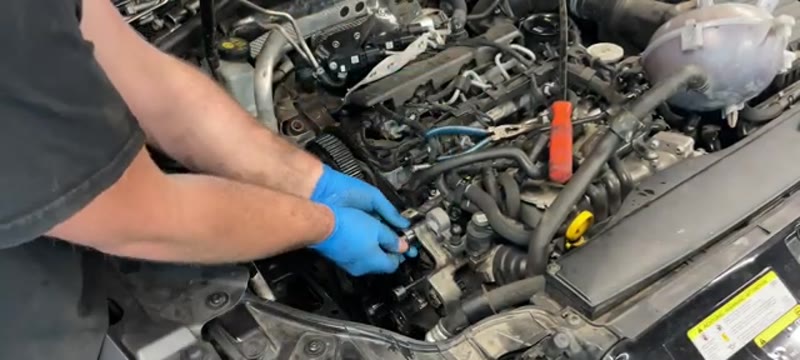
Undo the M10 bolts on the water pump. Note the sensor on top - disconnect its brown connector and twist the sensor out of its groove. Pull the water pump out and let coolant drain. Clean the mating surface thoroughly. Fit the new water pump with its rubber O-ring, reconnect the sensor.
10
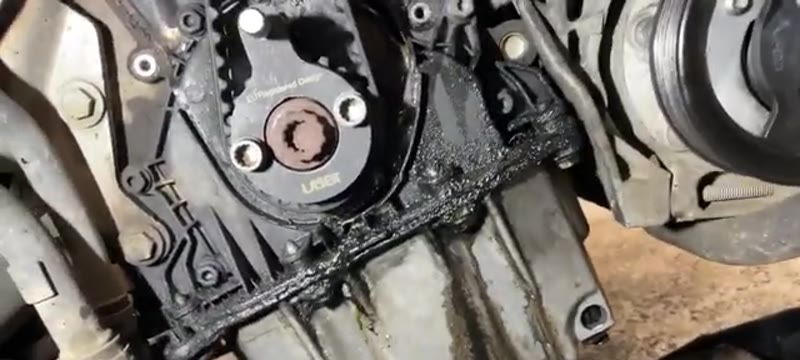
Fit new idlers and tensioner
Remove the old idler pulleys (13mm bolts) and tensioner. Fit the new items from the kit with new bolts.
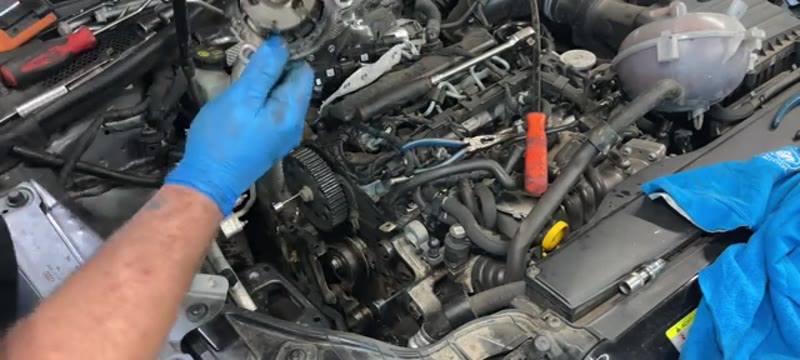
11
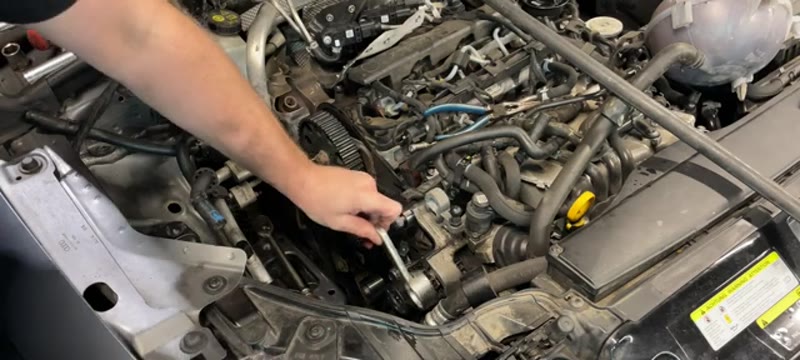
Loosen cam and fuel pump sprocket bolts
Use the three-pronged tool to hold the fuel pump (24mm socket on the bolt) and a holding tool for the cam sprocket (18mm socket). Crack both bolts loose. Also loosen the T30 Torx lower bolt slightly. Turn the cam sprocket fully to the right before fitting the belt.
12
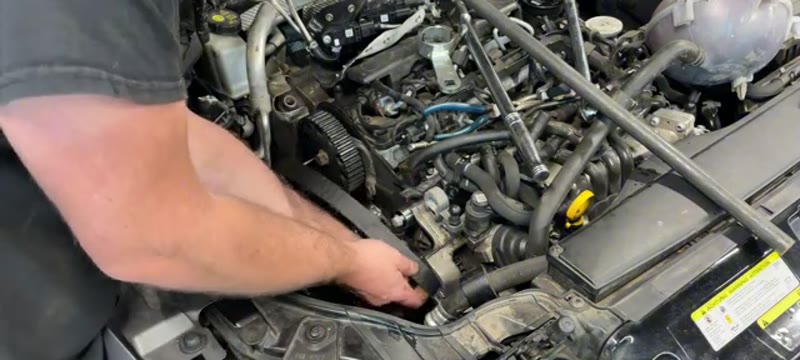
Fit the new cambelt
Route from the crank, around the water pump, fuel pump, under the idler, over the cam, around the tensioner and lower idler. Ensure the belt is seated in all pulley grooves.
13
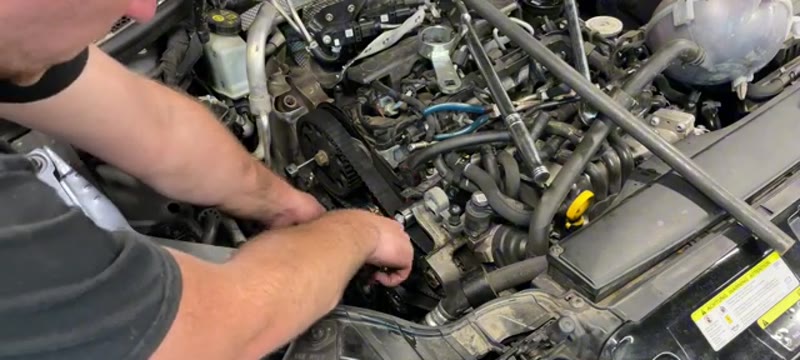
Tension the belt and tighten everything down
Use a 6mm Allen key to move the tensioner clockwise until the needle sits between the V marks. Nip the 13mm tensioner bolt. Tighten idlers, cam bolt (100 Nm) and fuel pump bolt (95 Nm). Tighten the T30 lower bolt.
14
Turn engine over twice and recheck timing
Remove timing tools. Turn the engine over two full revolutions using the crankshaft socket. Refit all three timing tools and verify all marks align. Refit everything in reverse order.
Torque Specifications
Component
Torque
Cam sprocket bolt
100 Nm
Fuel pump sprocket bolt
95 Nm
Tensioner bolt
25 Nm
Lower the engine after removing the water pump
After the water pump is out, lower the engine slightly on the jack - more coolant will drain out of the block. Raise it again before fitting the new pump to stop coolant running in.
Our PDF guide collection covers servicing, fault codes, buying a used car and more. Written by a qualified mechanic. Download once, use forever - no ads, no internet needed.
Why the Cambelt Has to Be Replaced (Even If Nothing Is Wrong)
The cambelt is the one job on the A3 you do on the calendar, not on symptoms. The 1.6 TDI is an interference engine: the pistons and valves share the same space a fraction of a second apart, and the belt is the only thing keeping them apart. If it snaps or strips teeth, the valves stop while the pistons keep coming - bent valves, damaged head, sometimes pistons too, and a repair bill of £2,000–£3,000 on a car that may not be worth it.
The belt itself is rubber and it ages two ways: mileage wears the teeth, but time hardens and cracks the compound even on a car that barely moves. That is why the interval has both numbers on it, and why the years figure matters as much as the miles on a low-use A3. The water pump goes on the same visit for one simple reason: the belt drives it, a pump costs £40 in parts, and a pump that fails six months later means paying the entire four-to-six-hour labour bill a second time.
Audi Dealer vs DIY Cost
Who does it
Typical price
What you get
Audi main dealer
£900+
Genuine parts, factory tooling, digital service record entry
Independent / VAG specialist
£400–£700
Belt, tensioners and pump with quality OE-brand parts
DIY
£120–£180
Full INA, Continental or SKF kit with pump - and a serious day's work
Typical UK prices for the 1.6 TDI. This is an advanced job needing locking tools and real care - the saving is large, but so is the cost of getting the timing wrong.
If you are weighing the quotes rather than the spanners, our cambelt cost guide covers what UK garages charge engine by engine, and the belt versus chain guide explains why this engine has the job at all.
Genuine Audi vs Aftermarket Kits
The belt kits in Audi boxes are made by the same companies you can buy directly: INA and Litens make the tensioners, Continental (ContiTech) and Gates make the belts, SKF and Graf make the pumps. A complete aftermarket kit from those names at £120–£180 is factory quality; the same contents through the parts counter run £250–£350. Buy the kit that includes belt, tensioner, idlers and pump together so every component that moves is renewed in one pass.
Do not economise with an unbranded belt on an interference diesel. A £30 marketplace kit failing at 40,000 miles does not cost £30 - it costs the engine.
Common Mistakes on a Cambelt and Pump Job
Working without the locking tools. The crank and cam must be pinned at TDC with the proper locking set (£20–£40). Trusting paint marks alone on an interference engine is how engines die on the first key turn.
Reusing stretch bolts. Several fasteners on this job are single-use torque-to-yield bolts, including the crank pulley bolt. New bolts are pennies; a loosening crank pulley is catastrophic.
Changing the belt but not the tensioner and idlers. A seized idler bearing shreds a brand-new belt exactly like an old belt. The kit exists for a reason - fit all of it.
Turning the engine backwards. Always rotate by the crank bolt, clockwise only, two full turns after fitting to re-check the timing marks before the covers go on.
Running the new pump dry. Refill and bleed the cooling system properly, and never spin the pump without coolant - the seal scorches in seconds.
Forgetting the aux belt. It is off anyway, it is £15, and its tensioner is a known noise-maker. Doing it now is free labour.
Related Faults and What to Check While You Are In There
With the belt covers off and the engine mount out, inspect what you can rarely see: the crank and cam oil seals (a weep now is a belt contaminated with oil later - and oil kills belts fast), the coolant hoses around the pump, and the engine mount itself, which sags with age and adds a driveline clonk owners often blame on other things. Any oil found on the old belt means finding the source before the new one goes on.
After the job, a rattle or squeal from the belt area is almost always the aux belt side or a mis-tensioned new belt - deal with it immediately, never drive on hoping. If you are unsure whether a noise is belt-related at all, the symptom finder will separate belt, pump and pulley noises before you strip anything.
Quick Stats
Difficulty
Advanced
Vehicle
Audi A3 1.6 TDI
Time
4–6 hrs
Parts Cost
£150–£350
Common Questions
FAQ
This is a job for a confident DIYer rather than a first-timer - the engine mount has to come off and the engine supported and lowered to reach the belt, and you need the correct locking tools for the CRKB engine. If you have done a cambelt before and can hire or buy the locking kit, it is very achievable at home. If you have never timed an engine up, this is not the one to learn on - get it wrong and the valves meet the pistons.
Expect £400–£700 at an independent UK garage for the belt, water pump and tensioners on the A3 1.6 TDI, and comfortably over £900 at an Audi dealer. The parts themselves - a quality belt kit and pump from INA, Continental or SKF - are typically £120–£180, so the saving for doing it yourself is substantial, but only take it on if you are confident with timing procedures.
Allow 3–5 hours on the A3 1.6 TDI. Most of that is access - engine mount off, engine supported and lowered, covers off - rather than the belt itself. Add time for setting and double-checking the timing marks with the locking tools fitted; rushing that stage is how engines get wrecked.
On most modern interference engines, a snapped cambelt causes the pistons to hit the valves, resulting in catastrophic engine damage that can cost thousands to repair - often more than the car is worth. This is why cambelt replacement at the correct interval is one of the most important maintenance jobs you can do.
20+ Years ExperienceMOT TesterProfessional UK Mechanic
All guides on this site are written from real, hands-on experience - not copy-pasted from a manual. If I haven't done the job myself, it doesn't go on the site.