
The pollen filter on the 2013 VW Polo is located under the passenger side glove box and takes just a few minutes to change. The same location and procedure is shared across a wide range of VW Audi Group cars - slightly different angles and filter shapes but the same basic concept throughout.
Same Concept Applies To
- VW Polo (2009 onwards)
- VW Golf (similar under-dash location)
- SEAT Ibiza & Leon (same group)
- Skoda Fabia (same group)
Why Change Your Pollen Filter?
The pollen filter - also called a cabin filter or air conditioning filter - cleans the air entering your car through the heating, ventilation and AC system. Every breath you take inside the vehicle passes through this filter first. A clogged filter means you're breathing in whatever it has trapped: pollen, road dust, exhaust particulates, mould spores and general airborne debris.
Beyond air quality, a blocked filter restricts airflow across the whole heater and ventilation system. The blower motor has to work harder, demisting takes longer, and the air conditioning becomes noticeably less effective. On high-mileage cars where the filter has never been changed, the improvement after fitting a new one is immediately obvious - stronger airflow, faster screen clearing, and no musty smell when you first start the car.
Signs Your Pollen Filter Needs Replacing
- Reduced airflow from the vents even at full fan speed
- Musty or unpleasant smell when the heater or AC is switched on
- Increased allergy symptoms - itchy eyes or nose while driving
- Windscreen takes noticeably longer to demist than it used to
- Fan sounds louder than normal - working harder against the restriction
- Unable to confirm the filter has been changed in the last 12–15,000 miles
How Often Should You Change It?
The standard recommendation is every 12–15,000 miles or every 12 months, whichever comes first. In practice, many service centres skip the pollen filter to keep the invoice down, which means a large proportion of UK cars are running on original, never-replaced filters. If you've just bought a used car with no service history showing a filter change, replace it immediately - the filters are inexpensive and the difference in air quality is significant.
If you drive mainly in heavy urban traffic, live in a high-pollen area, or use air conditioning frequently, err on the side of annual replacement regardless of mileage. City driving brings higher levels of particulates and exhaust fumes that clog filters faster than motorway or rural use.
Standard vs Activated Carbon Filters
When ordering a replacement you'll find two main types. A standard filter uses pleated paper or synthetic fibre to trap particles - this is the basic OEM equivalent. An activated carbon filter does the same job but includes a layer of activated charcoal that also absorbs odours and gases from traffic pollution, including nitrogen dioxide and other exhaust compounds. Activated carbon filters typically cost a few pounds more but deliver noticeably better cabin air quality, particularly on older vehicles or those used in heavy traffic. If your car has air conditioning and you use it regularly, the carbon filter is worth the extra cost.
Step-by-Step Guide
Shop Parts & Tools for This Job
As an Amazon Associate, Mr Auto Fixer earns from qualifying purchases. Prices and availability may vary.
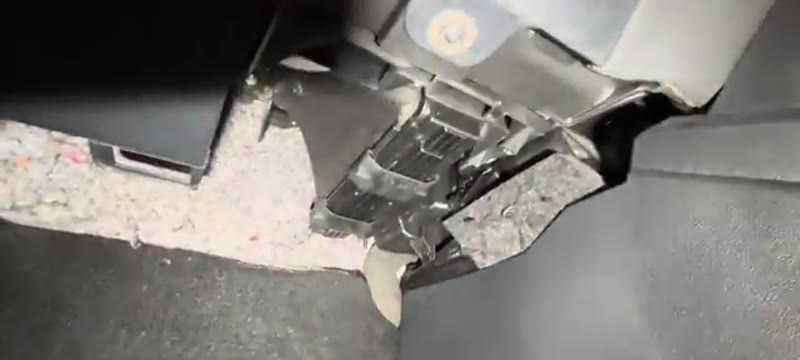
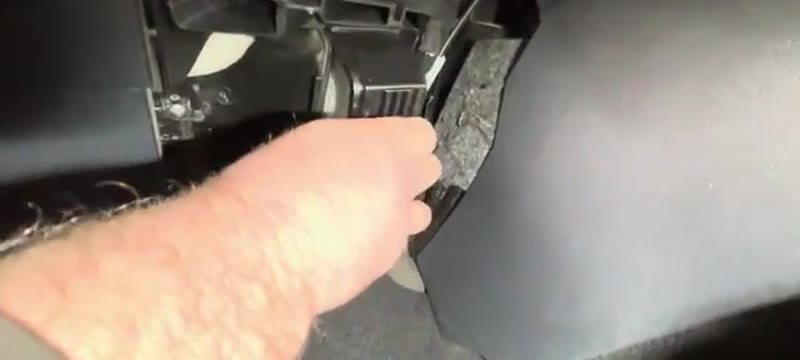
Locate the Filter Cover Under the Glove Box
Open the passenger door and look under the glove box. You will see a small black box with two sliding tabs on it - one either side. This is the pollen filter housing cover.
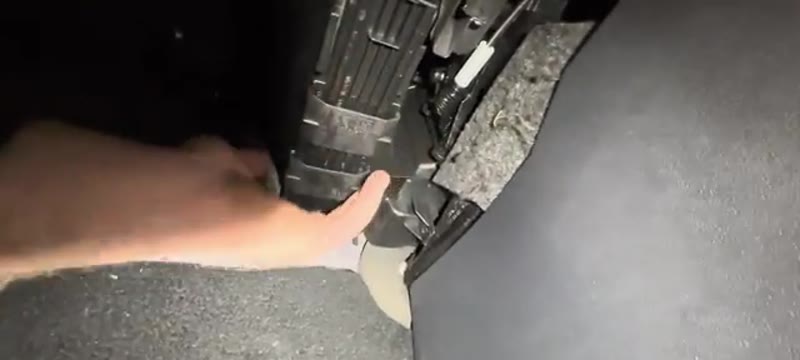
Slide Both Tabs Inwards & Pull the Cover Down
Slide both tabs inwards simultaneously, then give the cover a sharp pull downward. It will drop away from the housing, giving you access to the filter inside. No tools are needed.
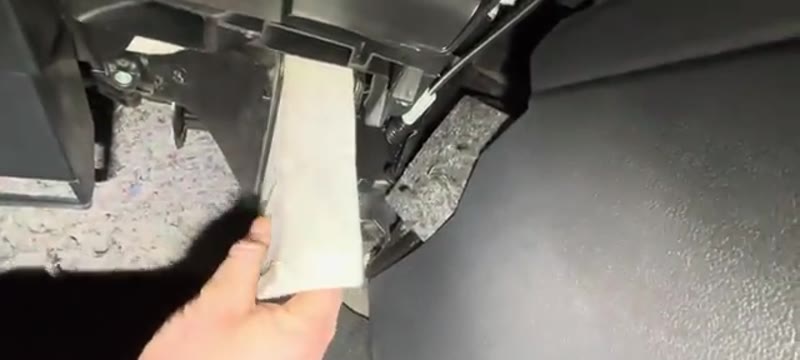
Slide Out the Old Filter
Reach in and slide the old pollen filter out of its slot. Take note of the airflow direction arrow before removing it. Dispose of the old filter.
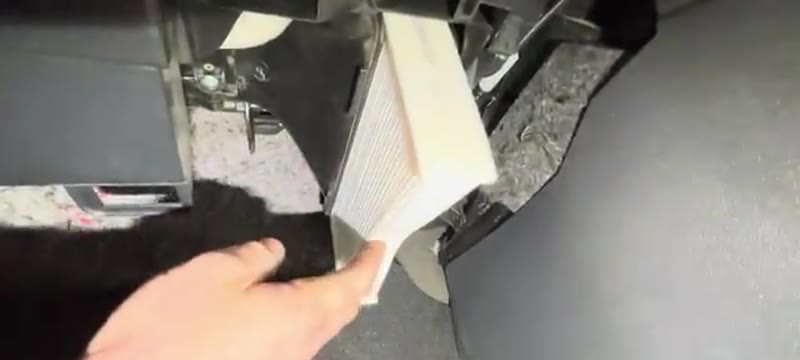
Fit the New Filter
Slide the new filter into the slot in the correct orientation, with the airflow arrow pointing the same direction as the old one. Push it in until it seats fully.
Refit the Cover
Slide the cover back up into the housing. The tabs will automatically spring back out and lock it in position when it is fully seated. Give it a firm press to confirm it is clipped home.
Want this guide offline - and 15 more like it?
Our PDF guide collection covers servicing, fault codes, buying a used car and more. Written by a qualified mechanic. Download once, use forever - no ads, no internet needed.
The Best First Job in Car Maintenance
If you have never done anything to a car in your life, this is where to start: the Polo's filter sits behind a slide-off cover under the glove box, needs no tools, and cannot go meaningfully wrong. That matters because Polos are so often first cars, and first cars get garage bills their owners cannot easily question. Doing this five-minute job yourself is worth £20–£40 a year, but the real value is the precedent - the discovery that the car is not a sealed mystery box. The filter itself needs changing annually: a town-driven Polo (which is most of them) breathes queue air, the dirtiest kind, and twelve months turns the element grey.
VW Dealer vs DIY Cost
| Who does it | Typical price | What you get |
|---|---|---|
| VW main dealer | £40–£75 | Genuine filter and a booked labour slot for a five-minute job |
| Independent garage | £20–£50 | Same job, usually done while the car waits for something else |
| DIY | £7–£14 | Quality branded filter, zero tools, five minutes |
Typical UK prices for the 2013-era Polo. This is the largest percentage saving of any job on the car - nearly all of the garage price is labour that takes less time than the invoice.
Choosing the Polo's Filter
The Polo shares its element with the Seat Ibiza and Skoda Fabia of the same era, so aftermarket coverage is deep and cheap: Mann and Mahle - who supply VW's originals - list it at £7–£14 in their own boxes against £20–£30 in VW packaging. The activated carbon grade costs a few pounds more and also absorbs exhaust smells; on a town car it is the version worth having. That is the entire buying decision - there is no wrong answer except the unbranded £2 filter whose frame folds in your hand.
Related Polo Symptoms the Filter Will Not Fix
A musty smell that survives the new element is mould on the evaporator - a £10 aerosol treatment through the intake deals with it. A blower that works only on some speeds is the resistor pack, a classic small-VW wear item. And stubborn misting with damp carpet means blocked scuttle drains, not a filter problem. The symptom finder sorts each of these quickly.
When you are ready for the Polo's next-level job, the Polo rear wheel bearing guide shows what that humming from the back is - same car, same logic, one step up the ladder.
Job Summary
Common Mistakes to Avoid
The most frequent error when changing a pollen filter is fitting it the wrong way around. Always check the airflow direction arrow printed on the side of the new filter before installing it - the arrow indicates the direction air flows through the unit (towards the cabin). Fitting it backwards reduces filtration efficiency and can cause the filter medium to collapse against the housing over time.
The second common mistake is not fully seating the housing cover on reassembly. If any clip is left unengaged you may notice airflow noise from behind the dashboard, a whistling sound, or reduced air pressure from the vents. Always give the cover a firm press to confirm all clips are properly locked before closing the job.
Frequently Asked Questions
Will changing the pollen filter improve my air conditioning performance?
Yes - often significantly. A restricted pollen filter reduces the volume of air the AC system can process, which directly affects how quickly it cools or heats the cabin. Fitting a new filter is the first thing to check before assuming the AC needs regassing or servicing. On vehicles where the filter has been blocked for a long time, the improvement in airflow after replacement can be dramatic.
Can I just clean and reuse the old filter?
Not effectively. Some drivers tap or blow out a pollen filter to temporarily improve airflow, but the filter medium becomes permanently contaminated with fine particles, biological matter, and pollution residue that cannot be removed by cleaning. Replacement filters are inexpensive enough that reusing the old one is not worth the compromise in air quality. Always fit a new filter.
My car doesn't have air conditioning - does it still need a pollen filter?
Yes. The pollen filter is part of the fresh air ventilation system, not the air conditioning itself. All vehicles with a heater blower draw outside air through a pollen filter before it enters the cabin. Even without AC, a blocked filter will cause weak airflow from the vents and can allow mould to develop in the ducting. It should be replaced on the same schedule regardless of whether the car has AC.
What happens if I leave a blocked pollen filter in too long?
Beyond the air quality issues, a severely blocked filter can cause the blower motor to run under increased load for extended periods, which shortens its life. In humid conditions, a saturated filter can also allow mould and bacteria to build up in the heater box and ducting behind it. This leads to persistent musty smells that can be very difficult to eliminate without cleaning or replacing the entire heater box - a job that is far more expensive and complex than a simple filter change.