
The pollen filter location on the new shape Vauxhall Vivaro is one of the most commonly asked questions about this van. It is on the driver’s side, accessed through the footwell - not from the engine bay or the passenger side. The key challenge is that you cannot reach it directly through the main footwell panels; you need to remove a small air duct section to create a passage for your hand and arm to reach the filter housing.
The Vivaro uses a two-part filter system (two halves) with pull tabs on the new filters to help get them back out next time. Once you have done it once it becomes straightforward, but the first time it can feel tricky.
Why Change Your Pollen Filter?
The pollen filter - also called a cabin filter or air conditioning filter - cleans the air entering your vehicle through the heating, ventilation and AC system. Every breath you take inside the cab passes through this filter first. A clogged filter means you’re breathing in whatever it has accumulated: pollen, road dust, exhaust particulates, mould spores and general airborne debris from the road environment.
Beyond air quality, a blocked filter restricts airflow across the whole ventilation system. The blower motor works harder, screen demisting takes longer, and air conditioning performance suffers. On a van like the Vivaro that may be used by multiple drivers over high mileage, the pollen filter is often one of the most overlooked maintenance items - yet one of the cheapest and most impactful to replace.
Signs Your Pollen Filter Needs Replacing
- Reduced airflow from the vents even at full fan speed
- Musty or unpleasant smell when the heater or AC is switched on
- Increased allergy symptoms or irritated eyes/nose while driving
- Windscreen takes noticeably longer to demist
- Fan sounds louder - working harder against the restriction
- Unable to confirm when the filter was last changed
How Often Should You Change It?
Most manufacturers recommend every 12–15,000 miles or every 12 months, whichever comes first. On a van used daily for deliveries or trade work, annual replacement is sensible regardless of mileage. Fleet operators often skip this item to reduce service costs, which means vans with high mileage may be running on a filter that has never been changed. If you cannot confirm from service records that the filter has been replaced, fit a new one.
Drivers who spend a lot of time in heavy urban traffic, construction sites, or dusty environments should consider replacing the filter more frequently - every 6–10,000 miles in these conditions is reasonable.
Standard vs Activated Carbon Filters
Standard pollen filters use a pleated paper or synthetic fibre to trap airborne particles and are the basic OEM equivalent replacement. Activated carbon filters add a layer of activated charcoal that also absorbs odours and exhaust gases such as nitrogen dioxide - relevant for van drivers spending long hours in heavy traffic. The cost difference is small. For a daily-use commercial vehicle, the activated carbon option is worth the modest premium.
Step-by-Step Guide
Shop Parts & Tools for This Job
As an Amazon Associate, Mr Auto Fixer earns from qualifying purchases. Prices and availability may vary.
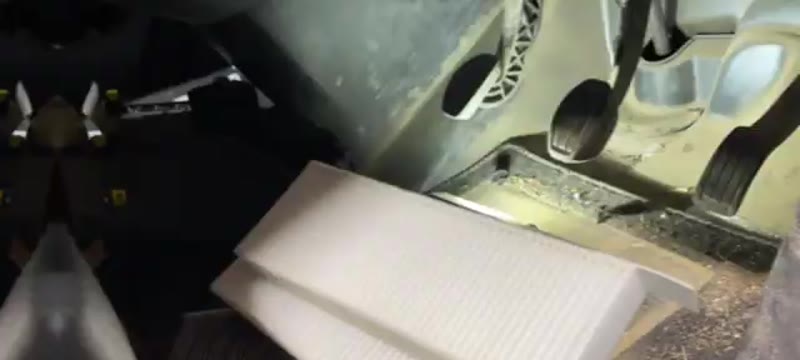
Remove the Lower Driver’s Side Footwell Panel
Get into the driver’s footwell. There is a plastic panel at the bottom of the dash. Pull it from the bottom - it has a couple of clips and comes away cleanly. Set it aside. Looking through the gap you can now see the black pollen filter cover in the space above the clutch pedal area.

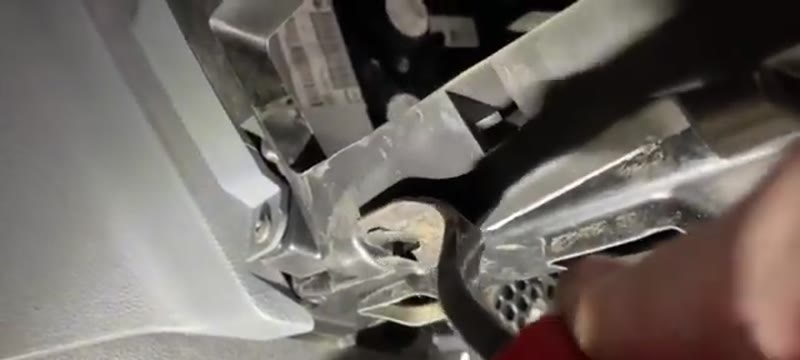
Remove the Small Air Duct Section
The space above the clutch pedal is not big enough to get your hand and arm through to the filter. You need to remove the small air duct that runs through this area. It is held by one clip at the bottom and one at the top. Pop the bottom clip, then the top pull-down clip, and the small duct section wiggles free. Now you have enough clearance to get your arm up and over the clutch pedal to access the filter door.
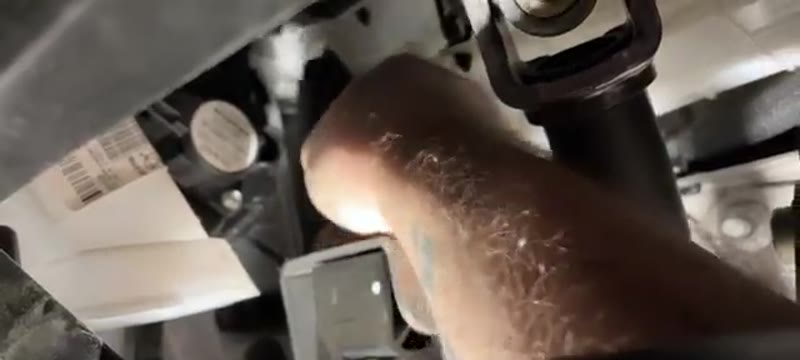
Open the Filter Door & Remove Both Filter Halves
Reach up and over the clutch pedal with your arm. Pull the tab on the filter door and it will come completely off its hinges - set it to one side. You can now see and reach both pollen filter halves. They sit side by side as two separate halves of the same filter. Pull the tab on the first half, slide it down and out. Do the same for the second half. Both come out through the gap you have created.
Fit the New Filters
New Vivaro filters come with small plastic pull tabs attached - leave these in place as they make future filter changes much easier. Bend the first filter slightly and feed it up into the housing. Once the leading edge locates in the slot, push it in and slide it downwards to seat fully. Repeat for the second filter half in the adjacent slot.
Refit the Filter Door & Duct
Refit the filter door: slide the back edge in first towards the front of the van, then clip the front edge over its retaining tab. Refit the air duct section - slide it up into the top clip first, then press the bottom clip in. Refit the lower footwell panel by locating the rubber seal correctly and pressing all the clips home. Done.

Want this guide offline - and 15 more like it?
Our PDF guide collection covers servicing, fault codes, buying a used car and more. Written by a qualified mechanic. Download once, use forever - no ads, no internet needed.
Why the Vivaro's Filter Is Worth the Awkward Access
The new-shape Vivaro hides its two-part filter down by the driver's footwell - a spot so unintuitive that this job's garage fee is genuinely a finder's fee - and that access is exactly why so many working Vivaros never get it changed. Yet no vehicle needs it more: the driver is in that cab eight-plus hours a day, in depot dust and town traffic, breathing what the filter passes. A working van's filter is loaded in eight to twelve months; if the van does site work, sooner. This is a wellbeing item as much as a service item - treat it like your work boots, not like an optional extra.
Vauxhall Dealer vs DIY Cost
| Who does it | Typical price | What you get |
|---|---|---|
| Vauxhall dealer | £60–£110 | Genuine filter pair and booked van downtime |
| Independent garage | £20–£50 | The same job - the fee is for knowing where the filter lives |
| DIY | £10–£20 | Quality two-part filter set and half an hour, van still earning |
Typical UK prices for the 2019-on Vivaro. This guide gives away the only hard part - the location - for free.
The Shared-Platform Parts Advantage
The new Vivaro is a Stellantis van under the skin - the same vehicle as the Peugeot Expert, Citroën Dispatch and Toyota Proace - so the filter set is stocked under all those applications, and cross-shopping them finds the best price for identical parts. Mann, Bosch and Purflux (the French OE supplier for this platform) all list the two-part set at £10–£20. Take the carbon version for a van that queues in town: it strips the diesel fumes of the traffic around you, which is most of what a Vivaro breathes.
Related Vivaro Jobs While You Are at It
If the vents still smell after the new set, an evaporator aerosol treatment finishes what the filter started. A blower that has lost speeds is the resistor, not the filter. And since the van is getting attention: the Vivaro service light reset guide clears the reminder this job probably triggered, and the Vivaro shock absorber guide covers the suspension job these vans need by 80,000 hard miles. Anything else, start at the symptom finder.
Job Summary
Common Mistakes to Avoid
The most frequent error is fitting the new filter the wrong way around. Always check the airflow direction arrow on the new filter before installing it - the arrow should point in the direction air flows through the system (towards the cabin). Fitting it backwards reduces filtration efficiency and can cause the filter material to collapse over time.
On the Vivaro, the filter access involves removing an air duct from the footwell area, which is the step most people struggle with. Do not force the duct - it is designed to release cleanly with the right technique. Taking a photo of the layout before removing anything makes reassembly straightforward.
Frequently Asked Questions
Will this filter change improve my air conditioning?
Yes. A restricted pollen filter reduces the volume of air the AC system can process, directly affecting how quickly it cools the cab. On a van used year-round with air conditioning, fitting a new pollen filter is the first thing to check before assuming the AC needs regassing or servicing. The improvement in airflow after fitting a new filter is often immediately noticeable.
Can I just blow the old filter out and reuse it?
Not effectively. The filter medium becomes saturated with fine particles and biological matter that cannot be removed by cleaning. Given the low cost of a replacement, always fit a new filter rather than attempting to clean the old one.
The Vivaro doesn't have air conditioning - does it still have a pollen filter?
Yes. The pollen filter is part of the fresh air ventilation system, not the AC. All Vivaro vans draw outside air through a pollen filter before it reaches the cab. Even without AC, a blocked filter causes weak airflow and can allow mould to develop in the heater ducting, leading to persistent musty smells that are difficult to eliminate.
What happens if I leave a blocked filter in too long?
A severely blocked filter forces the blower motor to run under increased load, shortening its life. In damp conditions, a saturated filter can also allow mould and bacteria to build up in the heater box. This creates persistent musty smells that require cleaning or replacing the entire heater box - far more expensive than a simple filter change.