Overview
A sinking brake pedal on a Mini Cooper is a serious safety concern and should not be ignored. When the pedal drops slowly to the floor under sustained pressure - rather than staying firm - the brake master cylinder's internal seals have failed, allowing fluid to bypass the pistons and preventing the system from holding pressure. The fix is a straight swap of the master cylinder followed by a full system bleed.
This is one of the more demanding DIY brake jobs due to the access required and the necessity of a complete bleed afterwards, but it is absolutely achievable with the right tools and some patience. A pressure bleeder makes the bleed procedure a one-person job and is well worth investing in if you do not already own one. Budget two to three hours and have plenty of brake fluid and rags to hand - spilt brake fluid strips paint.
Symptoms of a Failed Brake Master Cylinder
- Brake pedal sinks slowly to the floor under sustained pressure
- Pedal feels low or soft at rest
- Braking performance feels reduced or inconsistent
- Brake fluid level drops in the reservoir with no visible external leak
- Pedal firms up temporarily with pumping but sinks again under held pressure
Parts & Tools
Shop Parts & Tools for This Job
As an Amazon Associate, Mr Auto Fixer earns from qualifying purchases. Prices and availability may vary.
Step-by-Step Guide
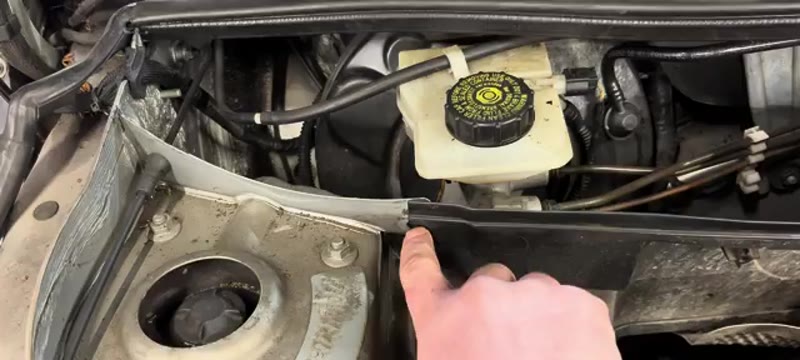
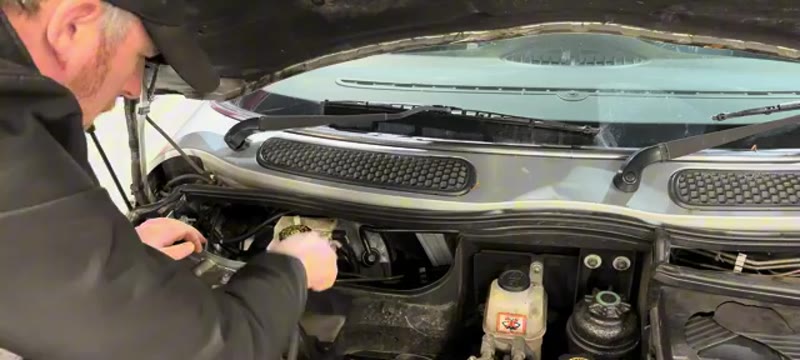
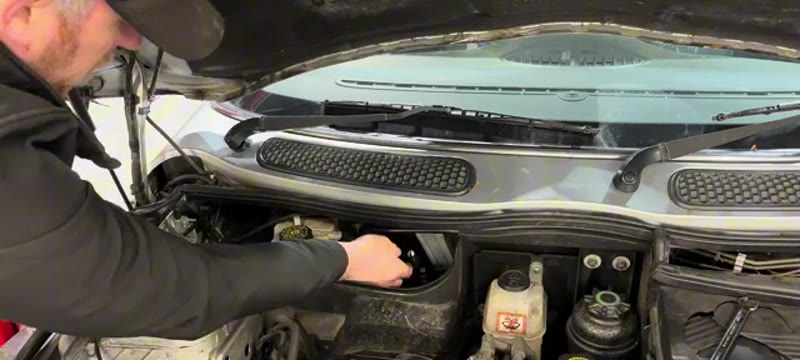
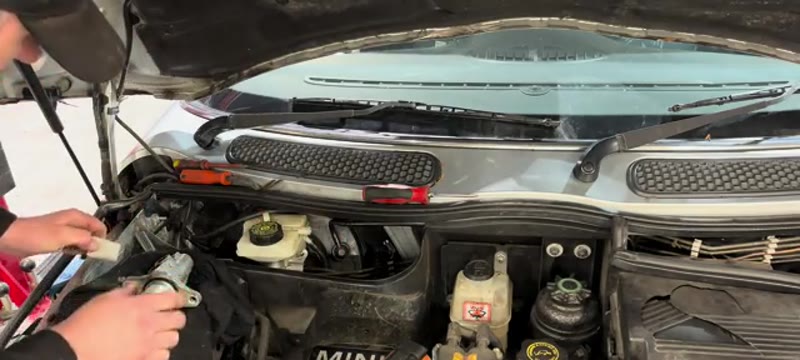
Gain access - remove the rubber trim
Open the bonnet. The master cylinder is located at the back of the engine bay, directly in front of the brake servo. Pull back the rubber trim that runs along the back of the bay - this frees up significantly more room to work. Remove any retaining clips and bend the trim back out of the way so it does not fall back in while you are working.
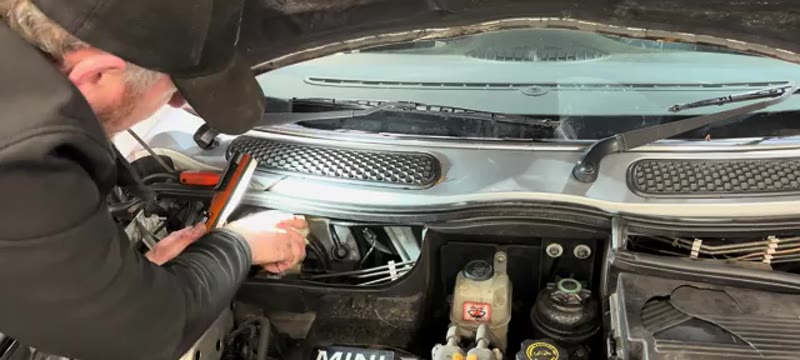
Crack the two brake pipe unions loose
The master cylinder has two brake pipes feeding into it. Using an 11mm spanner - ideally a flare-nut or crow-foot brake pipe spanner to avoid rounding the unions - crack each one loose by about a quarter turn. Do not fully undo them yet; you just want the seal broken so they will come out easily during removal. Slide an absorbent cloth underneath to catch any fluid drips.
Disconnect the electrical plug and feed pipe
Locate the electrical connector on the side of the master cylinder reservoir. Squeeze the retaining tab and pull the plug free - set it clear of the work area so it does not get soaked in fluid. Also identify the rubber feed pipe from the reservoir and have it ready to disconnect once the unit begins to come free.
Remove the two 13mm mounting bolts
The master cylinder bolts to the face of the brake servo via two 13mm bolts. The top bolt is fairly accessible; the bottom one sits lower and may need an extension on your ratchet. Remove both bolts completely and set them aside safely - these are reused on the new unit.

Fully undo the brake pipe unions and remove the master cylinder
With the mounting bolts out, fully unscrew both brake pipe unions and pull the pipes free from the ports. A little fluid will run out - have the cloth ready. Pull the master cylinder forward off the servo studs, disconnecting the rubber feed pipe as soon as you have enough slack to reach it. Keep the old unit upright to minimise fluid spillage as you move it away from the car.
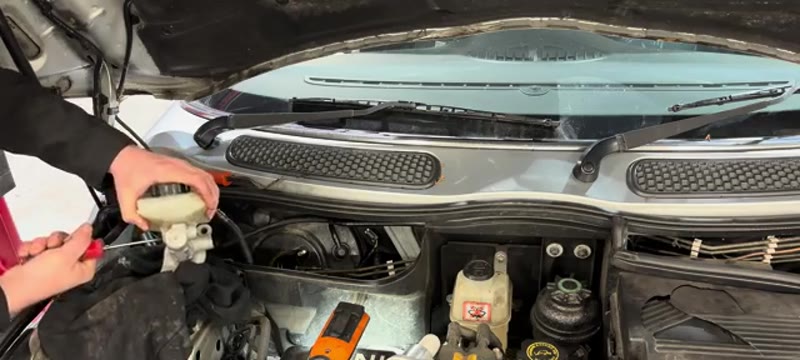
Transfer the fluid reservoir to the new master cylinder
There is a single screw through the centre of the master cylinder body that retains the reservoir. Remove this screw, pull the reservoir off the old unit and fit it to the new one. The reservoir locates on rubber grommets - press it down firmly until it seats flush. Refit the retaining screw.
Fit the new master cylinder and refit the brake pipes
Offer the new master cylinder onto the servo studs. Start both 13mm mounting bolts by hand and tighten them fully. Reconnect the rubber feed pipe. Start both brake pipe unions into their threaded ports by hand before using the spanner - this is critical, as it is very easy to cross-thread these unions on an angle. Tighten the unions firmly with the 11mm spanner. Reconnect the electrical plug.
Fill and pressurise the system with the pressure bleeder
Fill the reservoir with fresh DOT 4 brake fluid before attaching the pressure bleeder cap. Connect the pressure bleeder to the reservoir and pump it up to the recommended pressure (typically around 15 psi). Check around the new brake pipe unions and master cylinder face for any leaks before going under the car. Top up the bleeder reservoir before it runs dry during the bleed process.

Bleed all four corners of the braking system
Raise the car on a lift or axle stands. Working at each corner in turn - typically starting furthest from the master cylinder - attach a bleed tube to the bleed nipple (10mm), open the nipple a small amount and allow fluid to flow into your bleed bottle. Watch for air bubbles in the outgoing fluid. Once the flow runs clear and bubble-free, close the nipple before moving to the next corner. Check the pressure bleeder's fluid level regularly and do not let it run empty.

Test the pedal and check for leaks
Lower the car and release the pressure bleeder. Press the brake pedal firmly - it should feel solid and should not sink under steady pressure. If it still sinks, rebleed the system as there is likely still air present. Check all unions, pipe connections and bleed nipples for any signs of seepage. Top up the reservoir to the maximum mark with fresh DOT 4 fluid and refit the cap securely.
Download our complete repair guide collection
PDF guides covering servicing, fault codes, buying used cars and more. Written by a qualified mechanic - no ads, no internet needed.
Why a Mini Brake Master Cylinder Fails
Unlike pads and discs, a master cylinder is not a wear item you plan for - it is a component that fails, usually somewhere between 80,000 and 130,000 miles, and old brake fluid is nearly always the accomplice. Brake fluid absorbs moisture from the air over time, that moisture corrodes the machined bore of the cylinder, and the corrosion then chews up the rubber piston seals every time you press the pedal. A Mini that has had its fluid changed every two years can go its whole life on the original cylinder; one running ten-year-old fluid is on borrowed time.
The classic symptom is the pedal that sinks slowly to the floor while you hold the car at the lights - no leak, no fluid loss, just pressure bleeding internally past the worn seals. Once that starts it only ever gets worse, and it is a genuine safety failure, not something to monitor.
Mini Dealer vs DIY Cost
| Who does it | Typical price | What you get |
|---|---|---|
| Mini/BMW main dealer | £400–£600 | Genuine cylinder, dealer labour, full system bleed on the machine |
| Independent garage | £250–£400 | Quality OEM cylinder, parts and labour in |
| DIY | £80–£150 | The cylinder itself, fresh DOT 4 fluid and a patient afternoon |
Typical UK prices. This is an advanced job - the saving is real, but only if you can bleed the system properly afterwards. Budget for a helper or a one-man pressure bleeder kit (£25–£40).
If the pedal is already poor, do not drive it to shop around for quotes - a failing master cylinder does not give notice before it lets go completely.
Genuine Mini vs Aftermarket Cylinders
The cylinder in a Mini was made by TRW or ATE regardless of whose box it comes in, so a TRW or ATE aftermarket unit at £80–£150 is the identical part without the roughly £100 premium of the Mini-branded box. This is one component where you should insist on those OE brands: unbranded hydraulic parts from marketplace sellers are a genuine safety gamble, and the £40 saved is meaningless on the component that generates every ounce of your braking pressure.
Buy the cylinder for your exact VIN or registration - Minis of this era used different bore sizes depending on model and options, and a wrong-bore cylinder gives a pedal that is either wooden or alarmingly long.
Common Mistakes When Replacing a Master Cylinder
- Skipping the bench bleed. Fill and stroke the new cylinder on the bench (or in situ before connecting the pipes) until it pushes solid fluid. Fitting it dry traps air you may never get out through the calipers.
- Using an open-ended spanner on the pipe unions. The brass unions round off instantly. A brake flare spanner costs a few pounds and grips five faces instead of two.
- Letting the reservoir run dry mid-bleed. Air pulled into the ABS unit will not come out with a normal bleed - it can need a dealer-level pressure bleed with the pump cycled. Keep the reservoir topped the entire time.
- Mixing up the pipe positions. Photograph the unions before you crack them. The circuits are split diagonally and swapping two pipes scrambles the brake balance.
- Dripping fluid on the paint or wiring. Brake fluid strips lacquer in minutes. Rag around the work area, cap open pipes, and rinse any spill immediately with water.
- Calling it done after one test press. Bleed all four corners in the correct order, then check the pedal with the engine running - a pedal that is firm dead but sinks with the servo assisting still has air or a fault.
Related Faults with the Same Symptoms
Before condemning the master cylinder, be sure the symptom is really internal leak-down. A pedal that is long but pumps up firm points at air in the system or rear brakes needing adjustment. A pedal that hisses and needs a shove is servo vacuum, not hydraulics. Fluid dropping in the reservoir with no visible leak often turns out to be a weeping caliper seal or a corroded rigid line under the car - both MOT failures in their own right. The sinking-pedal-at-the-lights test in this guide is the one that specifically convicts the cylinder.
While the system is open, check the flexible hoses at all four corners for cracking and bulging, and finish with fresh fluid throughout - it is the cheapest brake component you will ever buy and the reason the new cylinder will outlast the car. If the symptoms do not quite match, run them through the symptom finder before spending money.
Safety-Critical Job - Take Your Time
A failing brake master cylinder makes a Mini Cooper unsafe to drive. The replacement job is involved but very achievable if you have basic mechanical confidence, the right tools, and are meticulous about cleanliness and bleeding. Do not skip corners on the bleed - test the pedal thoroughly before the car moves. Done correctly, you will have a firm, safe pedal and save a substantial garage bill.