Overview
This is a very common fault on the 2015 Suzuki Vitara - the boot simply refuses to open. Nothing happens when you press the key fob button or the exterior release switch. The root cause is almost always a broken wire inside the boot switch loom, caused by repeated flexing of the wiring harness as the tailgate is opened and closed over the years. The wire corrodes and eventually snaps. Before you do anything else, you need to get the boot open using the emergency release - then you can assess and fix the problem properly.
This guide covers the emergency opening procedure and the full replacement of the boot latch switch and loom assembly. The part is only available new from a Suzuki dealer, but it comes complete with everything you need. The job requires no special tools and can be done in under two hours once the part is to hand.
Symptoms of a Failed Boot Latch Switch
- Boot will not open from key fob or exterior button
- No click or mechanical response when button is pressed
- Boot may open via interior release or emergency lever but nothing else works
- Keyless entry / keyless boot function has stopped working
- Intermittent operation - works sometimes, fails after bumps or cold weather
Parts & Tools
Shop Parts & Tools for This Job
As an Amazon Associate, Mr Auto Fixer earns from qualifying purchases. Prices and availability may vary.
Step-by-Step Guide
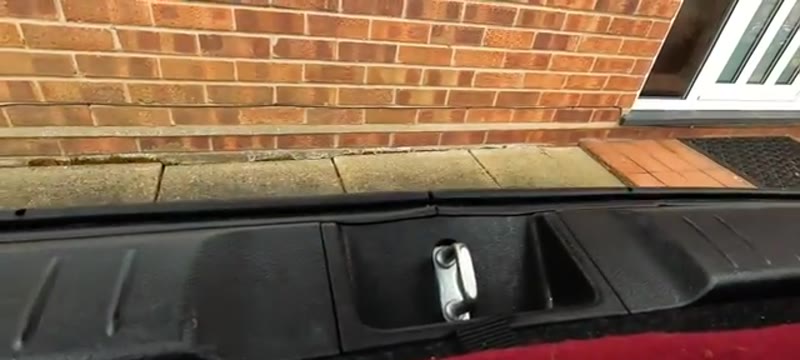
Emergency-open the boot via the rear seats
Before anything else, you need to get the boot open. Fold the rear seats down and crawl into the boot area. Reach towards the boot latch mechanism in the centre of the tailgate - you will find a small plastic emergency release lever on the body of the mechanism. Push the lever firmly upwards and the latch will release, allowing the boot to open from outside. This is a standard feature on all Vitaras and works regardless of electrical failure.
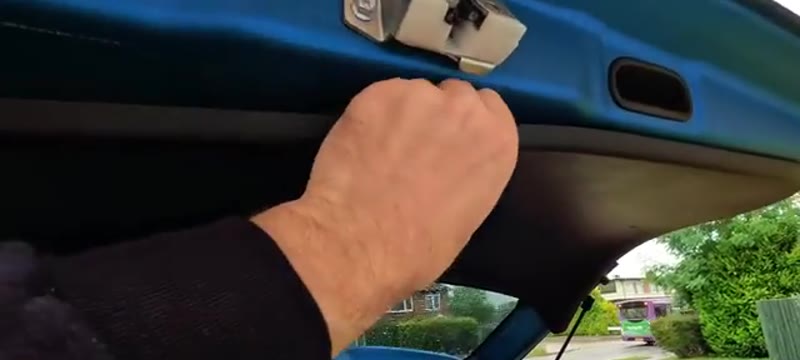
Remove the boot trim panel
With the boot now open, the interior trim panel is the first thing to come off. It is held on by a series of push-clip fasteners around its perimeter - there are no screws. Work your fingers behind one corner of the panel and pull with a sharp, controlled tug to pop the first clip. Run your hand along the edge, releasing each clip in sequence. Take it gently to avoid snapping any clips. Once all clips are free, lift the entire panel away and store it somewhere it will not be scratched or sat on.
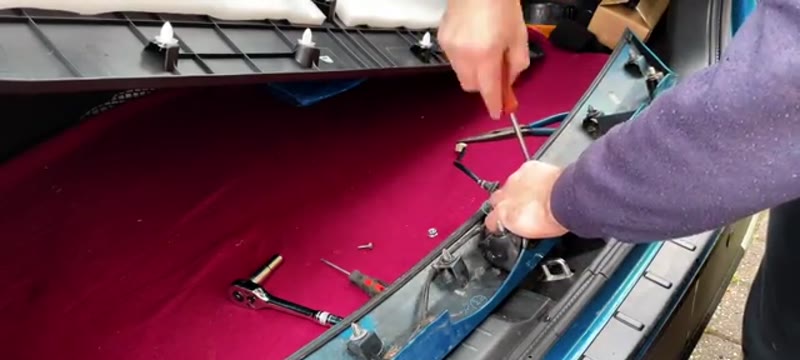
Inspect the wiring loom for the break
With the trim removed you now have full visibility of the boot mechanism, its wiring and the loom that runs to the exterior switch. Trace the wiring carefully - the fault is almost universally in the loom leading from the switch, specifically the small blue or blue-tracer wire. You will see it has corroded and broken, often very close to a connector or clip point where it flexes most with the tailgate movement. Flex the wire gently - you will feel or see the break confirm itself. There is no point repairing this wire in isolation; the whole loom needs replacing.

Undo the four 10mm bolts
The boot mechanism inner panel is secured by four 10mm bolts - three are readily accessible and one is positioned slightly higher up. Undo them all with your 3/8 ratchet and 10mm socket. Keep the bolts together in a safe place. Once all four are out, the panel and mechanism assembly will be loose and ready to remove.
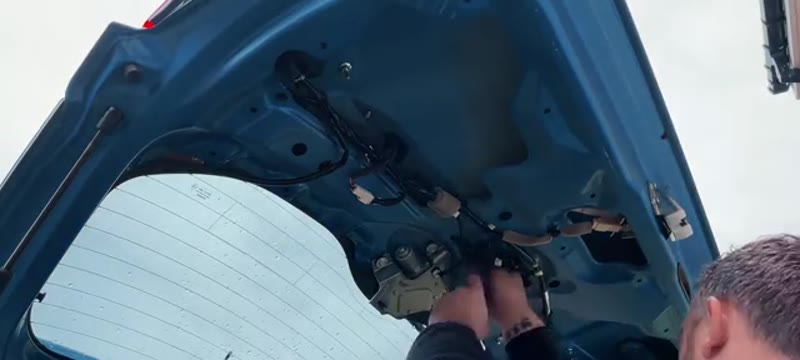
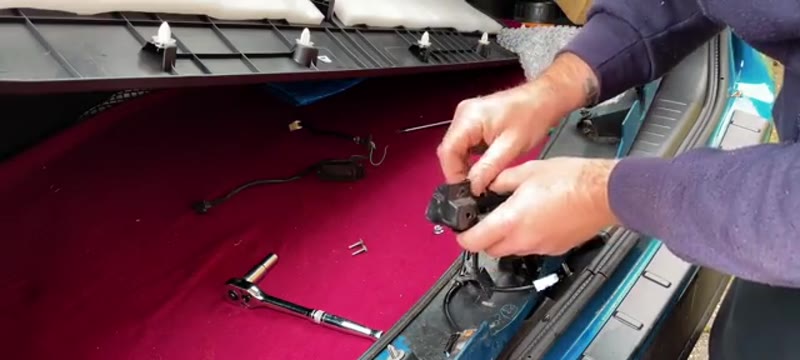
Release the wiring clips and remove the mechanism
The wiring loom is retained by several plastic clips along the panel - squeeze each one with long-nose pliers to release it without breaking the tab. There is a rubber grommet where the loom passes through the bootlid structure; pull this free from its hole. With all clips released and the grommet free, work the top section of the mechanism panel carefully away from the tailgate. Disconnect the wiring harness plug once you have enough slack to reach it comfortably.
Strip down and order the replacement part
Remove the two Phillips screws from the handle and the two Phillips screws from the keyless entry button housing. These screws are frequently corroded on this model - press down firmly with the screwdriver while turning and use a well-fitting bit to avoid rounding the heads. Note the part number from the old assembly before ordering; contact your local Suzuki dealer or an authorised parts supplier. The replacement part comes as a complete kit including the switch, wiring loom, grommet and keyless entry button.
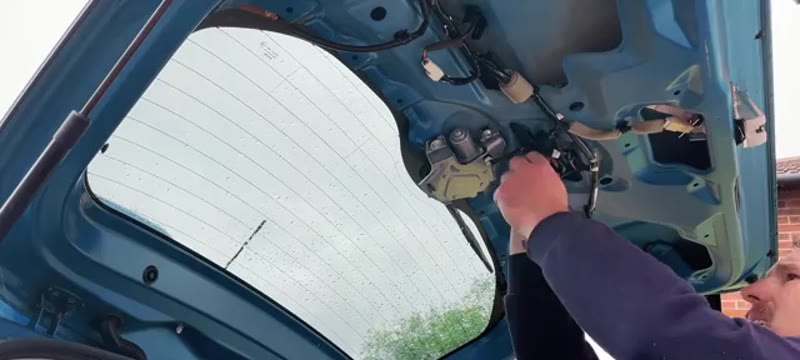
Fit the new switch and loom assembly
Before fitting, compare the new unit to the old one to confirm the orientation and routing of the loom. Attach the handle and keyless entry button to the new mechanism using the Phillips screws. Route the new loom through the grommet hole - ensure the grommet seats firmly in the bodywork to maintain the weatherproof seal and prevent rattles. Reconnect the wiring harness plug until it clicks home.
Refit the mechanism panel and wiring clips
Offer the mechanism panel back into position on the tailgate. Start all four 10mm bolts by hand first, then tighten them up evenly with the ratchet. Refit each wiring clip along the panel edge, pressing until each one clicks locked. This keeps the loom away from moving parts and prevents chafing.
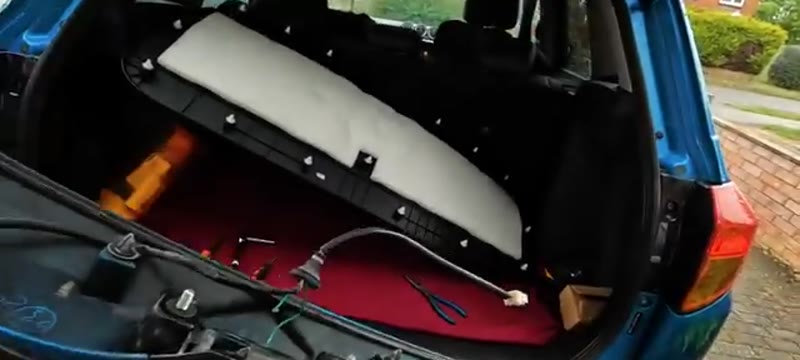
Refit the trim panel and test
Align the trim panel with its clip locations and press it firmly back into place, working around the perimeter until every clip is seated and there are no gaps. Close the boot fully. Test with the key fob - you should hear and feel the latch release cleanly. Test the exterior button as well. If the boot opens correctly on all inputs, the repair is complete.

Download our complete repair guide collection
PDF guides covering servicing, fault codes, buying used cars and more. Written by a qualified mechanic - no ads, no internet needed.
Why the Vitara's Boot Latch Sticks - and How Common It Is
The tailgate latch lives in the wettest, dirtiest spot on the whole car: low at the back, in the spray path of everything the rear wheels throw up, with a rubber seal above it channelling water past on both sides. On the 2015-on Vitara the latch mechanism and its microswitch are a recognised weak point - grease washes out, corrosion moves in, and the symptoms build from "needs a firm slam" through "opens when it feels like it" to a boot that will not release at all. Because the tailgate carries the reversing camera loom on many models, wiring chafe at the tailgate hinge grommet joins the suspect list too - the guide's diagnosis separates mechanical seizure from electrical failure before you buy anything.
Dealer vs DIY Cost
| Who does it | Typical price | What you get |
|---|---|---|
| Suzuki main dealer | £150–£250 | Genuine latch assembly fitted |
| Independent garage | £100–£180 | Latch supplied and fitted |
| DIY | £80–£120 | The latch assembly and 60-90 minutes of trim care |
Typical UK prices for the 2015-on Vitara. Try the £3 fix first: a thorough clean and a proper latch lubrication cures the early sticking stage more often than not.
Genuine vs Aftermarket - and the Lubrication Reprieve
Before buying: flood the mechanism with a penetrating cleaner, work it fifty times with the tailgate open, then grease with white lithium - a latch caught in the sticky stage often comes back to life for years. When replacement is due, the genuine Suzuki assembly at £80–£120 is the dependable route; pattern latches exist at £30–£50 but microswitch quality varies, and a flaky microswitch reintroduces exactly the intermittent fault you are curing. On a part this annoying to reach, the genuine unit earns its premium.
Common Mistakes on the Boot Latch Job
- Snapping the tailgate trim clips. The inner trim panel pops off with a trim tool worked clip by clip - pulling from one corner shears the towers and the panel buzzes over every bump afterwards.
- Dropping bolts into the tailgate cavity. The latch bolts exit downward into the void. Magnetic socket or a strip of tape - a bolt rattling in the tailgate is maddening and takes the trim off again to fix.
- Unplugging connectors by the wires. The microswitch connector is small and brittle; pull the body, not the loom, or the intermittent fault continues with a new latch fitted.
- Not marking the striker position. Outline the striker plate with a marker before touching it - its position sets how the tailgate seats, and guessing costs three rounds of adjust-and-slam.
- Skipping the full-function test. Latch, key fob, interior release and the dash "boot open" light all get tested with the trim still off. Every one of them is easier to fix now than after reassembly.
Related Tailgate Faults on the Vitara
If the latch tests fine but the boot still misbehaves, work along the circuit: the tailgate wiring loom where it flexes through the rubber grommet at the hinge (broken wires here also kill the reversing camera and rear wiper - if those play up too, the loom is your fault), the fob battery, and the central-locking actuator. Water in the boot floor after rain is the tailgate seal or the same grommet, worth fixing before it drowns the new latch. A "boot open" warning that flickers over bumps with a good latch is the microswitch loom, not the mechanism. The symptom finder triages tailgate electrics from mechanics, and the Vitara service light reset guide is the two-minute companion job while the car is with you.
Solid DIY Fix - Dealer Part Required
This is a straightforward repair once you have the part in hand. The boot cannot be fixed by splicing wires - the entire loom and switch assembly is corroded through and needs replacing. Order from Suzuki, allow 60–90 minutes, and the boot will work as new. A dealer would charge around £150–£250 for this repair; the DIY saving is well worth the time.