
Broken door handles are one of the most common faults on the Fiat 500. The plastic mechanism is a known weak point and snapping off is virtually a rite of passage on these cars. The good news is a complete replacement handle including chrome surround, hinge and lock mechanism is available cheaply, and the job is very doable at home.
The process involves removing the door card, carefully peeling back the vapour membrane, and accessing the handle bolts and linkage rod from inside the door. Take your time with the membrane - if it tears reseal it carefully on reassembly to prevent damp getting into the door.
Why Do Door Handles Fail?
The Fiat 500's exterior door handles are made from lightweight plastic with an internal metal hook mechanism. Over time, the plastic can become brittle - particularly in older cars exposed to years of UV light and thermal cycling. The internal plastic hook that engages the door latch is the most common failure point: it snaps under normal opening force, leaving the outer handle moving freely without releasing the latch. On the Fiat 500, this is a well-documented and very common failure, particularly on cars over 7–10 years old.
Cold weather accelerates the problem - plastic that is already stressed becomes significantly more brittle below freezing. Many Fiat 500 door handles fail on cold mornings when a little extra force is applied. The handle can also fail gradually: you may notice the door requires more force to open than usual in the weeks before the handle gives way completely.
OEM vs Aftermarket Replacement Handles
Replacement handles are available as genuine Fiat/Mopar parts, or in aftermarket versions from suppliers including Febi, Magneti Marelli, and generic Chinese manufacturers. Genuine parts are more expensive (typically £20–£40 per handle) but match the original specification exactly. Quality aftermarket parts from recognised brands are usually a reliable and more affordable alternative at £8–£20 per handle. Avoid the very cheapest unbranded options - they are often made from similarly brittle plastic and may fail again quickly. It is also worth replacing the door handle cable and any worn clips at the same time while the door card is already removed.
Tools & Parts Needed
Shop Parts & Tools for This Job
As an Amazon Associate, Mr Auto Fixer earns from qualifying purchases. Prices and availability may vary.
Step-by-Step Guide
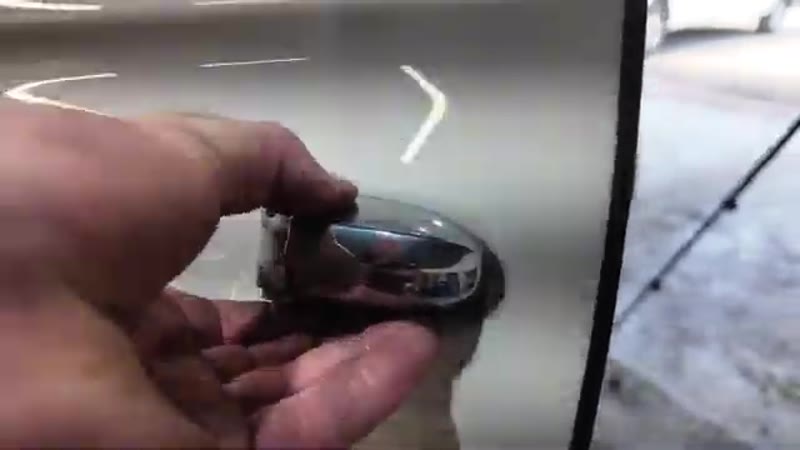
Remove the Silver Trim & Expose Allen Bolts
Use a trim pry tool to carefully pop off the silver decorative cover around the door handle. Behind it, pop off the small plastic cover too. This reveals two 5mm Allen bolts - one in the door handle itself and one in the lower section of the door card. These are the main fasteners for the handle assembly.
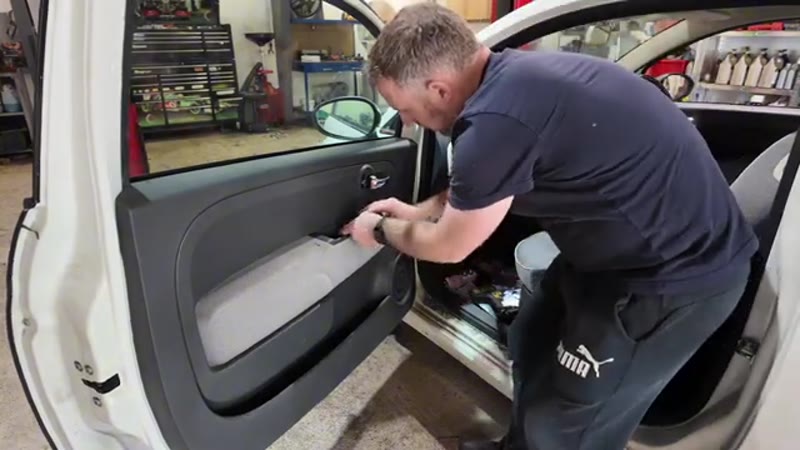
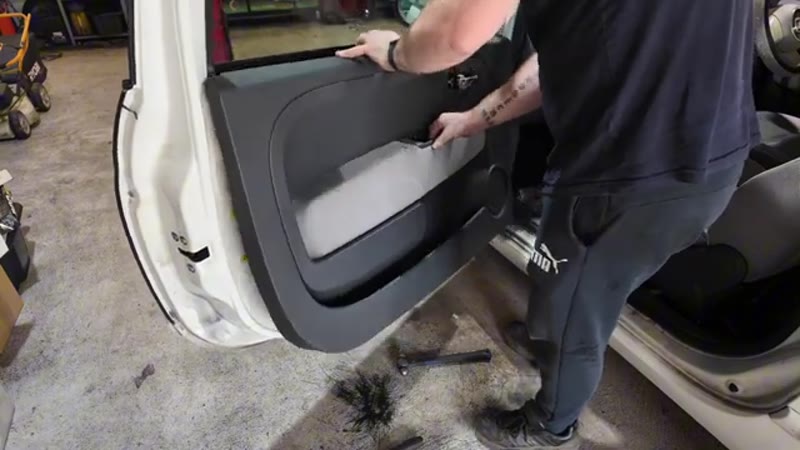
Remove the Door Card
Undo both 5mm Allen bolts. The door card is now only held by plastic pop clips around the perimeter - work around methodically pulling each one free. Once all clips are released, lift the card upward off the plastic runner at the top. Inside you'll find the door handle linkage rod held by a plastic clip - push the clip sideways to release it and pull the rod out of its housing.
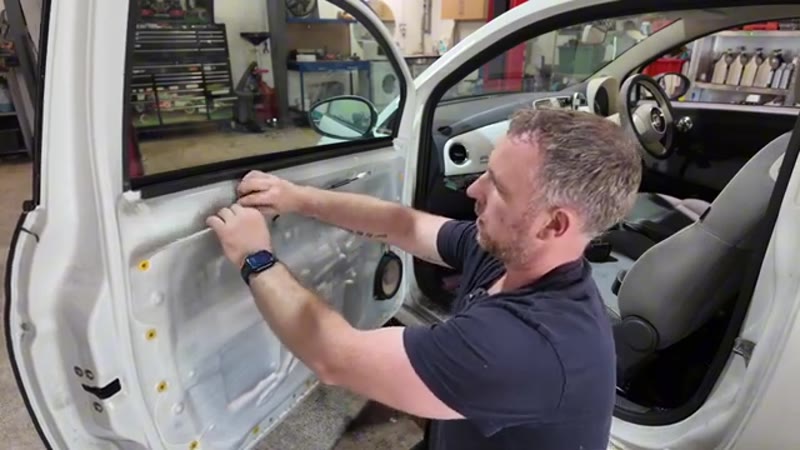
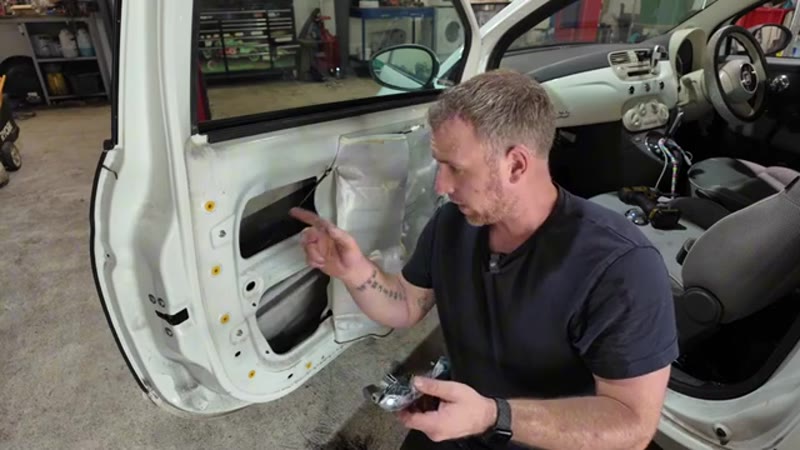
Peel Back the Vapour Membrane
With the door card removed you'll see a plastic vapour barrier membrane covering the door internals. Carefully peel it back - use a Stanley blade to score the adhesive edge if needed. Fold it back and press it to itself temporarily so it stays clear. This membrane is important for keeping water out of the door so handle it carefully and reseal it properly on reassembly.
Disconnect & Remove the Old Handle
Inside the door to the right of the frame there's a 10mm nut holding the hinge side of the handle - undo and set aside. The handle is also secured by a T30 Torx bolt accessible through the inside of the door - undo this too. At the bottom of the linkage rod inside the door there's a clip - push it sideways to free the rod, then pull the rod clear. Pull the handle outward from the bottom first then wiggle free of the door aperture.
Fit the New Handle
Feed the new handle into position - route the linkage rod through and into its housing inside the door, pushing the red plastic clip home to lock it. Fit the T30 Torx bolt from inside and tighten. Refit the 10mm nut on the hinge side. Test the outer handle and confirm the latch opens correctly before rebuilding.
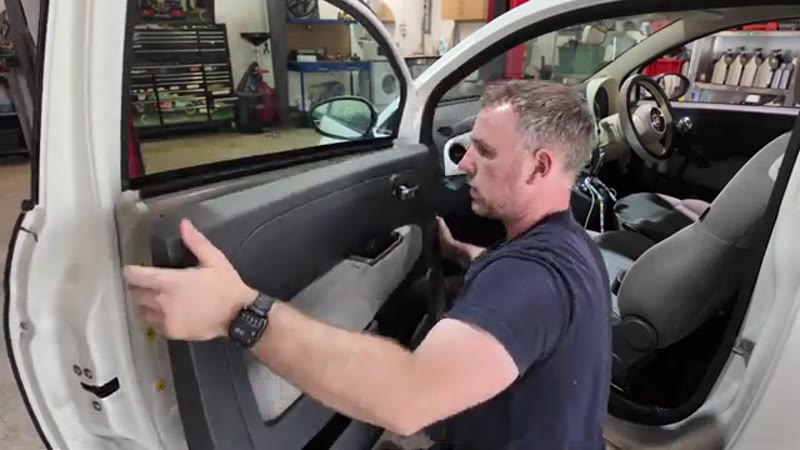
Reseal Membrane & Rebuild Door Card
Carefully reseal the vapour membrane - this is important for preventing water ingress into the door interior. Refit the door card by locating it over the top runner first, then aligning and tapping all the pop clips home with the flat of your hand. Refit both 5mm Allen bolts, pop the plastic cover back on and refit the chrome trim. Test both inner and outer handles to confirm everything operates correctly.
Want this guide offline - and 15 more like it?
Our PDF guide collection covers servicing, fault codes, buying a used car and more. Written by a qualified mechanic. Download once, use forever - no ads, no internet needed.
Why 500 Door Handles Snap - a Design Habit
The 500's exterior handle is a plastic lever doing a mechanical job thousands of times a year, and its pivot and return spring were built to a city-car budget. Cold weather makes the plastic brittle, gloved winter hands pull harder, and one January morning the handle comes away light and useless in your fingers. It is one of the 500's best-known small failures - most examples will break at least one handle in a long life, usually the driver's door first because it does five times the work. There is no wear warning: the handle feels normal right up until the pivot lets go.
Dealer vs DIY Cost
| Who does it | Typical price | What you get |
|---|---|---|
| Fiat dealer | £120–£200 | Genuine handle, painted and fitted |
| Independent garage | £80–£150 | Handle supplied and fitted |
| DIY | £8–£40 | Aftermarket or genuine handle and 1-2 patient hours with door trim |
Typical UK prices. The part is cheap; the price everywhere else is the door-trim labour this guide walks you through.
Common Mistakes on the Handle Change
- Levering the door card off by force. The trim clips release with a proper trim tool worked around the edge - a screwdriver snaps the clip towers off the card, and then the door rattles forever.
- Losing the control rod clip inside the door. The little plastic clip that connects handle to latch rod drops into the door cavity if released carelessly - and retrieving it through the access hole is the worst ten minutes of the job.
- Tearing the vapour membrane. The plastic sheet behind the door card keeps rain out of the cabin. Peel it back gently and re-stick it with butyl tape - a torn membrane means damp carpet in a month.
- Trapping the window in the wrong position. Set the glass fully up before disconnecting anything, and mind the regulator cables while your hand is inside the door.
- Testing after reassembly instead of before. Work the new handle, lock and window with the door card still off. Finding a misrouted rod after the trim is back on doubles the job.
Related Door Faults on the 500
While the door is open-heart: check the door check strap (the 500's creaks and eventually cracks its mounting plate - grease it now), the window regulator cables for fraying, and the latch mechanism for dry pivots that a shot of lithium grease fixes before they stick. If the handle broke because the latch itself was stiff, lubricate the latch or the new handle inherits the same load that killed the old one. Central locking playing up on the same door is usually the connector disturbed inside the door rather than coincidence - check it before the card goes back. Anything else the door does, the symptom finder can triage.
Job Summary
Frequently Asked Questions
Can I Open the Door from Inside If the External Handle Breaks?
Yes - the internal door handle will still work. When the external handle fails (the plastic hook snaps), the internal mechanism that releases the latch remains functional. However, if you're locked outside with a broken external handle, you cannot enter from that side. The internal handle will only work if you're already inside the car. For safety and practicality, a failed external handle should be replaced rather than relying on the internal mechanism as a workaround.
What Trim Year Does This Guide Apply To?
This guide covers the post-2007 Fiat 500 (the modern city car generation). The door card removal process and handle assembly are consistent across the range from 2007 through to current models. Minor variations exist between standard, Lounge, and 500X models, but the core handle replacement procedure remains the same. If your 500 is from the original 1957–1975 era or a later special edition, the mechanism may differ - check your specific model's service information before starting.
Can I Paint the Replacement Handle?
Yes, if you buy an unpainted plastic replacement handle from an aftermarket supplier. These can be primed and painted to match your vehicle's colour. Genuine OEM handles typically come in body colour already. If painting, ensure you use flexible paint designed for plastic and allow adequate drying time (usually 24 hours) before refitting. Avoid high-temperature paint as it can soften the plastic base and affect the hinge mechanism. If you're uncertain about the paint type, consult with a motor factor or body shop technician before applying.
How Long Does the Complete Job Take?
On a Fiat 500 with straightforward door card clips and no damaged hinges, the complete job - card removal, vapour membrane handling, old handle removal, and new handle installation - takes 1–2 hours. The membrane peeling and careful resealing adds time compared to a simpler door card job. If the door card clips are brittle and break (common on older cars), or if the vapour membrane is already damaged and needs patching, add another 30 minutes. Allow 2–3 hours if you're working carefully for the first time and want to avoid rushing.