Brakes are safety-critical, so a true first-timer should have someone experienced alongside for the first axle. That said, the 500 is about the gentlest car there is to learn discs and pads on - light components, a simple pin caliper - and the guide flags every check point.
Overview
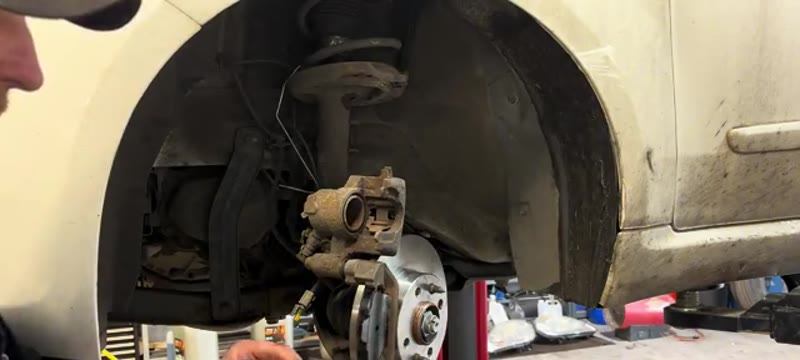
The Fiat 500 uses a pin-type caliper system rather than the conventional sliding-pin Allen key design found on most modern cars. Instead of Allen key bolts, the caliper is held by a single horizontal pin running through the bottom, locked in place with a small safety clip.
Once you understand the system it is very accessible. This guide covers full front disc and pad replacement - note that one side has a brake pad wear sensor that must be unplugged and replugged correctly.
When You Need This Job
Grinding or squealing when braking
Brake pad wear warning light on the dashboard
Visible thin pads through the wheel spokes
Lip on the outer edge of the disc
Pulling to one side under braking
Vibration through the brake pedal
⚠ The caliper pin system is different to most carsOn the Fiat 500 the caliper is retained by a single horizontal pin rather than Allen key slider bolts. Pull the safety clip first, then knock the main pin out with a punch. Do not confuse the two.
⚠ Pump the pedal before drivingAfter pushing the piston back the pedal will go straight to the floor. Pump firmly several times until it feels normal before driving anywhere.
Tools You'll Need
Pliers
Punch or drift
Flat blade screwdriver
12mm socket
17mm socket
Wire brush
Sandpaper or wire wheel
Bungee cord or hook
Brake cleaner
Torque wrench
Step-by-Step Guide
01
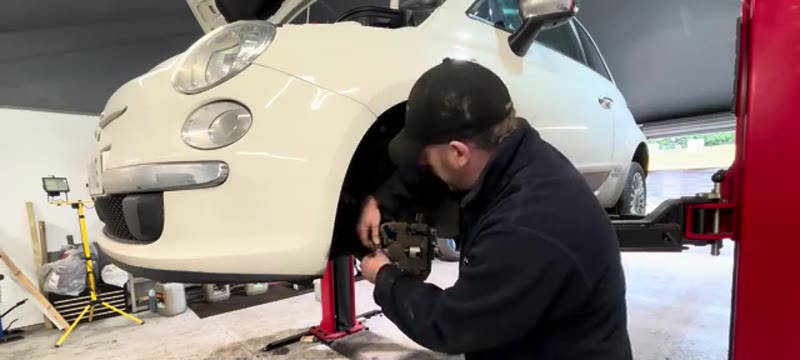
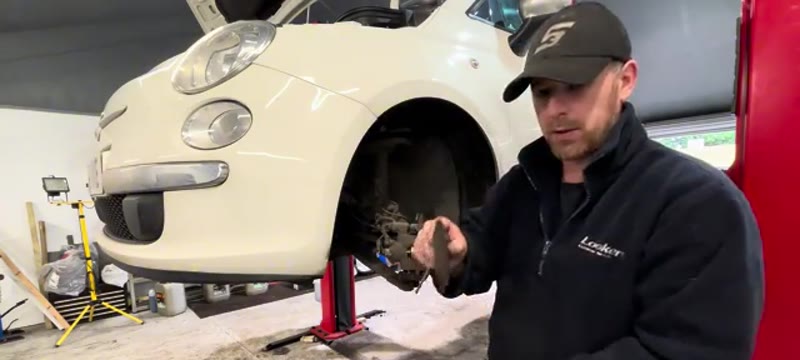
Remove the wheel and unplug the wear sensor
Remove the front wheel. Unplug the brake pad wear sensor connector and slide the wire out of its retaining clip so it hangs freely.
02
Pull out the safety clip
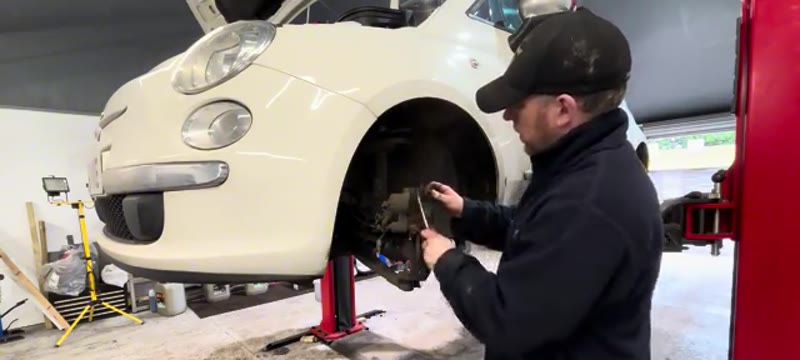
Use pliers to pull the small R-clip or safety pin from the bottom of the caliper. This locks the main caliper pin in place.
03
Knock out the main caliper pin
Using a punch, drive the main horizontal caliper pin out from one side. This releases the caliper from the pad assembly.
04
Push the piston back
Remove the brake fluid reservoir cap. Use a flat screwdriver against the pad face to push the piston fully back into the caliper.
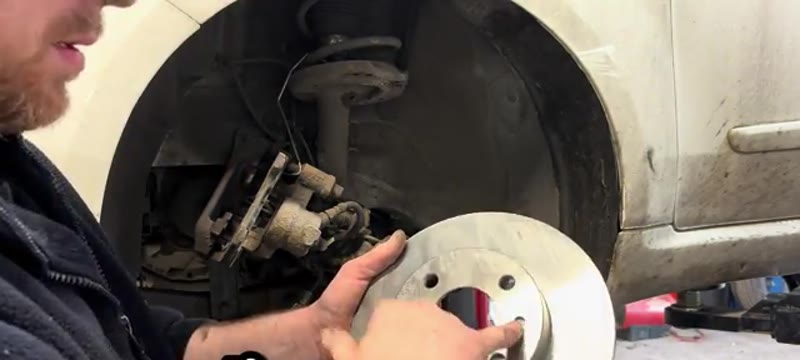
05
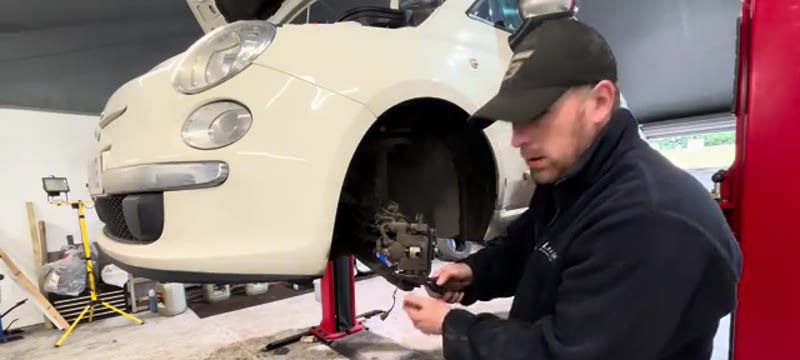
Remove the pads and inspect
Lift the caliper away and pull the pads out. Check wear - inner pad worn to metal means this job is well overdue.
06
Wire brush inside the caliper
Carefully clean inside the caliper with a wire brush. Do not damage the rubber seal around the piston.
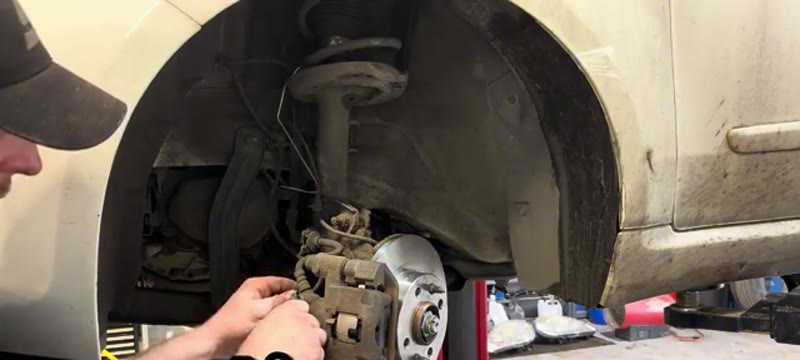
07
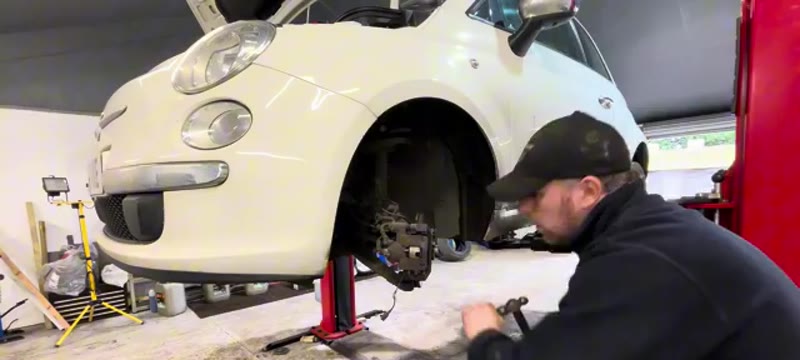
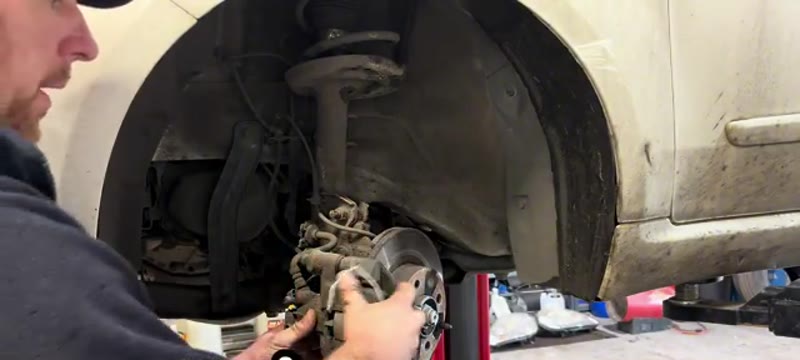
Remove the caliper carrier
Undo the two 17mm bolts on the caliper carrier and remove it. Hook the caliper to the suspension with a bungee.
08
Remove the disc
Undo the two 12mm disc retaining bolts and tap the disc off. Clean the hub face with a wire brush.
09
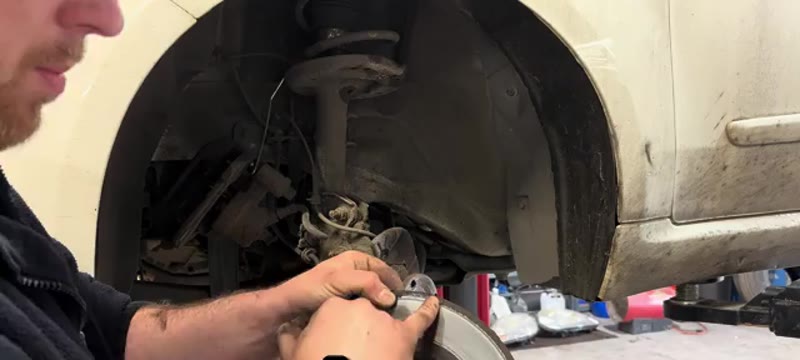
Fit the new disc
Apply a small amount of copper slip to the hub mating face. Fit the new disc and refit the 12mm retaining bolts.
10
Refit caliper carrier and new pads
Bolt the carrier back on. Apply copper slip to the pad backing plate ends. Refit the new pads - sensor pad goes on the piston side at the bottom.
11
Clean the caliper pin and refit
Clean the main pin with sandpaper until smooth. Apply a thin smear of copper slip. Slide it back through the assembly and refit the safety clip.
12
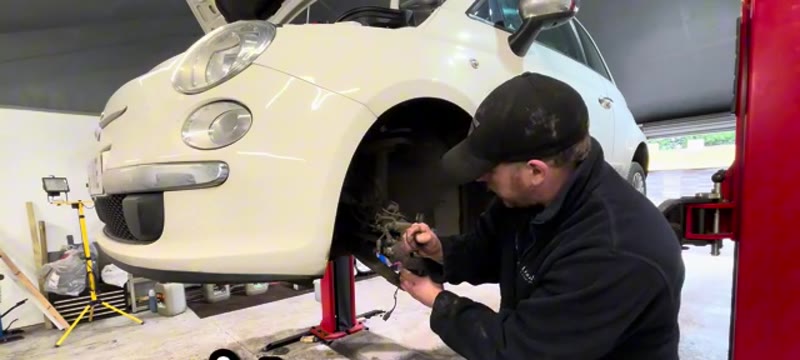
Reconnect the wear sensor and refit wheel
Route the sensor wire back into its clip and reconnect the connector. Refit the wheel and torque up. Pump the brake pedal before driving.
Torque Specifications
Component
Torque
Caliper carrier bolts (17mm)
90 Nm
Disc retaining bolts (12mm)
10 Nm
Wheel nuts
98 Nm
Clean the pin thoroughly
A smooth pin slides freely and ensures even pad contact. Take time to get it properly clean - rough pins cause dragging brakes.
Our PDF guide collection covers servicing, fault codes, buying a used car and more. Written by a qualified mechanic. Download once, use forever - no ads, no internet needed.
Why Fiat 500 Discs and Pads Wear Out (and How Fast)
Here is the odd thing about braking on a Fiat 500: the discs usually die of rust, not wear. Most 500s live in town, cover low annual mileage and sit outside between short trips, so the discs never get hot enough for long enough to keep their faces clean. Surface corrosion pits the swept area, the pads then ride over a rough surface, and by MOT time the tester writes "discs pitted" on a car with barely 30,000 miles on it.
Pads on a 1.2 city car last roughly 25,000–35,000 miles of stop-start driving - the car is light, but town braking is constant. The small 240mm front discs are typically good for two pad sets by wear, though on a low-mileage 500 corrosion usually gets them first. If your discs have a deep lip or visible pitting, do discs and pads together as this guide shows rather than putting fresh pads on ruined faces.
Fiat Dealer vs DIY Cost
Who does it
Typical price
What you get
Fiat main dealer
£280–£450
Genuine parts and dealer labour on what is a small, simple car
Independent garage
£200–£350
Front discs and pads, parts and labour in
DIY
£60–£100
Quality discs and pads for both sides, about two hours of work
Typical UK prices for the front axle of a 2008-on Fiat 500. The 500's parts are among the cheapest of any modern car.
The saving is £140–£350 for a job with no special tooling and no electronics involved. See our UK brake replacement cost guide for how the 500 compares with other small cars.
Genuine Fiat Parts vs Aftermarket
Brembo - the brand people pay a premium for on performance cars - is Italian, and supplies a large share of Fiat's original brake components. A Brembo, Mintex or ATE disc and pad set at £60–£100 is the same quality that left the factory, without the genuine-parts markup of roughly double at the dealer counter. There is no braking argument for the Fiat-boxed part on a 500.
What to skip is the sub-£40 full axle set from an online marketplace. Soft castings warp, the friction material glazes on the first hard stop, and on a car this light you will actually feel cheap pads - the 500's pedal is honest and tells you everything.
Common Mistakes on a Fiat 500 Brake Job
Fighting the disc retaining screw with a hand screwdriver. After a decade of British winters it will be seized. Use an impact driver from the start - rounding it off turns a two-hour job into a drilling session.
Not cleaning the hub face. 500 hubs rust badly. Any crust left between hub and new disc creates run-out, and run-out becomes steering-wheel judder within a few thousand miles.
Leaving the anti-corrosion coating on new discs. Most new discs arrive with an oily protective film. Brake cleaner on both faces before the wheel goes back on, or the first press of the pedal is a fright.
Pushing the piston back with the reservoir full. The 500's reservoir is small and overflows easily - check the level before you clamp the piston home.
Ignoring the caliper slides. The single-piston caliper depends on two greased pins to centre itself. Dry pins mean one pad does all the work and wears out in half the time.
Skipping the bedding-in. Gentle braking for the first 150 miles. Hard stops on fresh discs and pads glaze the new friction surface permanently.
Related Faults to Check While the Front End Is Up
Fiat 500s of this age knock and rattle at the front, and with the wheel already off you can check the usual suspects in minutes: drop links (the classic 500 knock over speed bumps), lower wishbone bushes and the track rod ends. Grab the disc at top and bottom and rock it - play here is a wheel bearing or a worn ball joint. We cover both jobs step by step in the Fiat 500 lower wishbone guide and the Fiat 500 shock absorber guide.
Also flex the rubber brake hoses and look for cracking - they are original on most 500s of this age and cheap to do while the fluid system is already being disturbed. If you are chasing a specific noise rather than doing routine replacement, run it through the symptom finder first.
Quick Stats
Difficulty
Intermediate
Vehicle
Fiat 500 2008
Time
2 hrs
Parts Cost
£50–£120
Common Questions
FAQ
It is a manageable home job with one Fiat quirk: the 500 uses a pin-type caliper held by a single horizontal pin and safety clip rather than the usual sliding-pin bolts. Once you understand that arrangement (the guide shows it step by step) the job is no harder than any other small car - but do not lose the safety clip, and do not force anything that resists.
£200–£350 at an independent for discs and pads on a 500, parts included. The parts themselves are cheap - quality discs and pads for £60–£100 the lot - so doing it yourself keeps most of that. Always replace discs in pairs and pads as a full axle set.
One to two hours for both sides. The pin-and-clip caliper is quick once you have done one side; budget extra the first time for cleaning the hub faces properly before the new discs go on - skipping that causes brake judder later.
Yes - both sides of the axle, every time. On the 500 the parts are so affordable that there is no saving worth chasing by doing one side; mismatched friction pulls the car under braking and fails the MOT.
20+ Years ExperienceMOT TesterProfessional UK Mechanic
All guides on this site are written from real, hands-on experience - not copy-pasted from a manual. If I haven't done the job myself, it doesn't go on the site.