
This BMW Mini came in with a persistent engine management light and a stored Vanos fault code. Vanos is BMW's variable valve timing system - the solenoids control oil flow to the camshaft phasers to advance or retard valve timing depending on engine load and speed. When a solenoid fails or becomes blocked the system can't adjust timing correctly, triggering the fault.
The exhaust Vanos solenoid is the more accessible of the two - it sits right at the front of the engine and can be swapped in under 10 minutes. Before condemning the solenoid it's worth trying a clean first, but if the fault code returns after cleaning, replacement is the only fix.
Fault Code on This Mini
Common Symptoms of Vanos Solenoid Failure
- Engine management light on
- Vanos-related fault code stored (238D or similar)
- Slightly rough idle or hesitation at low revs
- Fault code returns immediately after clearing
- Reduced power or poor throttle response
What You'll Need
Step-by-Step Guide
Read the Fault Code to Confirm
Connect a scan tool to the OBD port and read the fault codes. The exhaust Vanos solenoid fault will show as code 238D (DME Vanos exhaust adaption stop) or similar depending on your tool. Note which solenoid is at fault - exhaust or intake. The exhaust solenoid is at the front of the engine with a two-pin plug, the intake solenoid is at the rear and requires more disassembly to access.

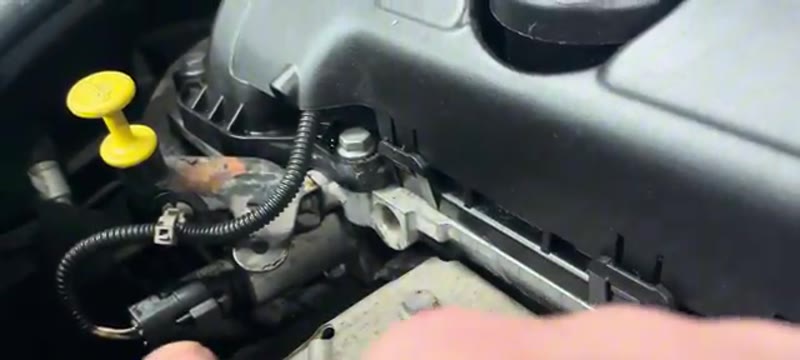
Locate & Unplug the Exhaust Vanos Solenoid
Open the bonnet. The exhaust Vanos solenoid is clearly visible at the front of the engine - it's a cylindrical unit with a two-pin electrical connector and a single 10mm bolt at the base. Unplug the connector by pressing the tab and pulling it free. Tuck the connector safely to one side.
Remove the Solenoid
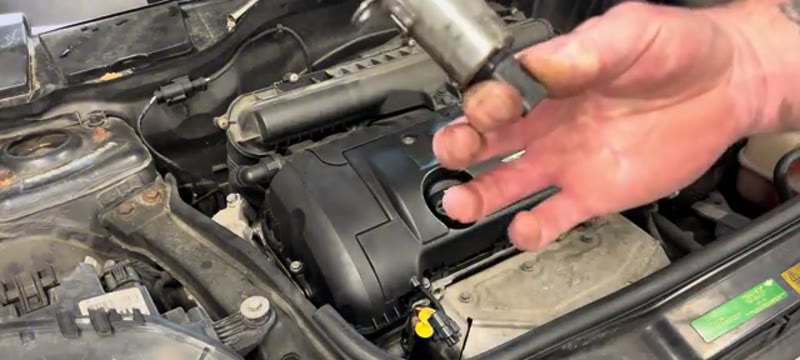
Using a 10mm socket on a short extension (quarter-drive works well in the limited space), undo the single retaining bolt at the base of the solenoid. Place a clean rag beneath the solenoid before removing it - a small amount of oil will run out as it comes free. With the bolt out, grip the end of the solenoid, give it a gentle wiggle and pull it straight out. Inspect the plunger - it should move freely against its spring when pushed. Check the filter gauze for blockage.
Fit the New Solenoid
The replacement solenoid comes with a new O-ring seal - apply a small smear of clean engine oil to the O-ring to help it slide in without damage. With the rag still in place to catch any drips, push the new solenoid into the bore until it seats firmly and you feel it locate on the seal. Refit the 10mm bolt and tighten it securely. Reconnect the electrical plug - make sure it clicks fully home.
Clear the Fault Code & Verify
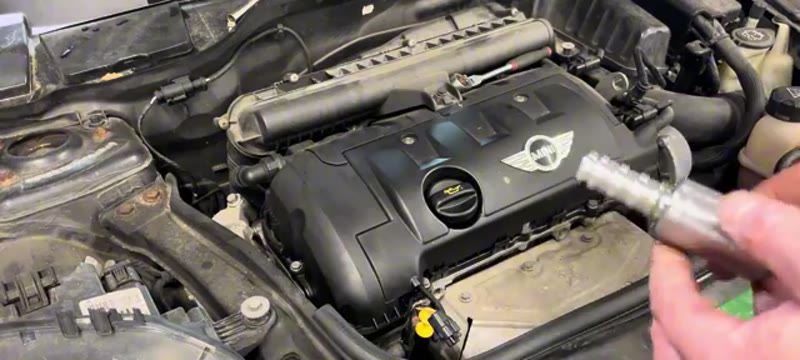
Connect the scan tool, go into the ECM and clear all fault codes. Turn the ignition off then back on. Start the engine and let it idle. Run a full scan - the Vanos fault code should not return. If it does, double-check the connector is fully seated and the solenoid bolt is tight. On this Mini the fault cleared immediately and the engine management light stayed off.

Parts & Tools for This Job
As an Amazon Associate, Mr Auto Fixer earns from qualifying purchases. Prices and availability may vary.
Want this guide offline - and 15 more like it?
Our PDF guide collection covers servicing, fault codes, buying a used car and more. Written by a qualified mechanic. Download once, use forever - no ads, no internet needed.
Why Vanos Solenoids Fail on the Mini
The Vanos solenoid is an electro-hydraulic valve that meters pressurised engine oil to the cam phaser, moving cam timing dozens of times a second - and it fails for one dominant reason: the oil it breathes. The solenoid's fine mesh screen filters its oil supply, and on an engine that has lived on stretched oil-change intervals, that screen silts up with sludge and varnish until the solenoid can no longer move oil fast enough. The ECU notices the cam lagging its commanded position and logs the fault - code 238D on these - and the engine falls into the rough idle, hesitation and poor economy this page exists for. On Minis running the long factory intervals, solenoid trouble from 60,000–90,000 miles is common; on cars fed fresh oil every year, it may never happen.
Garage vs DIY Cost
| Who does it | Typical price | What you get |
|---|---|---|
| BMW/Mini dealer | £180–£300 | Genuine solenoid and diagnostic time |
| Independent garage | £100–£200 | Quality solenoid fitted and codes cleared |
| DIY | £20–£60 | The solenoid itself - a 10-20 minute job with basic tools |
Typical UK prices. This is one of the best-kept secrets in Mini ownership: a fault that sounds like engine surgery is a two-bolt, one-connector part swap.
Genuine vs Aftermarket - and the £0 First Step
Before buying anything, try the clean: our Vanos solenoid cleaning guide covers pulling the solenoid and washing the sludge out of its screen, which cures a fair share of 238D cases for the price of some brake cleaner. When replacement is the answer, Pierburg makes the OE part - £20–£60 in their box against £80–£120 in Mini packaging for identical hardware. Avoid the £12 marketplace solenoid: its internal spool tolerances are the whole job, and a sloppy one gives you intermittent cam faults that come and go with oil temperature, the most annoying fault class in motoring.
Common Mistakes on the Solenoid Swap
- Replacing the solenoid without changing the oil. The sludge that killed it is still in the engine. Fresh oil and filter at the same time, or the new solenoid inherits the same diet.
- Forgetting the O-rings. The solenoid seals with O-rings that stay behind in the bore if you are not watching - a doubled O-ring on refit means instant leaks and a repeat performance.
- Confusing intake and exhaust solenoids. Engines with two Vanos solenoids need the faulty one identified by code - swapping them left-right is a valid free test, but note which was where.
- Yanking the connector by its wires. The clip releases with a press; the wires do not appreciate impatience, and a broken connector converts a £30 job into loom repair.
- Not clearing the code and re-testing. Clear 238D, then a proper test drive through full temperature. A code that returns immediately with a new, clean solenoid moves suspicion to oil pressure or the cam phaser itself.
Related Vanos and Timing Faults on the Mini
The solenoid is the cheap end of the Vanos system. If symptoms persist with a known-good solenoid and fresh oil, the suspects escalate: low oil pressure (check level and pressure before anything mechanical), the cam phaser unit, and on these engines the timing chain and tensioner - the infamous cold-start "death rattle" on N12/N14 Minis is chain territory, not solenoid, and needs addressing promptly. A rough idle with no cam codes at all points instead at ignition or the classic Mini vacuum leaks. The symptom finder separates rattle from surge from misfire, and the timing chain cost guide has the honest numbers if the rattle turns out to be the chain.