A first-timer with patience can manage it, but it suits someone who has at least used a socket set in anger before. The tensioner's three-bolt alternator mounting is unusual rather than difficult. If the old belt has shredded and wrapped itself around the crank pulley, stop - debris can get behind the crank seal, and that is garage territory.
Overview
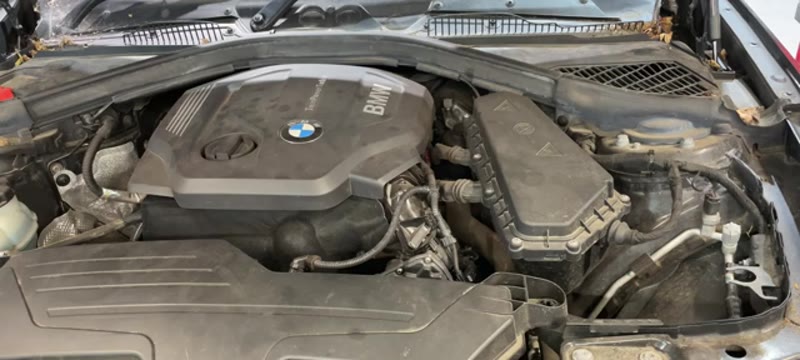
A squealing auxiliary belt on the BMW 1 Series 116d is almost always caused by a worn tensioner bearing. On this model the tensioner is an integrated unit that mounts onto the alternator with three 13mm bolts - an unusual design but once understood it is very manageable.
The new tensioner comes pre-tensioned with a retaining pin that you must not remove until the belt is fully routed. The third mounting bolt is in a tight gap behind the throttle body - a flexi-head spanner makes this significantly easier.
When You Need This Job
Loud squealing or chirping noise from the engine
Noise present from cold startup and on driving
Visible cracking or glazing on the belt
Belt coming off the pulleys
⚠ Do not pull the tensioner pin until belt is routedThe new tensioner has a spring pre-loaded with a retaining pin. If you pull the pin before the belt is routed the spring releases and re-pinning is very difficult. Belt first - pin second.
Tools You'll Need
16mm socket
13mm socket
Flexi-head 13mm spanner
Quarter drive ratchet with long extension
Trim removal tool
Step-by-Step Guide
01
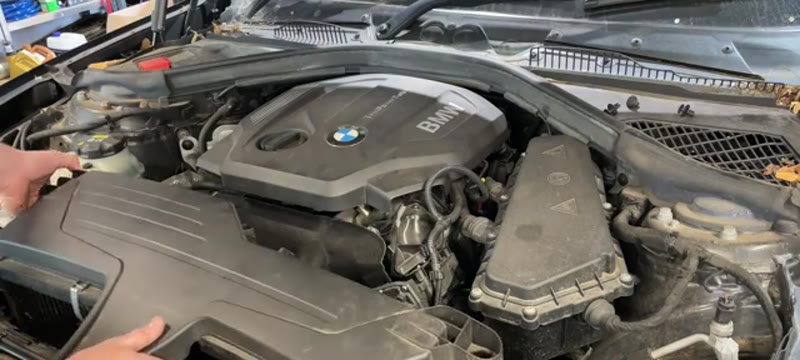
Remove the airbox assembly
Unplug the airflow meter sensor. Pull the air filter box up from its three mounting points. Loosen the jubilee clips on the air pipes and pull the entire assembly out in one piece.
02
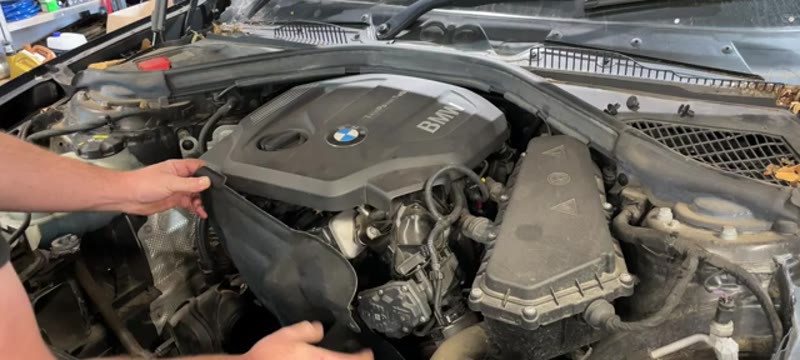
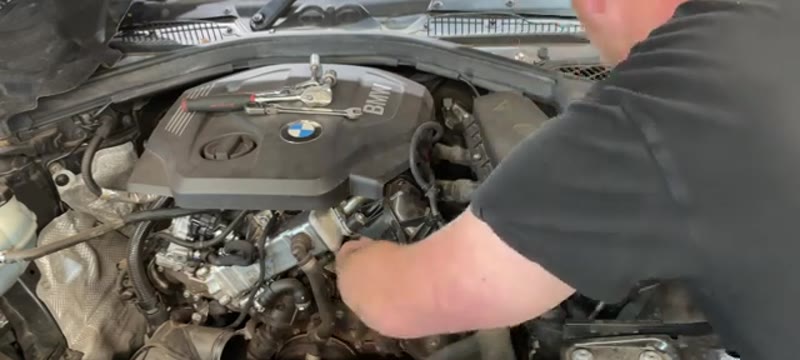
Remove the engine cover
Use a trim tool to pop the three push-fit clips on the plastic engine cover. Slide the cover out and set aside.
03
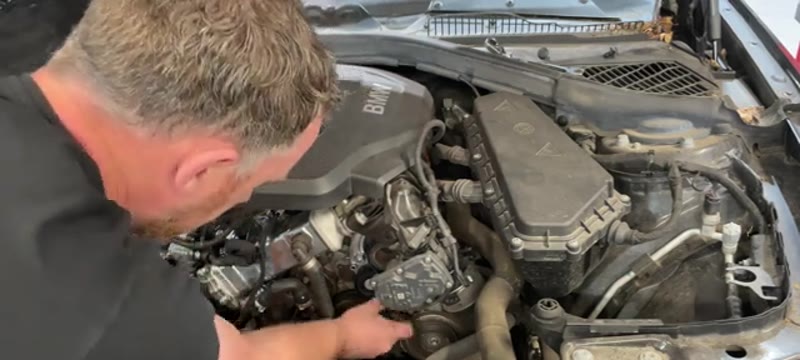
Release belt tension and remove the old belt
Use a 16mm socket on the tensioner centre bolt and rotate to release tension. Slip the belt off the pulleys. Take a photo of the routing first.
04
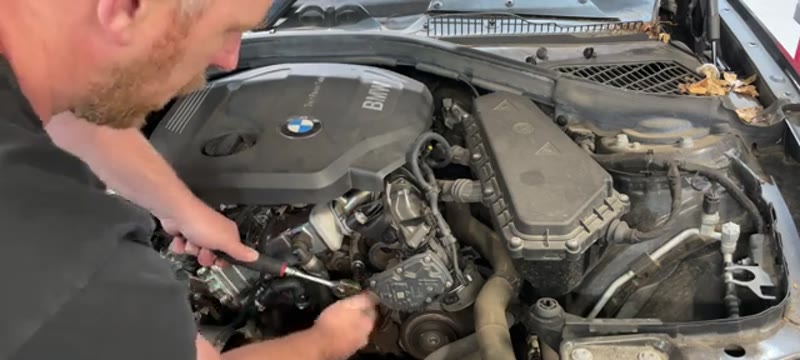
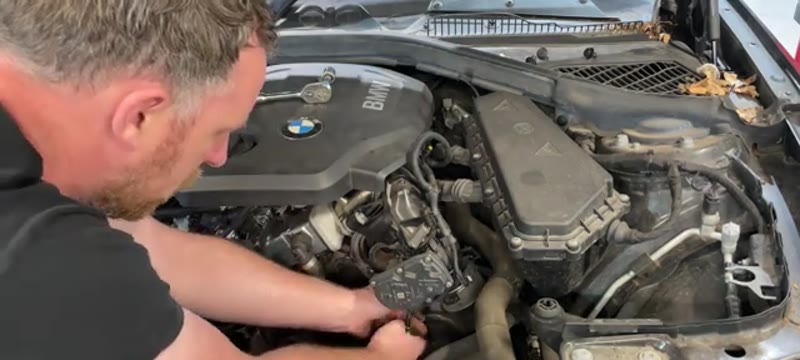
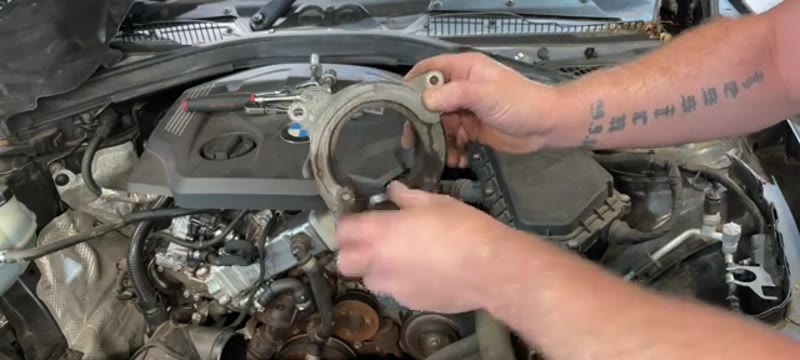
Remove the three 13mm tensioner bolts
Two are accessible with a socket. The top bolt is behind the throttle body - use a flexi-head 13mm spanner. Take your time on this one. Get it finger tight then tighten with the spanner.
05
Remove the old tensioner
Wiggle the tensioner clear of the throttle body. Check the bearing for roughness - a rough bearing confirms the cause of the squeal.
06
Fit the new tensioner
Position the new tensioner and start all three bolts by hand. Tighten the two easier lower bolts first then use the flexi spanner on the top bolt.
07
Route the new belt and pull the pin
Route the new belt around all pulleys following the original routing. Once correctly routed pull the retaining pin out - the spring will tension the belt automatically. Keep the pin safe for future use.
08
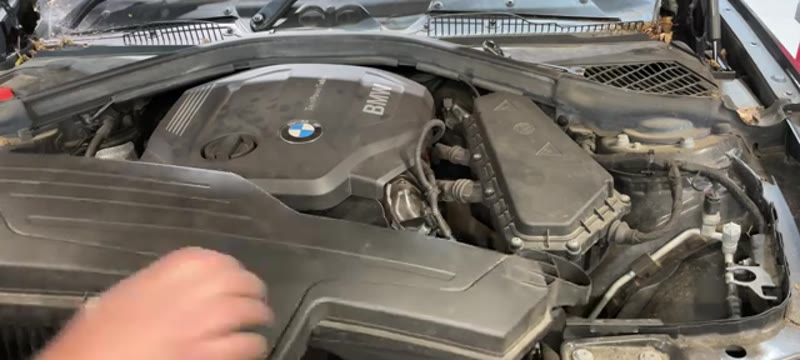
Refit airbox and cover
Refit the engine cover clips. Refit the lower jubilee clip on the airbox pipe before fully seating the box as it is harder to reach once the box is in. Reconnect the airflow meter sensor.
09
Start and test
Start the engine. The squeal should be completely gone. Let it run for a few minutes to confirm.
Torque Specifications
Component
Torque
Tensioner mounting bolts (13mm)
25 Nm
Keep the retaining pin
Store the tensioner pin in the glovebox or toolbox. If the tensioner ever needs removing again you can re-pin it before loosening the bolts to control the spring.
Our PDF guide collection covers servicing, fault codes, buying a used car and more. Written by a qualified mechanic. Download once, use forever - no ads, no internet needed.
The auxiliary belt drives the 116d's alternator and air-con compressor off the crank, kept taut by a spring-loaded tensioner - and both belt and tensioner are wear items with a shared clock. The belt's rubber ribs crack and glaze with heat cycles; the tensioner's internal spring and damper weaken and its idler bearing dries out. On this engine the pair is typically done by 80,000–100,000 miles, and the early warnings are unmistakable once you know them: a flutter or rattle at idle that vanishes with revs (tensioner damper gone), a squeal on cold start or with a wet engine bay (glazed slipping belt), or rubber dust collecting around the pulleys.
The reason not to wait matters more on this engine than most: a shredding aux belt on the N47 can wrap into the crank pulley area and - in a known worst case on these BMW diesels - get dragged behind the crank seal towards the timing chain. What starts as a £70 belt-and-tensioner job can end as four figures. Treat a rattling tensioner as an appointment, not background noise.
BMW Dealer vs DIY Cost
Who does it
Typical price
What you get
BMW main dealer
£250–£400
Genuine belt and tensioner at dealer rates
Independent garage
£80–£150
Quality parts fitted - a quick job for any workshop
DIY
£40–£70
Continental belt plus INA or SKF tensioner, 90 minutes
Typical UK prices for the 116d. This is one of the highest dealer-to-DIY ratios on the car - the parts are cheap and the access is honest.
Buying the Parts - Belt and Tensioner Together, Always
Continental (ContiTech) makes the belts, INA the tensioners, and both supply BMW's production line - their aftermarket parts at £40–£70 the pair are the factory components without the roundel tax. The rule that matters: never fit a new belt to an old tensioner. A weak tensioner under-tensions the new belt (squeal, glazing, early death) and its worn idler bearing chews the belt's back face. The £25 tensioner is half the point of the job. Skip unbranded belts on this engine entirely, given where a shredded one can end up.
Common Mistakes on the Belt and Tensioner Job
Not photographing the belt routing first. Thirty seconds with a phone camera saves the classic half-hour of puzzling over which side of the idler the belt passes.
Releasing the tensioner without control. It is spring-loaded and stores real energy - walk it back with the breaker bar, never let it snap free near fingers.
Fitting the belt one rib off. Every rib must sit in its groove on every pulley. One rib overhanging shreds the belt's edge within miles - check each pulley by feel before releasing the tensioner.
Ignoring the crank pulley itself. The 116d's crank pulley has a rubber damping ring that separates with age. If the outer ring wobbles or the rubber is cracked, replace it now - it is the other half of this failure story.
Missing an oil leak onto the belt. Oil from a weeping crank or vacuum pump seal destroys belts fast. If the old belt is oily, fix the leak or budget for this job again soon.
Related Faults on the N47's Front End
Noise at the front of a 116d has a short suspect list: aux belt and tensioner (this guide), the crank pulley's damping ring, the alternator's overrun clutch pulley (rattle at shutdown), and - the one every N47 owner has read about - timing chain rattle, which comes from the other end of the engine, sounds like a diesel tinnitus from the rear of the block, and is a much bigger conversation. Telling aux-belt rattle from chain rattle early is genuinely valuable: belt-side noise changes when you rev with the belt removed for testing; chain noise does not. The symptom finder walks the distinction, and the timing chain cost guide has honest numbers if the noise turns out to be the other one.
Quick Stats
Difficulty
Intermediate
Vehicle
BMW 116d
Time
1.5 hrs
Parts Cost
£40–£120
Common Questions
FAQ
It sits in the middle of the difficulty range - not because anything is technically hard, but because the tensioner mounts onto the alternator with three 13mm bolts in a tight space, which is an unusual design. With the front of the car raised and decent sockets it is well within reach of a home mechanic who has done basic jobs before.
An independent will charge £80–£150 for the belt and tensioner on the 116d. The parts - a quality INA or SKF tensioner and a Continental belt - are around £40–£70 combined, so the saving is most of the labour. Always replace the belt with the tensioner; a squealing belt has usually been chewed by the failing bearing.
Allow 45 minutes to an hour. Access to the three tensioner bolts is the time-eater; the belt routing itself takes minutes with the diagram in the guide. Turn the engine over by hand and re-check the belt is seated on every pulley before starting it.
A 16mm and 13mm socket, a flexi-head 13mm spanner and a long quarter-drive extension cover the tensioner, with a trim tool for the covers. The flexi-head spanner is the one that earns its place - one of the three bolts sits where a straight spanner cannot reach.
20+ Years ExperienceMOT TesterProfessional UK Mechanic
All guides on this site are written from real, hands-on experience - not copy-pasted from a manual. If I haven't done the job myself, it doesn't go on the site.