This Ford Transit Connect came in with heavily corroded and lipped discs along with very low brake pads. The inner edge of the disc had a significant lip which would cause uneven wear with new pads, so a full disc and pad replacement was the right call on a van that does high mileage.
The brake setup on this Connect is the same as many other Ford models, so the procedure is transferable. The key extra step is cleaning the caliper carrier properly on the bench before fitting the new pads - this is what prevents binding, uneven wear and repeat jobs.
Tools & Parts Needed
Shop Parts & Tools for This Job
As an Amazon Associate, Mr Auto Fixer earns from qualifying purchases. Prices and availability may vary.
DIY Car Service Guide
- Full service at home: oil, filters, plugs, fluids
- Which jobs are safe to DIY and which are not
- What a garage charges for each item, so you know the saving
Instant PDF download · works on phone, tablet or PC · 7-day money-back guarantee
Step-by-Step Guide
Remove Wheel & Sliding Pin Covers
Remove the wheel (5x 19mm bolts). Turn the steering towards you to improve access. Pop off the two plastic dust covers - one top, one bottom - that cover the sliding pins on the caliper. These just prise off with a flat tool.
Remove the Sliding Pins & Caliper
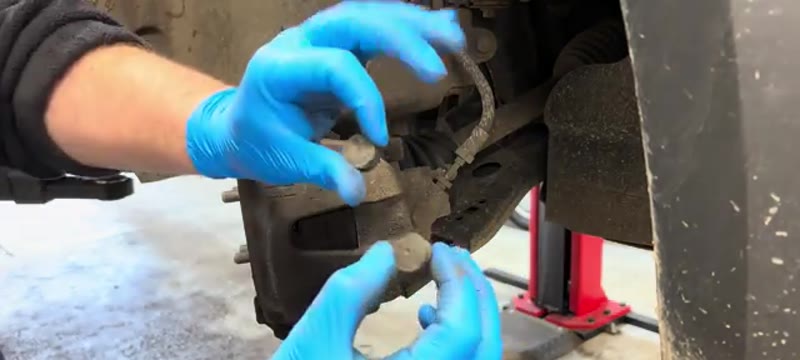
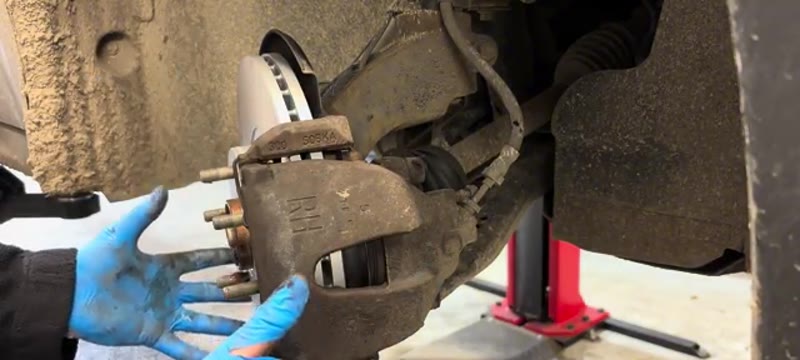
Use a 7mm Allen key to undo both sliding pins - wiggle them out and set aside. If tight, a small screwdriver can help lever them free. With both pins out, remove the small spring clip at the front of the caliper by prying it off with a flathead screwdriver. The caliper is now free. Open the brake fluid reservoir cap so the piston has somewhere to go, then press the piston all the way back using a screwdriver against the old pad. Hang the caliper up to avoid stressing the brake line - do not let it hang free.
Remove the Pads & Caliper Carrier
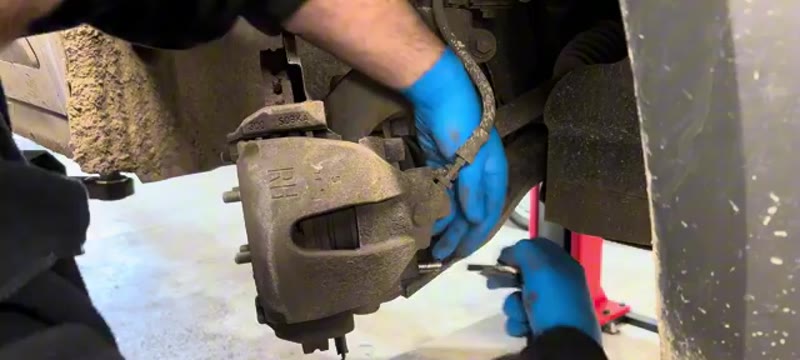
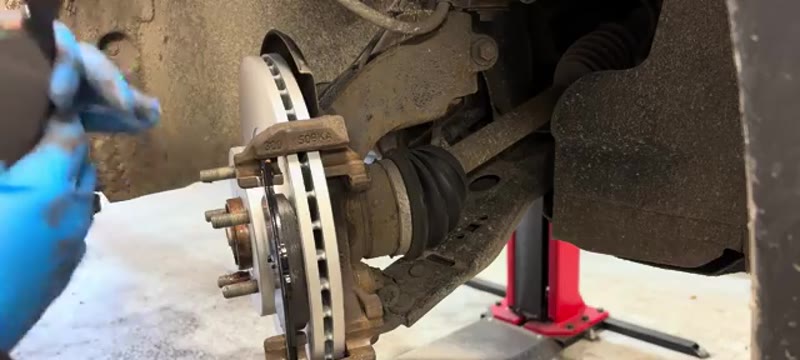
Slide out both pads - note that the inner pad clips onto the piston. With pads out, undo the two 18mm bolts at the rear of the caliper carrier. These are tight - crack them off with a breaker bar. Once undone, lift the carrier off and take it to the bench.
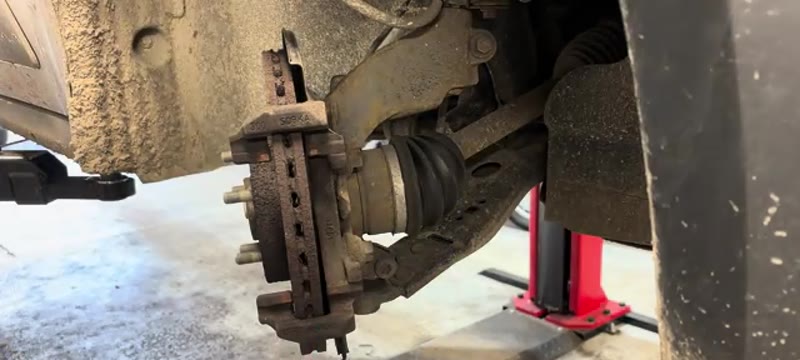
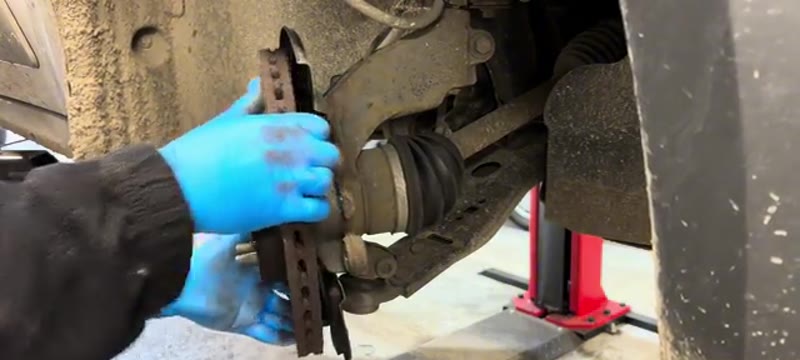
Remove the Old Disc & Clean the Hub
The disc usually comes off by hand once the carrier is clear. If stuck, give it a firm tap with a hammer and it will come free. Use a wire brush to clean the face of the hub and the mating surface where the disc sits, removing all rust and debris so the new disc sits completely flat.
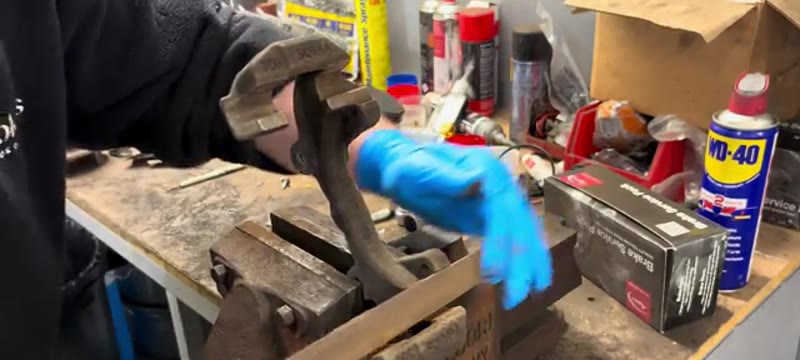
Clean the Caliper Carrier on the Bench
Clamp the carrier in a vice. Use a wire brush on all surfaces where the brake pads contact. Follow up with a flat file across the same surfaces to remove any rust ridges and lumps. The goal is completely flat, smooth contact areas. Turn it over and repeat on the other side. Also clean the mounting face where it bolts to the hub. This step takes time but is the most important part of the job.
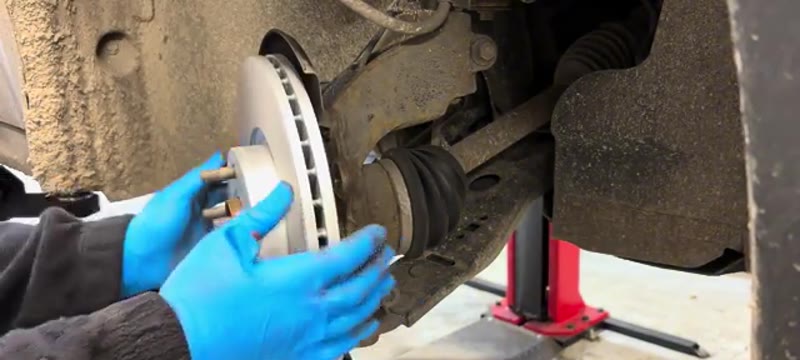
Fit New Disc & Refit Carrier
Fit the shiny new disc onto the hub. Apply a thin smear of copper slip to the inner edge bore only - not the braking surface - to prevent future rust seizure. Refit the caliper carrier and tighten the 18mm bolts to spec. They should be done up nice and tight.
Fit New Pads & Reassemble Caliper
Apply a small amount of copper slip to the back edges of the new pads - not the friction material. The outer pad drops into the carrier. The inner pad clips onto the piston - it only goes on one way. Locate the caliper over the pads. Clean the sliding pins and lubricate with proper silicone brake grease before reinserting. Tighten both pins with the 7mm Allen key. Fit the plastic dust caps. Fit the new spring clip - bottom hole first, then rest the top in and push out and in to secure it. Tap with a hammer to ensure it is fully seated.
Refit Wheel & Bed In
Refit the wheel and lower the car. Pump the brake pedal several times before moving off to push the piston back out against the new pads. Top up brake fluid as needed. Bed in the new pads gently over the first few stops before applying full braking force.
Why Van Brakes Wear Faster (Transit Connect Lifespan)
A working Transit Connect gets through front brakes noticeably faster than the car it is based on. Weight is the whole story: a van that spends its life half-loaded is asking the same size brakes to kill far more energy at every stop, and multi-drop urban work - brake, deliver, repeat - is the hardest braking duty there is. Expect 20,000–30,000 miles from front pads on a working Connect, against 35,000 or more on one that is used like a car.
Discs suffer too, because repeated heavy stops heat-cycle them until the faces crack, score or warp. That is why this guide does pads and discs together: on a loaded van, discs at the wear limit are a genuine safety item, not an advisory to postpone until next year.
Dealer vs DIY Cost on a Transit Connect
| Who does it | Typical price | What you get |
|---|---|---|
| Ford Transit centre | £300–£450 | Genuine parts, dealer rates, and the van off the road by appointment |
| Independent garage | £250–£300 | Front pads and discs fitted; pads alone £100–£180 |
| DIY | £70–£120 | Factor discs and pads for both sides, done between jobs |
Typical UK prices for the front axle. For a van there is a second cost most tables miss: every day it is booked in is a day it is not earning.
Van parts are commodity items, so the DIY saving of £150–£350 comes with no downside on quality - see the UK brake cost guide for the wider picture on what garages charge.
Genuine Ford vs Aftermarket Parts for a Working Van
The usual genuine-versus-aftermarket logic applies - TRW, Pagid and Textar supply Ford and sell the same components in their own boxes for £70–£120 rather than roughly double - but on a working van, buy the load-rated mid-range or better, never the budget line. Cheap discs on a van that carries weight will warp within months, and you will pay for the job twice.
One honest tip: if the van tows or runs at max payload daily, consider the heavy-duty pad options TRW and Pagid list for the Connect. They cost £10–£15 more, dust a little more, and last significantly longer under load.
Common Mistakes on Van Brake Jobs
- Treating it like a car brake job. Van calipers and carriers live outside in all weathers and every fastener will be tighter and rustier than the same job on a Fiesta. Penetrating oil the night before saves knuckles.
- Not cleaning the hub face properly. A loaded van amplifies any disc run-out into judder you feel through the whole bulkhead. Wire-brush the hub to bare metal before the new disc goes on.
- Reusing seized slider pins. On working vans the pins are the number one cause of one pad wearing to metal while the other looks new. Clean, grease or replace - never just push them back in dry.
- Skipping the anti-corrosion film on new discs. Brake-clean both faces of each new disc. Oily film plus a heavy first stop equals glazed pads on day one.
- Doing one side only. Always both sides of the axle - a van that brakes unevenly with weight in the back is genuinely dangerous in the wet.
- Forgetting the torque wrench on wheel nuts. Van wheels come off and on far more often than car wheels. Rattle-gunned nuts stretch studs; hand-torque them and recheck after 30 miles.
Related Faults to Check While the Van Is Up
Weight kills more than brakes, so use the wheel-off time. Rock the road wheel at 12 and 6 for bearing play - Connect front bearings work hard and rumble early. Check the CV boot on each driveshaft for splits flinging grease; if you find one, the Transit Connect driveshaft guide covers the full job. Flex the brake hoses, and glance at the rear brakes while you are underneath - rear shoes or pads on vans seize from sitting loaded far more often than they wear out.
If the van came to you with a specific braking symptom - pulling, pulsing, a soft pedal - diagnose before you buy parts; the symptom finder separates pad problems from caliper and hose problems in a couple of minutes.