If your OBD2 scanner plugs into the Ford Transit Connect and shows no lights or fails to connect, the most common cause is a blown fuse for the data link connector. This is a 2-minute fix that costs under £2.
The OBD port on the Transit Connect is powered by a 10 amp micro fuse in position 19 in the passenger compartment fuse box.
When You Need This Job
OBD2 scanner shows no lights when plugged in
Scanner fails to connect to the vehicle ECU
Diagnostic tool not communicating
OBD port has no power
DIY vs Garage Cost - UK 2026
A garage will typically charge a "no-communications" diagnostic fee of £60-£120 simply to identify that the OBD port is blown - before they have even fixed anything. That's because most garages charge a minimum hour of labour to plug their tool in, find that nothing responds, then trace the power and ground at the port back to the fuse box. The actual fix once they find it is replacing a fuse: parts cost around £1, labour around 5 minutes. DIY cost: a 10-piece blade-fuse kit from a UK factor is £3-£6, a multimeter to confirm the fault is £15-£30 if you don't already own one. Total parts: under £10. This is one of those jobs where the diagnostic step is the entire job - once you've found it, the fix is trivial. Worth knowing: the OBD port fuse on a Transit Connect is sometimes shared with the cigar lighter and the dashcam socket. If either of those has stopped working alongside the dead OBD port, you have your answer.
Tools You'll Need
OBD2 scanner (to test)
Fuse puller or flat blade screwdriver
10 amp micro fuse (replacement)
Step-by-Step Guide
01
Plug in your OBD scanner to confirm no power
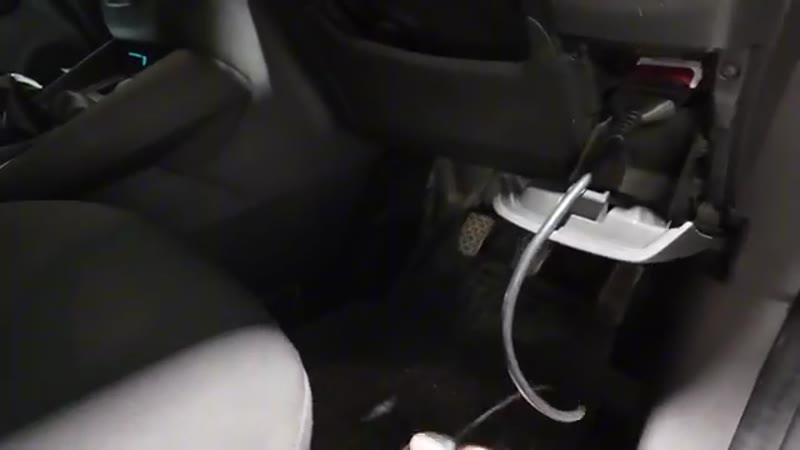
Connect your OBD2 scanner to the port under the dashboard. No lights on the scanner means no power to the port.
02
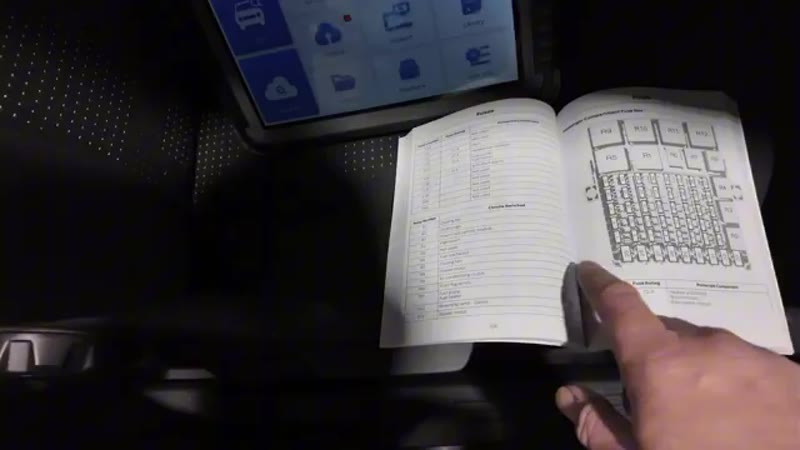
Locate the fuse diagram in the handbook
The Transit Connect comes with a handbook that lists fuse positions. Look for "data link connector" - it is a 10 amp fuse in position 19 in the passenger compartment fuse box.
03
Access the passenger compartment fuse box
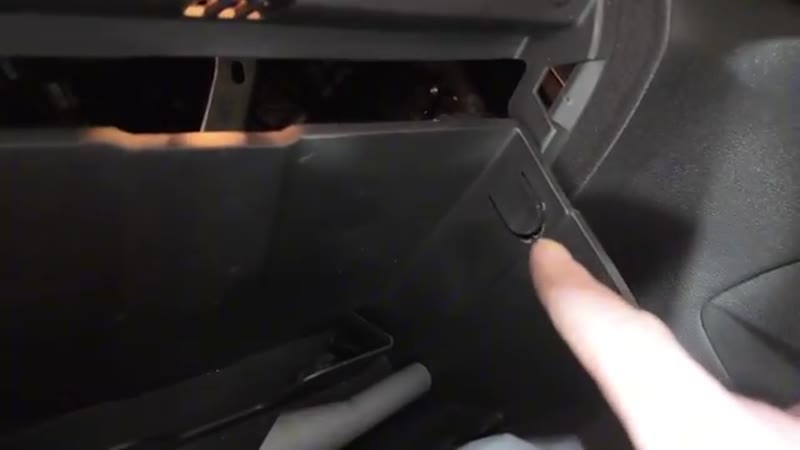
Open the passenger side glove box and press both tabs on either side to drop the glove box down fully. The fuse box is now visible inside the dashboard.
04
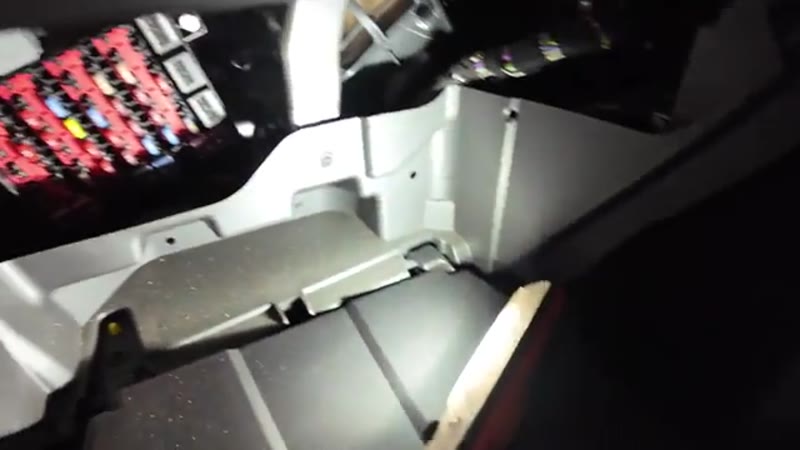
Find fuse 19 - third row in, third one up
Using the fuse diagram as reference, locate fuse 19. Count to the third row across and the third fuse up from the bottom.
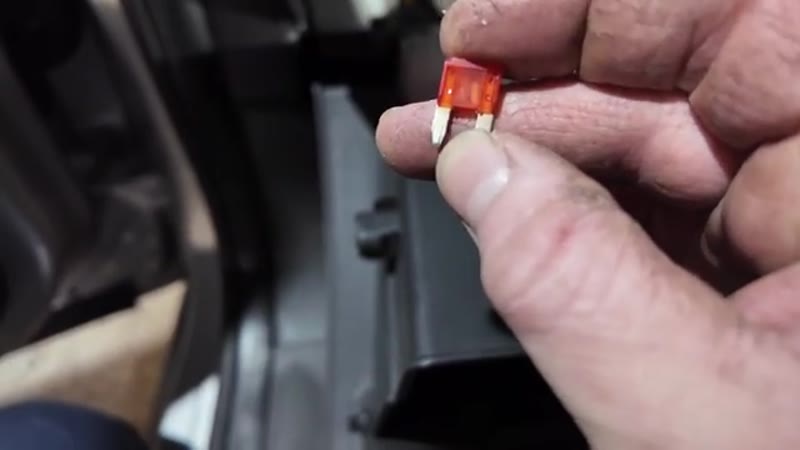
05
Pull out the fuse and inspect it
Use a fuse puller or flat blade screwdriver to remove fuse 19. Hold it up to the light - a blown fuse will have a visibly broken wire inside.
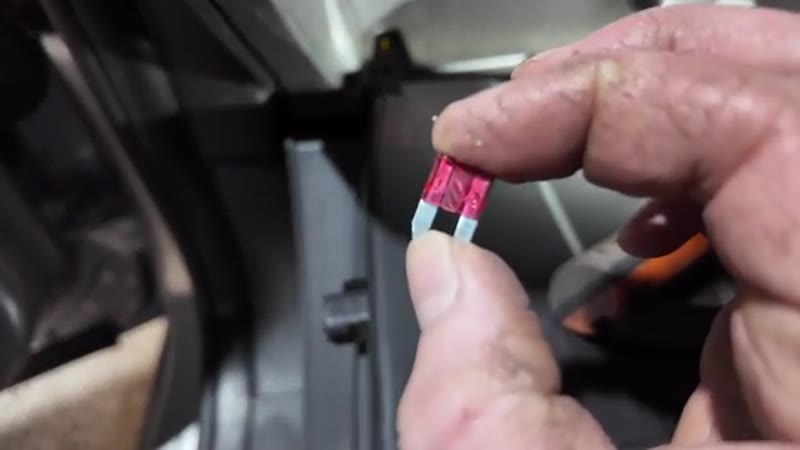
06
Replace with a new 10 amp micro fuse
Fit a new 10 amp micro fuse in the same position. You should hear a beep from the vehicle when it seats - this confirms the data link connector has power.
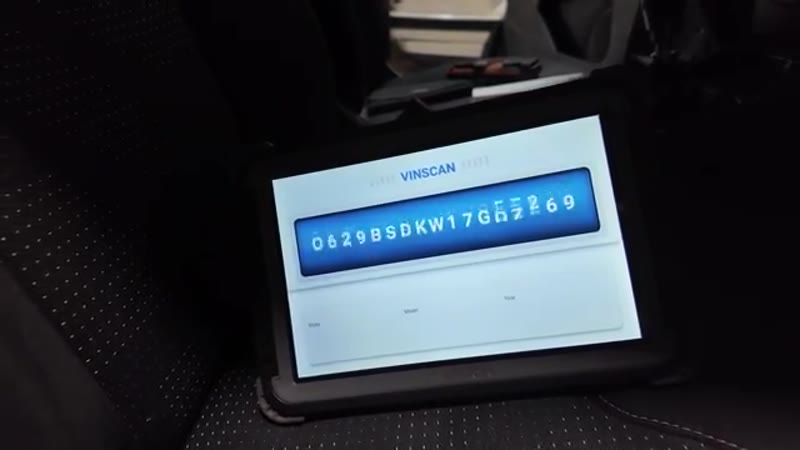
07
Test with the OBD scanner
Plug the scanner back in. It should now light up and connect to the ECU. Turn the ignition on and run a scan to read any stored fault codes.
Note any fault codes found after fixing
Once the OBD port is working run a full system scan. The original cause of the blown fuse may have stored fault codes worth investigating.
The most common mistake is replacing the wrong fuse. Different generations of Transit Connect use different fuse layouts: the pre-2014 model has the OBD fuse in the engine bay pre-fusebox, the 2014-2018 has it inside the driver-side dashboard fuse panel, and the 2018+ post-facelift has it again moved to a panel below the steering column. Use the printed fuse map that lives on the back of the fuse box cover, or look up the correct location for your specific build year. Second mistake: probing the OBD port with reversed polarity. Pin 16 of the OBD2 port is +12V battery feed, pin 4 is chassis ground, pin 5 is signal ground. Get those reversed when testing and you can short the port. Always check polarity with a multimeter before connecting any tool. Third: assuming the OBD fuse is blown when it's actually the OBD port connector itself that's loose or the wiring harness behind the dash. After fitting a new fuse, if the port still doesn't work, gently probe the OBD socket with a thin meter probe at pin 16 to confirm 12V is present. If not, the fault is upstream and you need to trace the wiring with a continuity tester.
Mr Auto Fixer Shop
Want this guide offline - and 15 more like it?
Our PDF guide collection covers servicing, fault codes, buying a used car and more. Written by a qualified mechanic. Download once, use forever - no ads, no internet needed.
The OBD socket does not get its own fuse on the Transit Connect - it shares a circuit with the cigarette lighter and accessory sockets. That sharing is the whole story of this fault: a cheap USB charger shorts internally, a coin rolls into the lighter socket, or a dashcam lead gets pinched in the trim, the shared fuse does its job, and the next time you plug in a scanner the port is silent. It is easily the most common cause of "my scanner will not connect" on these vans, and it costs under £2 to fix - which is worth knowing before a garage charges an hour of diagnostic time to find it.
The clue that gives it away: check the cigarette lighter. Dead lighter plus dead OBD port equals blown shared fuse, with near certainty. A dead OBD port with a working lighter sends you deeper into wiring - rarer, but the guide's multimeter steps cover it.
What This Fault Costs at Each Door
Who finds it
Typical price
What actually happens
Ford dealer diagnostics
£100–£160
An hour of diag time to find a £1 fuse
Independent garage
£50–£90
The same discovery, slightly cheaper
DIY with this guide
£2–£6
A blade-fuse kit and two minutes at the fusebox
Typical UK prices. This is the single best effort-to-saving ratio on the whole site - the fix is genuinely a two-minute job.
Related Diagnostic-Port Problems
If the fuse is good and pin 16 shows 12 volts but the scanner still will not talk, the fault has moved from power to data: a damaged CAN line, a corroded connector behind the port, or occasionally a scanner that predates the van's protocol. Those are rarer and slower to trace - the wiring checks in this guide cover the first steps. Once the port is live again, our guide to reading OBD fault codes shows what to do with it, and the fault code library decodes whatever the van has been storing while the port was down.
Quick Stats
Difficulty
Easy
Vehicle
Ford Transit Connect
Time
5 mins
Parts Cost
£1–£3
Common Questions
FAQ
Completely - this is a two-minute fuse swap once you know which fuse feeds the data link connector, and that is exactly what the guide tells you. No tools beyond the fuse puller in the fuse box lid. It is the cheapest fix on this entire site.
A garage will bill £40–£80 of diagnostic time to find this; the fuse costs under £2. That is the whole argument for checking the fuse yourself before booking the van in for a dead OBD port.
Fifteen minutes the first time, most of it finding the right fuse box and position. The actual swap takes seconds. Plug your scanner straight in afterwards to confirm the port is live.
A fuse puller or small flat screwdriver, a replacement 10 amp micro fuse and your OBD2 scanner to test the result. Total spend if you already own a scanner: about £2.
It varies by model year, but on most UK Transit Connect builds the OBD port fuse is shared with the cigar lighter socket, the accessory power outlet in the load area, and on some post-2014 models the dashcam-power feed too. If your OBD port has gone dead and you also notice the cigar lighter no longer powers your phone charger, you have your culprit. The fuse rating is typically 10A or 15A depending on year - check the printed fuse map on the back of the fuse box cover or look up the wiring diagram for your specific VIN. Replacing with the same rating is critical: oversizing the fuse can let downstream wiring overheat instead of the fuse blowing as a safety device.
20+ Years ExperienceMOT TesterProfessional UK Mechanic
All guides on this site are written from real, hands-on experience - not copy-pasted from a manual. If I haven't done the job myself, it doesn't go on the site.